Sewing for Hibernation

Hello everyone! Wow, it’s been a while. I mean, I don’t know if anyone notices apart from my mother, who has my blog as her start page and complains regularly that I don’t write blog posts anymore but only share stuff on Instagram (give me a follow over there if you are interested).

Anyways, there is a big reason, why I haven’t been blogging lately. I’m 24 weeks pregnant and completely lost my sewjo throughout the winter. It was such a new experience for me to not constantly be sewing or at least be thinking about sewing; I just couldn’t find the energy or inspiration. Truth be told, I didn’t really feel like myself. I guess that’s quite a normal feeling for a lot of people in their first trimester. But fear not, my sewjo has come back full force, so I will have more to share in the future.

It’s not that I didn’t sew anything at all though. I did, but a lot of comfy and practical stuff, that does not necessarily lend itself to an interesting blog post. Which is why I have decided to do a little roundup here of all the pieces I have sewn over the winter, before I move on to the more exciting spring/summer sewing. While I wasn’t heavily inspired (or maybe because of it) I did end up with a lot of practical stuff that I wore non-stop throughout the winter.

So what did I make?

The Ruska Dress was the one reason why I finally decided to get the Named Clothing “Breaking the Pattern” book and it didn’t disappoint. The version with the knotted overlay is such a cool design and the plain version is a great staple. I made the knot dress version first in a wonderfully heavy tencel knit. I got it from “Stoffmarkt Holland”, a travelling fabric market when it came here to Karlsruhe last autumn, and I wish I had gotten it in all the colours. It’s a great fabric to wear and it barely wrinkles, which has made it the perfect dress to wear on business trips. I graded between three sizes to give my hips enough room; other than that I sewed it up as drafted. Some hand-sewing was involved to get the points of the ties to look neat and crisp, which I didn’t mind though. It’s always worth putting in the extra effort for a nice finish.

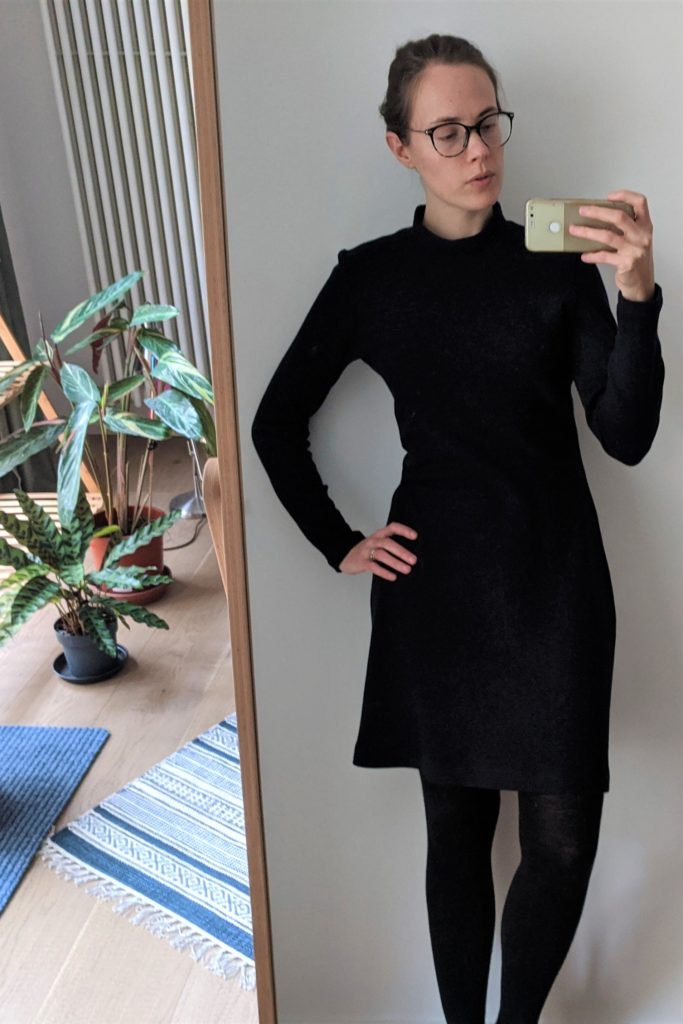
The plain version of the dress is made from a navy herringbone wool knit (which you can’t really see in this picture) that I picked up at “Die Stoff Scheune” a small fabric shop close to my parents place, with a great selection of designer deadstock fabric. For this version I left off the overlay and added a little turtleneck, based on the Nikko Top. It has a curved turtleneck, which in my opinion has the best shape! Again another comfy dress, perfect for work on cold winter days.

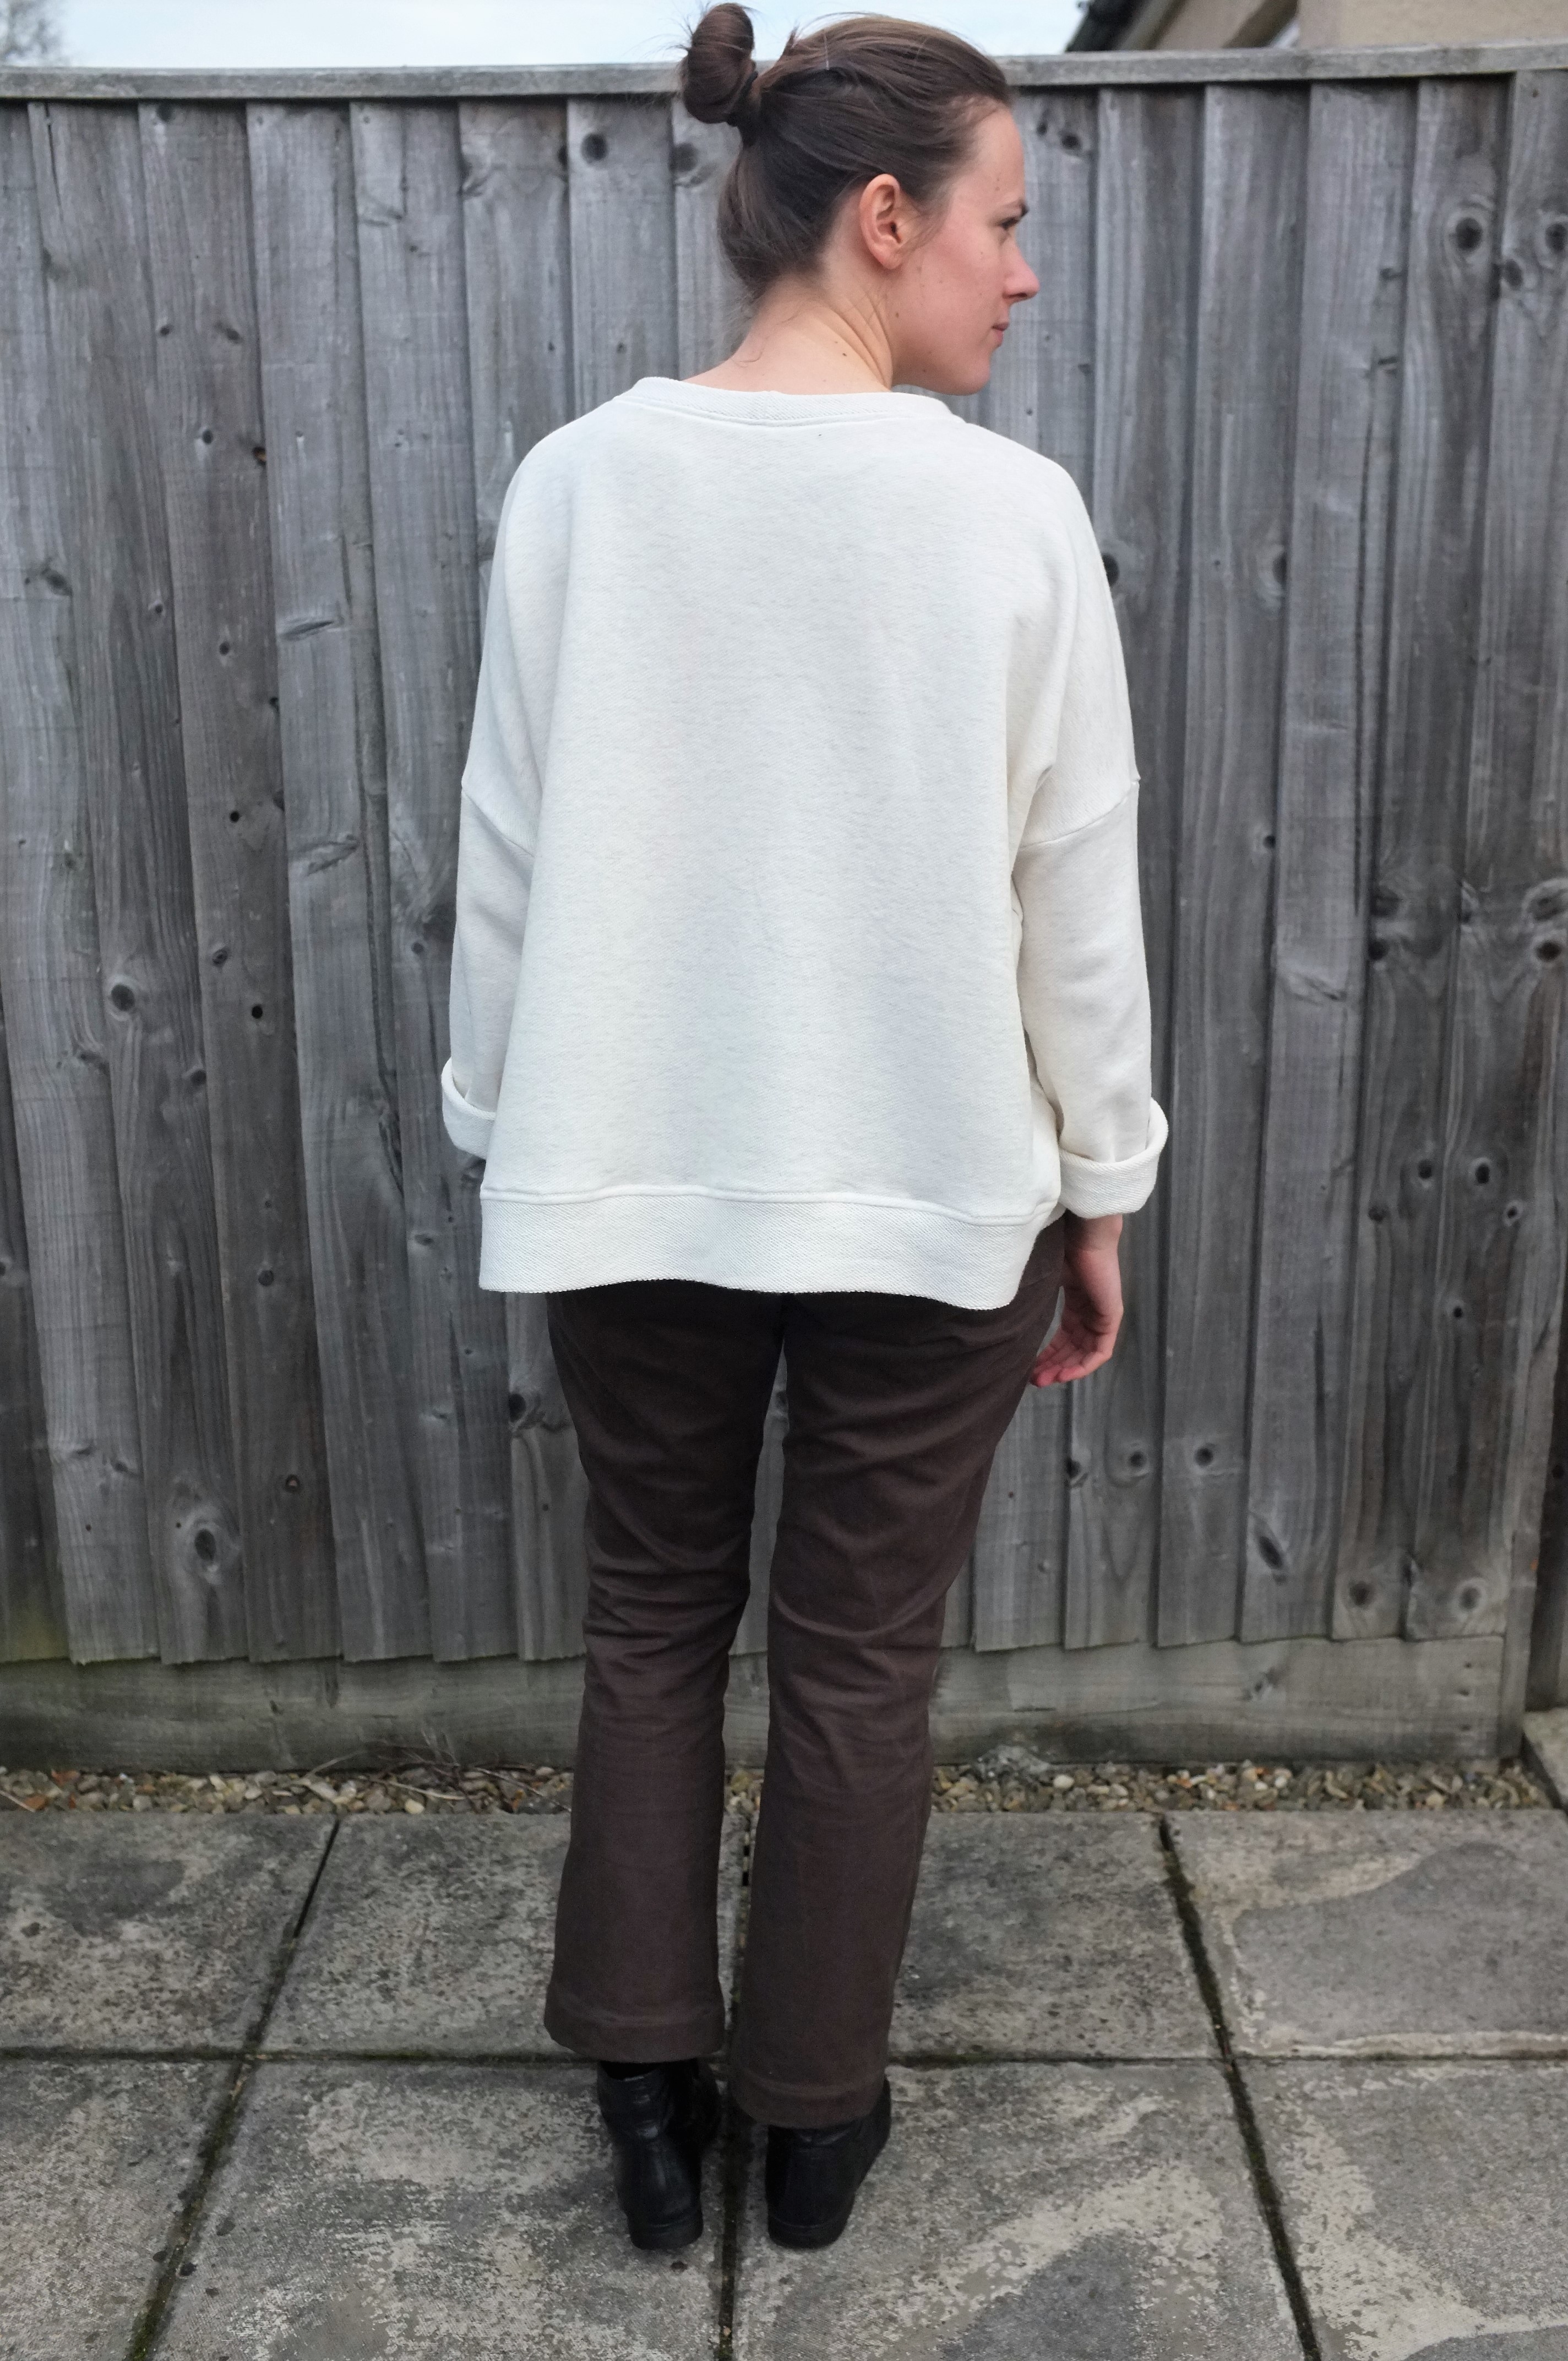
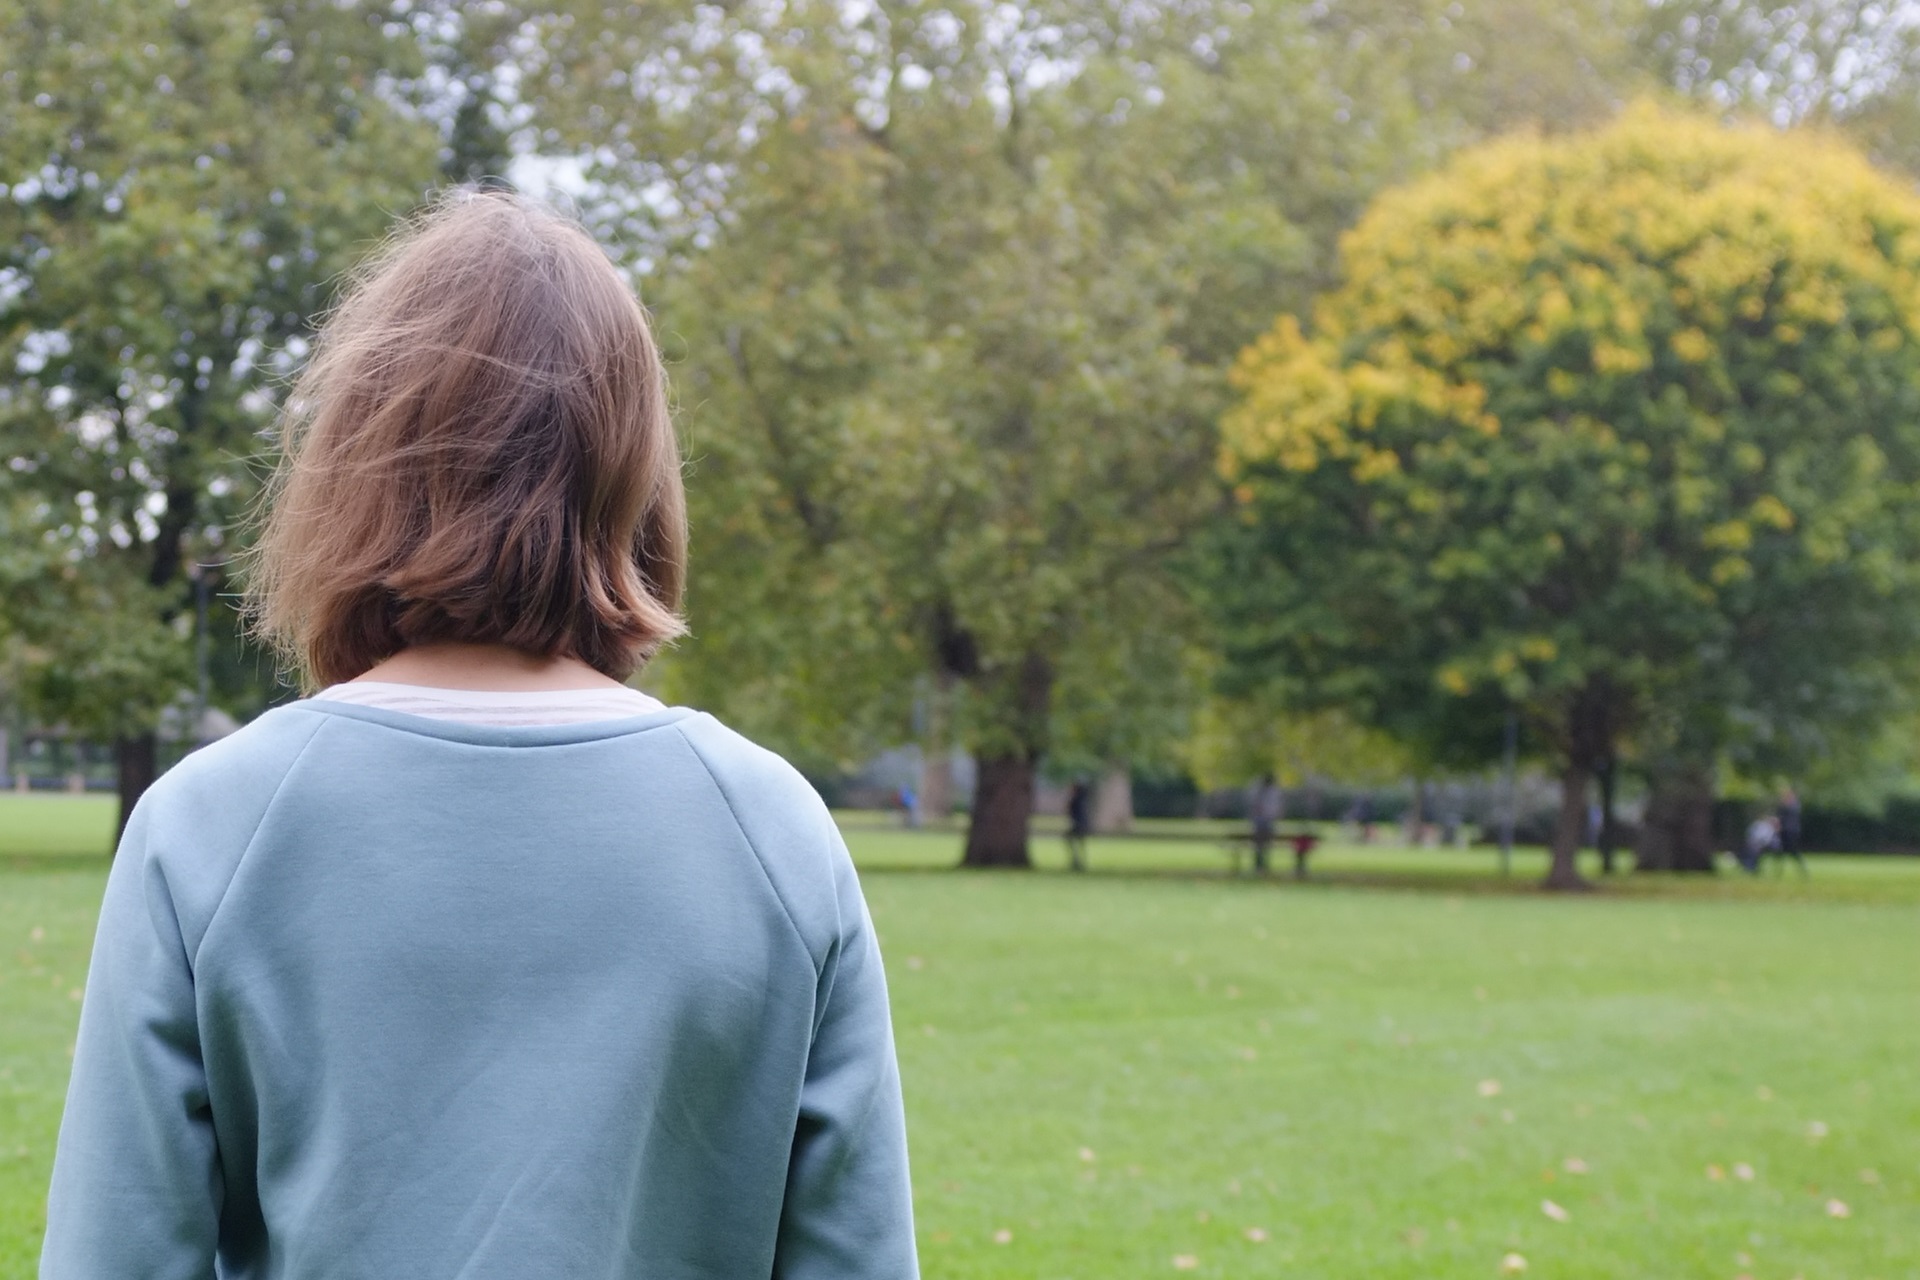
The Toaster Sweater, is another pattern I’ve been wanting to make for ages. When I found this heavy viscose knit at “Stoffmarkt Holland” I knew the Toaster would be a great pairing. However, I was envisioning something with balooney sleeves and a bit more oversized than the pattern is drafted. So what I did was to sized up and make the sleeves wider and longer before gathering it in in a cuff, slimmer than drafted. I played around with different gathering and pleating options and settled on one box pleat with two knife pleats on each side. This sweater is exactly what I’ve been wanting to wear all winter; super soft and just very cozy.

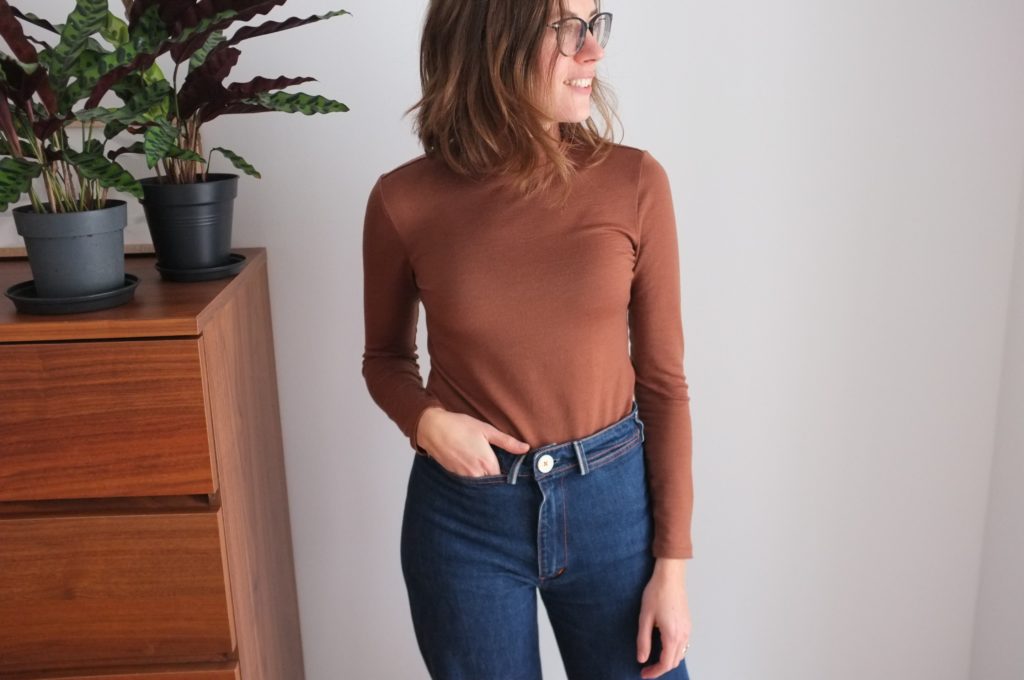
The Nikko Top: I can’t believe it took me so long to make this pattern. I love wearing turtlenecks in winter and have been experimenting with a lot of different patterns from my stash and also self-drafted versions to get the perfect fit, but never 100% achieved it. Then I tried the Nikko and it was almost there on the first try. Next time I would shape the side seams to follow my figure more but other than that I wouldn’t change a thing. It’s perfect, especially in this Acorn merino jersey from The Fabric Store. I’m still obsessed with all the brown colours and this is gorgeous; it perfectly pairs with my denim Persephone Pants.

Corduroy has been on my mind all winter, and I’m super happy with the two corduroy pieces that I made.

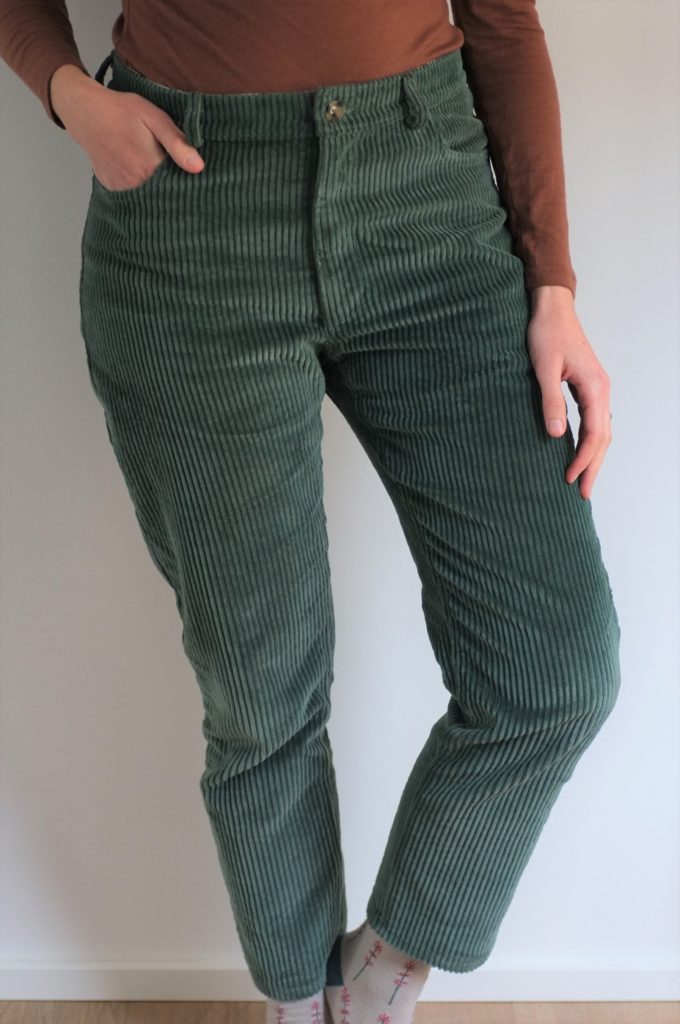
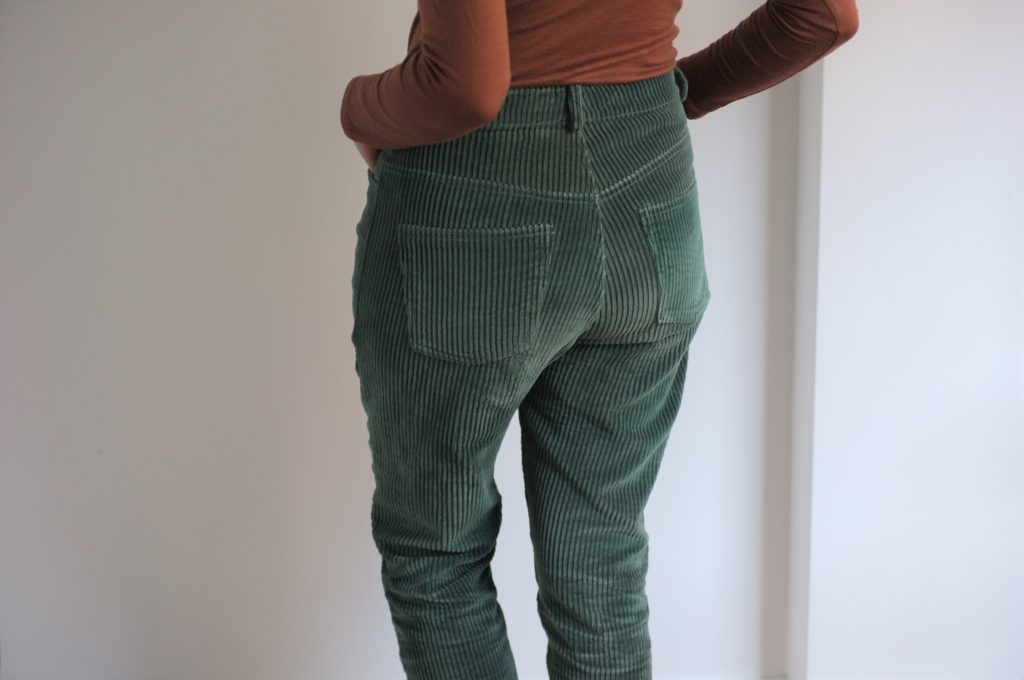
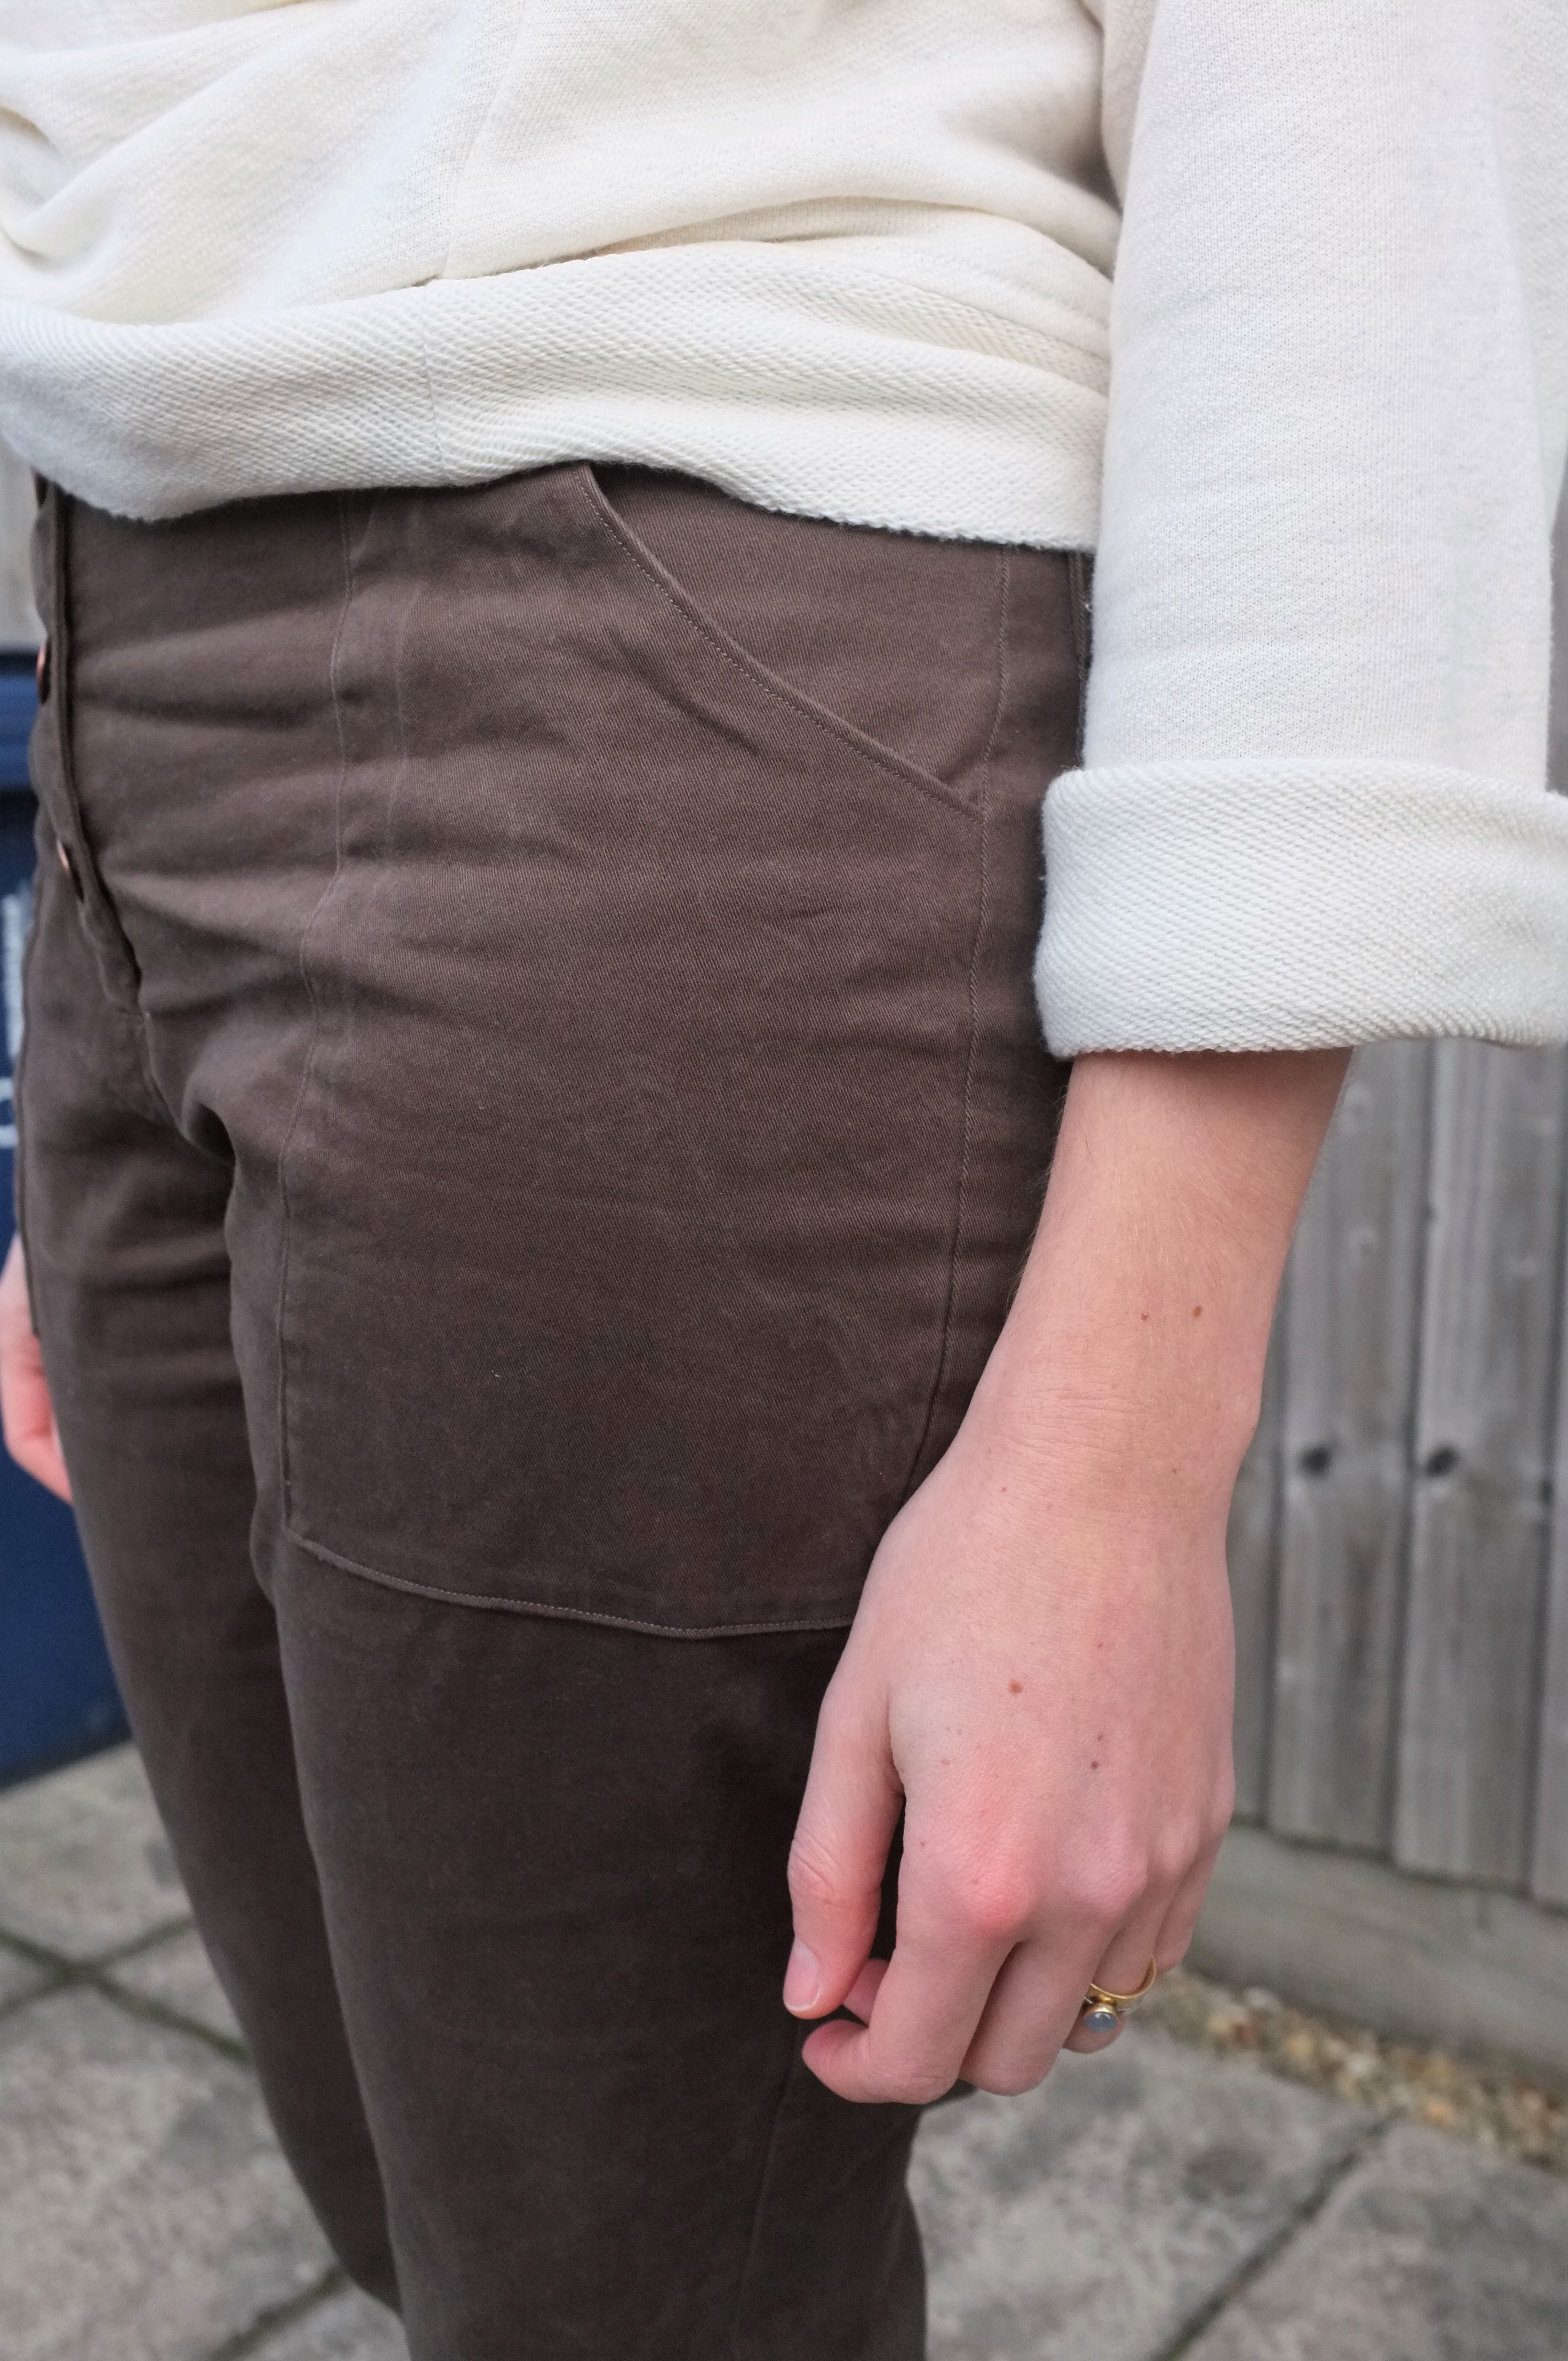
I really wanted to make a pair of corduroy trousers for winter but struggled to find the right corduroy (I wanted something really heavy) in an interesting colour. I looked everywhere until I realised that I had a suitable fabric in my stash, two pieces of heavy cotton corduroy that I had picked up at a flea market. In theory they would have been too small to fit the pattern; however, I am not one to get defeated by fabric limitations. Instead I got creative, chose the slim legged version, cut the waistband on the cross grain, the fly pieces from lining fabric (which was a wise move with this heavy fabric in any case) and left the legs as long as would fit on the fabric (which was shorter than I needed, but I decided I’d rather have cropped trousers than none). So in the end, everything fit, including back pockets, ideal! Next I had to tackle the colour of the fabric. It was a very uninspiring beige-grey. However, with a packet of Dylon dye in Emerald I was able to turn it into a dusty teal, which actually works perfectly with my wardrobe.

As I had read a few times that the Dawn runs small, I chose to go up one size. I made a quick muslin and realised that that would not have been necessary, so I took some width out again through the side seams. In the corduroy the trousers still turned out a little big, especially in the waist. Since I knew at that point already that I was pregnant though, I decided to leave them as they were, to be able to grow into them. And I’m so glad that I did, as they are the only pair of normal trousers that I’m still able to wear. They have been a life saver in the cold winter months. My husbands calls them my “sofa” trousers, which is fair, as this fabric most likely was upholstery fabric. I don’t mind since they are so warm and cozy.

Finally, this olive green dress. Some of you might have a slight deja-vu. Didn’t she make the same dress last winter? And you are right. I made a dress very similar, which I however, gave to my sister as she liked it so much. I figured if I really missed it, then I could recreate it again. And it turned out I did. So when I was visiting “Die Stoff Scheune” over Christmas (which is where I got the fabric last time) I was delighted to see they still stocked the exact same fabric. To switch things up, however, I decided to try a new pattern.

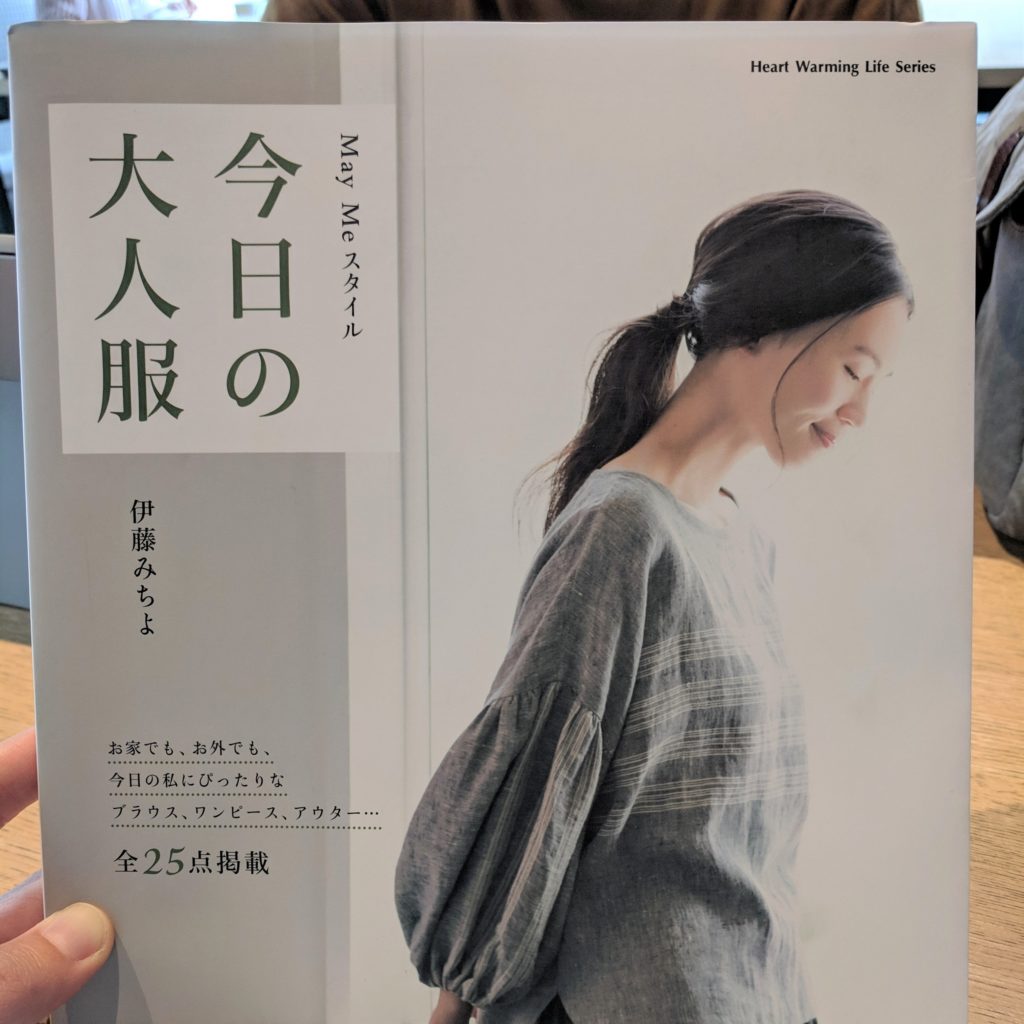
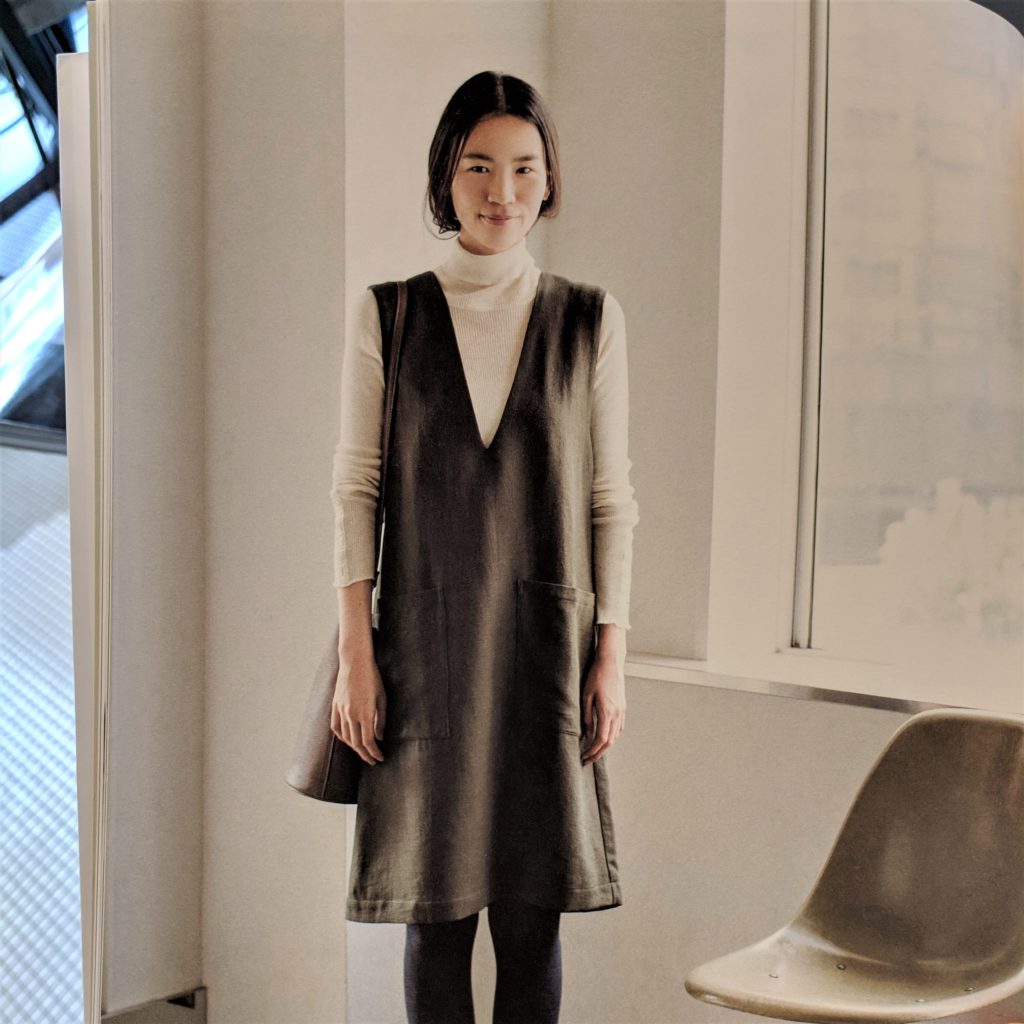
The original dress was self-drafted but in one of my Japanese Sewing books, I saw an almost identical dress, with a deep v, which looked interesting. I raised the neckline a little, left off the pockets (though I might add one still) and added some length. Other than that sewed it as drafted. I love Japanese pattern books! The diagrams are so clear, that within just a couple of pages, all the instructions are covered. There wasn’t even a need for me to translate any of the text. The fit of the dress (a size L) turned out to be great too, the armhole shaping is perfect for this pinafore style.

Phew, that was a long list of projects after all. As I said in the beginning, I’m super happy with all these pieces and have been wearing them a ton. It showed me, that with winter sewing it all comes down to the fabric. Cozy, high-quality fabric in combination with simple/comfortable patterns is the key to a perfect winter wardrobe. It kept me comfortable throughout the dark winter months. While I really can’t complain about my first trimester (just some constant nausea and tiredness), I still was very grateful for a wardrobe that felt like a warm hug.

I’m so glad though that we are now heading into spring. Dressing and sewing for the warmer months is still what I enjoy the most. So expect some pregnancy friendly sewing projects on the blog soon.

Finally, I of course have to mention the crazy situation we are in right now. I can’t believe how much the world has changed over the last few months. Being pregnant during these uncertain times is definitely scary. We are already affected by COVID-19 through things like my husband not being allowed to join for the big ultrasound I had a couple of weeks ago, hospital visits being cancelled and prenatal courses having to switch to virtual. I’m glad though that the birth is still a while away (due date is in August) so hopefully the situation is a little bit clearer by then, especially the question of whether fathers are allowed to be present at the birth. There are positive sides to this situation too. Thanks to lock-down, my husband is not allowed to travel, and being out of a job for the foreseeable future he has all the time in the world to look after me and really be present for this pregnancy, so I’m not complaining.

For any other pregnant mothers out there, I hope you are holding up ok. I’m sending you all the love!

Landers and a cosy sweater

Hi everyone, it’s been a while. I’ve been struggling with the usual winter blogging issues: no daylight during the week and a lot of grey weekends which just didn’t give me a chance to get decent blog pictures. So today we finally managed to take a couple of pictures of a new outfit: an oversized sweatshirt and a pair of Lander pants.

Let’s start with the sweatshirt. When I was fabric shopping on Goldhawk road two weeks ago I came across this french terry at Misan West. I’m always on the look-out for cosy knits which are surprisingly hard to find. But this one was perfect, it’s super soft and the perfect ivory colour. It’s definitely on the lighter side, but thus perfect for summer and it works for layering in winter. My initial intention was to make a cardigan but then I realised that the fabric would be perfect for creating a copy of one of my favourite sweaters. It’s a white cotton cable knit sweater which I bought back in 2012 when I was studying in Copenhagen. It will have to be retired soon, but I adore the oversized shape which just always reminds me of the effortless Danish style. So I traced of the shape which is super simple. Basically it’s just a big rectangle for the body and smaller ones for the sleeves. It could probably be re-created by using the Grainline Studio Hemlock Tee.

The construction was quick and easy. I assembled the pieces with a stretch stitch on my sewing machine and finished the seams on my overlocker. The sleeve hems are just overlocked and then rolled up. The bodice hem and the neckline are finished with bands using the loopy side of the fabric, to mirror the rolled up sleeves. The neckline did need two tries to sit nicely. As the fabric is not very stretchy my first attempt of the neckline just didn’t lie flat. I decided to re-cut it with a slightly shorter length but twice as wide. Once attached I folded the neckband under and secured it with top-stitching around the neckline. This gives the neckline a nice structured look due to the 4 layers of fabric.

The final sweater has a lot of volume which I love but I do have to roll up the sleeves quite high to make sure I don’t dip them in food etc. So for a future iteration I might play around and slim them down a little. All in all this sweater is very close to its inspiration and will be really good replacement. Isn’t it great how sewing allows you to copy your favourite clothes? That way it is slightly easier to say goodbye to well-worn pieces.

Now let’s talk about these trousers, the True Bias Lander Pant. When this pattern came out it was love at first sight and judging by the reaction of the sewing community I wasn’t the only one. However, in real life our relationship turned out to be a little bit more complicated… But let’s start at the beginning. I picked up a 3 m remnant of this khaki green twill at a trousers fabric wholesaler in my hometown over Christmas. It’s not a colour I usually wear but I realised that it goes very well with my colour palette (especially my many blush pieces) and I thought it would be perfect to test the Lander pattern. The fabric is a medium weight with a little bit of stretch, which the pattern doesn’t call for but I thought it couldn’t hurt as I read a couple of reviews where people struggled to get the fit tight but comfortable. According to the size chart my waist was slightly smaller than an 8 and my hips slightly larger than a 12. I decided I could get away with a 12 in the hips due to the stretch in the fabric and that I could always adjust the fit in the waist through the side seams and the waistband.

The construction was really quick and straight forward thanks to the instructions being very thorough. The button closure really saves a lot of time compared to a full zip fly. And the exposed buttons are really a nice feature. I love the brass colour of my jeans buttons against the green. The only thing slightly odd was the construction of the front pockets. You are supposed to line them by attaching the lining right side to right side to the pocket pieces and then turn them inside out. Then the whole thing is being top stitched to the front. While this helps with neat corners and pocket edges, it requires a lot of precision for the lining not to show at the seams. I did read the instructions in advance and realised that ideally I would need a lining in the same colour of the fabric. As self lining would have been too bulky and I couldn’t find a lining fabric in my stash in the right colour, I went with a scrap of ivory silk in the end, making sure to be extra precise with the pockets.

Then came the fitting and this is where the struggles started. Kelli includes a 1″ seam allowance at the outer leg seam, which in theory should make fitting easy, but in my case the trousers turned out way too big. Not only through the waist and hips but also in the legs there was a massive amount of volume. In combination with the colour, they gave off a serious army trousers vibe that I didn’t like at all. To avoid any rash decisions I decided to wear them around the house for a couple of days to see if I just needed to get used to the volume. I also went through the #landerpant hashtag to see how it was fitting on other people. The trousers are definitely intended to be loose from the hips, but I realised that I was most drawn to versions that were closer fitting through the thighs than mine. I also realised that my fabric was potentially too thin, which led to fabric pooling below my bum which probably would not occur in a very structured denim or twill like the samples.

So there was no way around it, the trousers had to be taken in. I took out as much as I could from the side seams but was restricted by the back pockets, which I cut out in the medium size. I also slimmed down the legs through the thighs but let them flare out again at the hem. I used the original straight waistband but could have benefited from drafting a curved waistband as it’s gaping slightly at the back.

Then I had to decide on the length. I had cut the full boot length without adding any additional length. While I am an average 1.70 m I have disproportionately long legs, but since the pattern called for a very wide hem, I thought I would have some wiggle room. Once it came to hemming though it turned out that even with a narrow hem, the trousers would be slightly too short (the story of my youth). I still hemmed them to see if I could get used to it but it just didn’t look intentional. After letting them sit for another couple of days I decided to shorten the legs a good 6 cm by just folding up the hem twice and top-stitching it. Now they are probably closer to the ankle length view of the pattern. I’m still not 100% sold, but I have worn them out and they turned out to be great for a rainy day, no water creeping up your legs.

So what’s my final verdict? It’s definitely a great pattern but it took a lot of work to get them to a stage where I would actually wear them. Unfortunately it’s not love, yet. I will see how I feel about them in summer, with some lighter shoes and bare ankles. When I make them again (I’ll definitely make the shorts, no leg drama foreseen there) I will size down and use a thicker fabric. I’ll also use the smaller size back pockets and a curved waistband. Then I might get closer to my original vision for these trousers, the perfect retro, high-waisted trousers. Until then I’ll just live through all the cool people out there, that are rocking their Lander pants. Until next time.

Linden Sweatshirt

Linden 12I don’t know about you guys but winter is approaching here in the UK and for the first time we had to put the heating on today. What better reason to sew a warm and cosy sweater? I’ve been looking for a sweater like this for probably a year now and couldn’t find any ready-to-wear ones that I liked. Then I started looking for some sweater fabric and wasn’t successful either. I wanted a really thick knit in an interesting colour but wasn’t inspired by the selection in the fabric shops and I’m still not the biggest fan of buying fabric online. So I put the search on hold over the summer and stumbled across the perfect fabric on a short trip to Wuppertal two weeks ago. Strolling through the city with the friend I was staying with, I obviously had to check out the one fabric shop they have there and was pleasantly surprised by the huge selection of knits. I settled for this greyish mint colour, which is not very surprising if you have ever seen my flat and wardrobe. I bought 1.5 meters and just about managed to squeeze those into my carry-on bag (my fabric shopping always seems to be limited by suitcase space, I’m just not sure if that is a bad thing or a good thing).

For the pattern I went with the Grainline Studio Linden Sweatshirt. When this pattern came out I was not sure if I liked the wide neckline but after seeing so many gorgeous versions I decided to give it a go. Now I like how the neckline gives the sweater a less sporty and more feminine touch. Sewing this up reminded me that I need to make more simple projects. There is nothing better than a quick Friday evening sew that results in a garment that you can wear the same weekend. And I have literally been living in this sweater since I made it. It kept me warm for a shopping trip in London yesterday (where we took the outdoor pictures) and was perfect for a lazy Sunday on the sofa today.

Linden 3Linden 7Linden 4Linden 5Linden 8In terms of fit: according to the sizing chart I’m a 8 in the bust, a 6 in the waist and a 10 in the hips, due to the loose silhouette of the sweater I decided to cut a straight 8 . As expected the sweater is quite roomy which is great for the type of sweater I wanted. For a dressier version I would probably size down in the bust and waist. The construction itself was simple. I sewed it all up with the stretch stitch of my machine and left the seams unfinished as I don’t have a serger. The insides therefore don’t look very professional but that doesn’t really bother me. I just about managed to sew through all the layers when attaching the neck and hem band. They turned out really nicely despite the chunkiness of the knit. All in all a very satisfying sew. I’m sure I’ll get a lot of wear out of this one. I paired my Linden with my Closet Case Files Ginger Jeans (blogged here) and some socks my mum made for me for Christmas. Now I’m prepared for the long dark evenings ahead that hopefully will be filled with lots of sewing.

Linden 11Linden 9Linden 10