 Let me preface this by saying, I love a good sewing challenge! This look is definitely a departure from my usual style but I enjoyed working on this a lot. A while back, Raphaëlle from Ready to Sew contacted me to ask if I wanted to test her newest pattern, the Jean-Paul boiler suit. While I have never made a Ready to Sew pattern, I was very excited to try one of them as I love her style and have heard many great things about the patterns. But a boiler suit? I haven’t even really joined the jumpsuit trend and generally am more of a separates gal. However, the more I thought about it the more excited I got to try this trend. As you might know from my Tello Jacket adventures, I love making and wearing work wear. Also it seems like all the cool people on Instagram have been wearing boiler suits lately. So in the end I decided to say yes.
The design is really a classic boiler suit, with a collar, plenty of pockets, waistband and button placket at the front. While it is quite a complex project, the construction of this was really straight-forward. It helps that the instructions are impeccable, every step is nicely illustrated and Raphaëlle provides some additional resources for the trickier bits and fit adjustments. I didn’t need any of the additional resources but it was nice to know that I could refer to them if I got stuck. Oh, and she even provides a music playlist to go with the pattern (I’m currently listening to it, what a fun idea!).
The pattern strongly recommends making a muslin first and I agree. A boiler suit is just one piece, and it’s essential to be able to move around in it, so test driving it before cutting into the actual fabric is important. I followed this advice and made up a muslin in a pink cotton. I decided to go with a size 40 for the top, grading to a size 43 in the bottom (this pattern comes in half sizes, which is great). I basted everything together and then spent a whole afternoon wearing it to make sure I could move around comfortably. The crotch seemed quite low initially but the ease is needed to be able to reach overhead without getting a wedgie. Otherwise the muslin fit quite well and in the end I made only minor fit changes. I shortened the front crotch slightly and moved the bust dart down a bit.
Doesn’t this pink version look super fun? I might have to make a colourful boiler suit at some point.
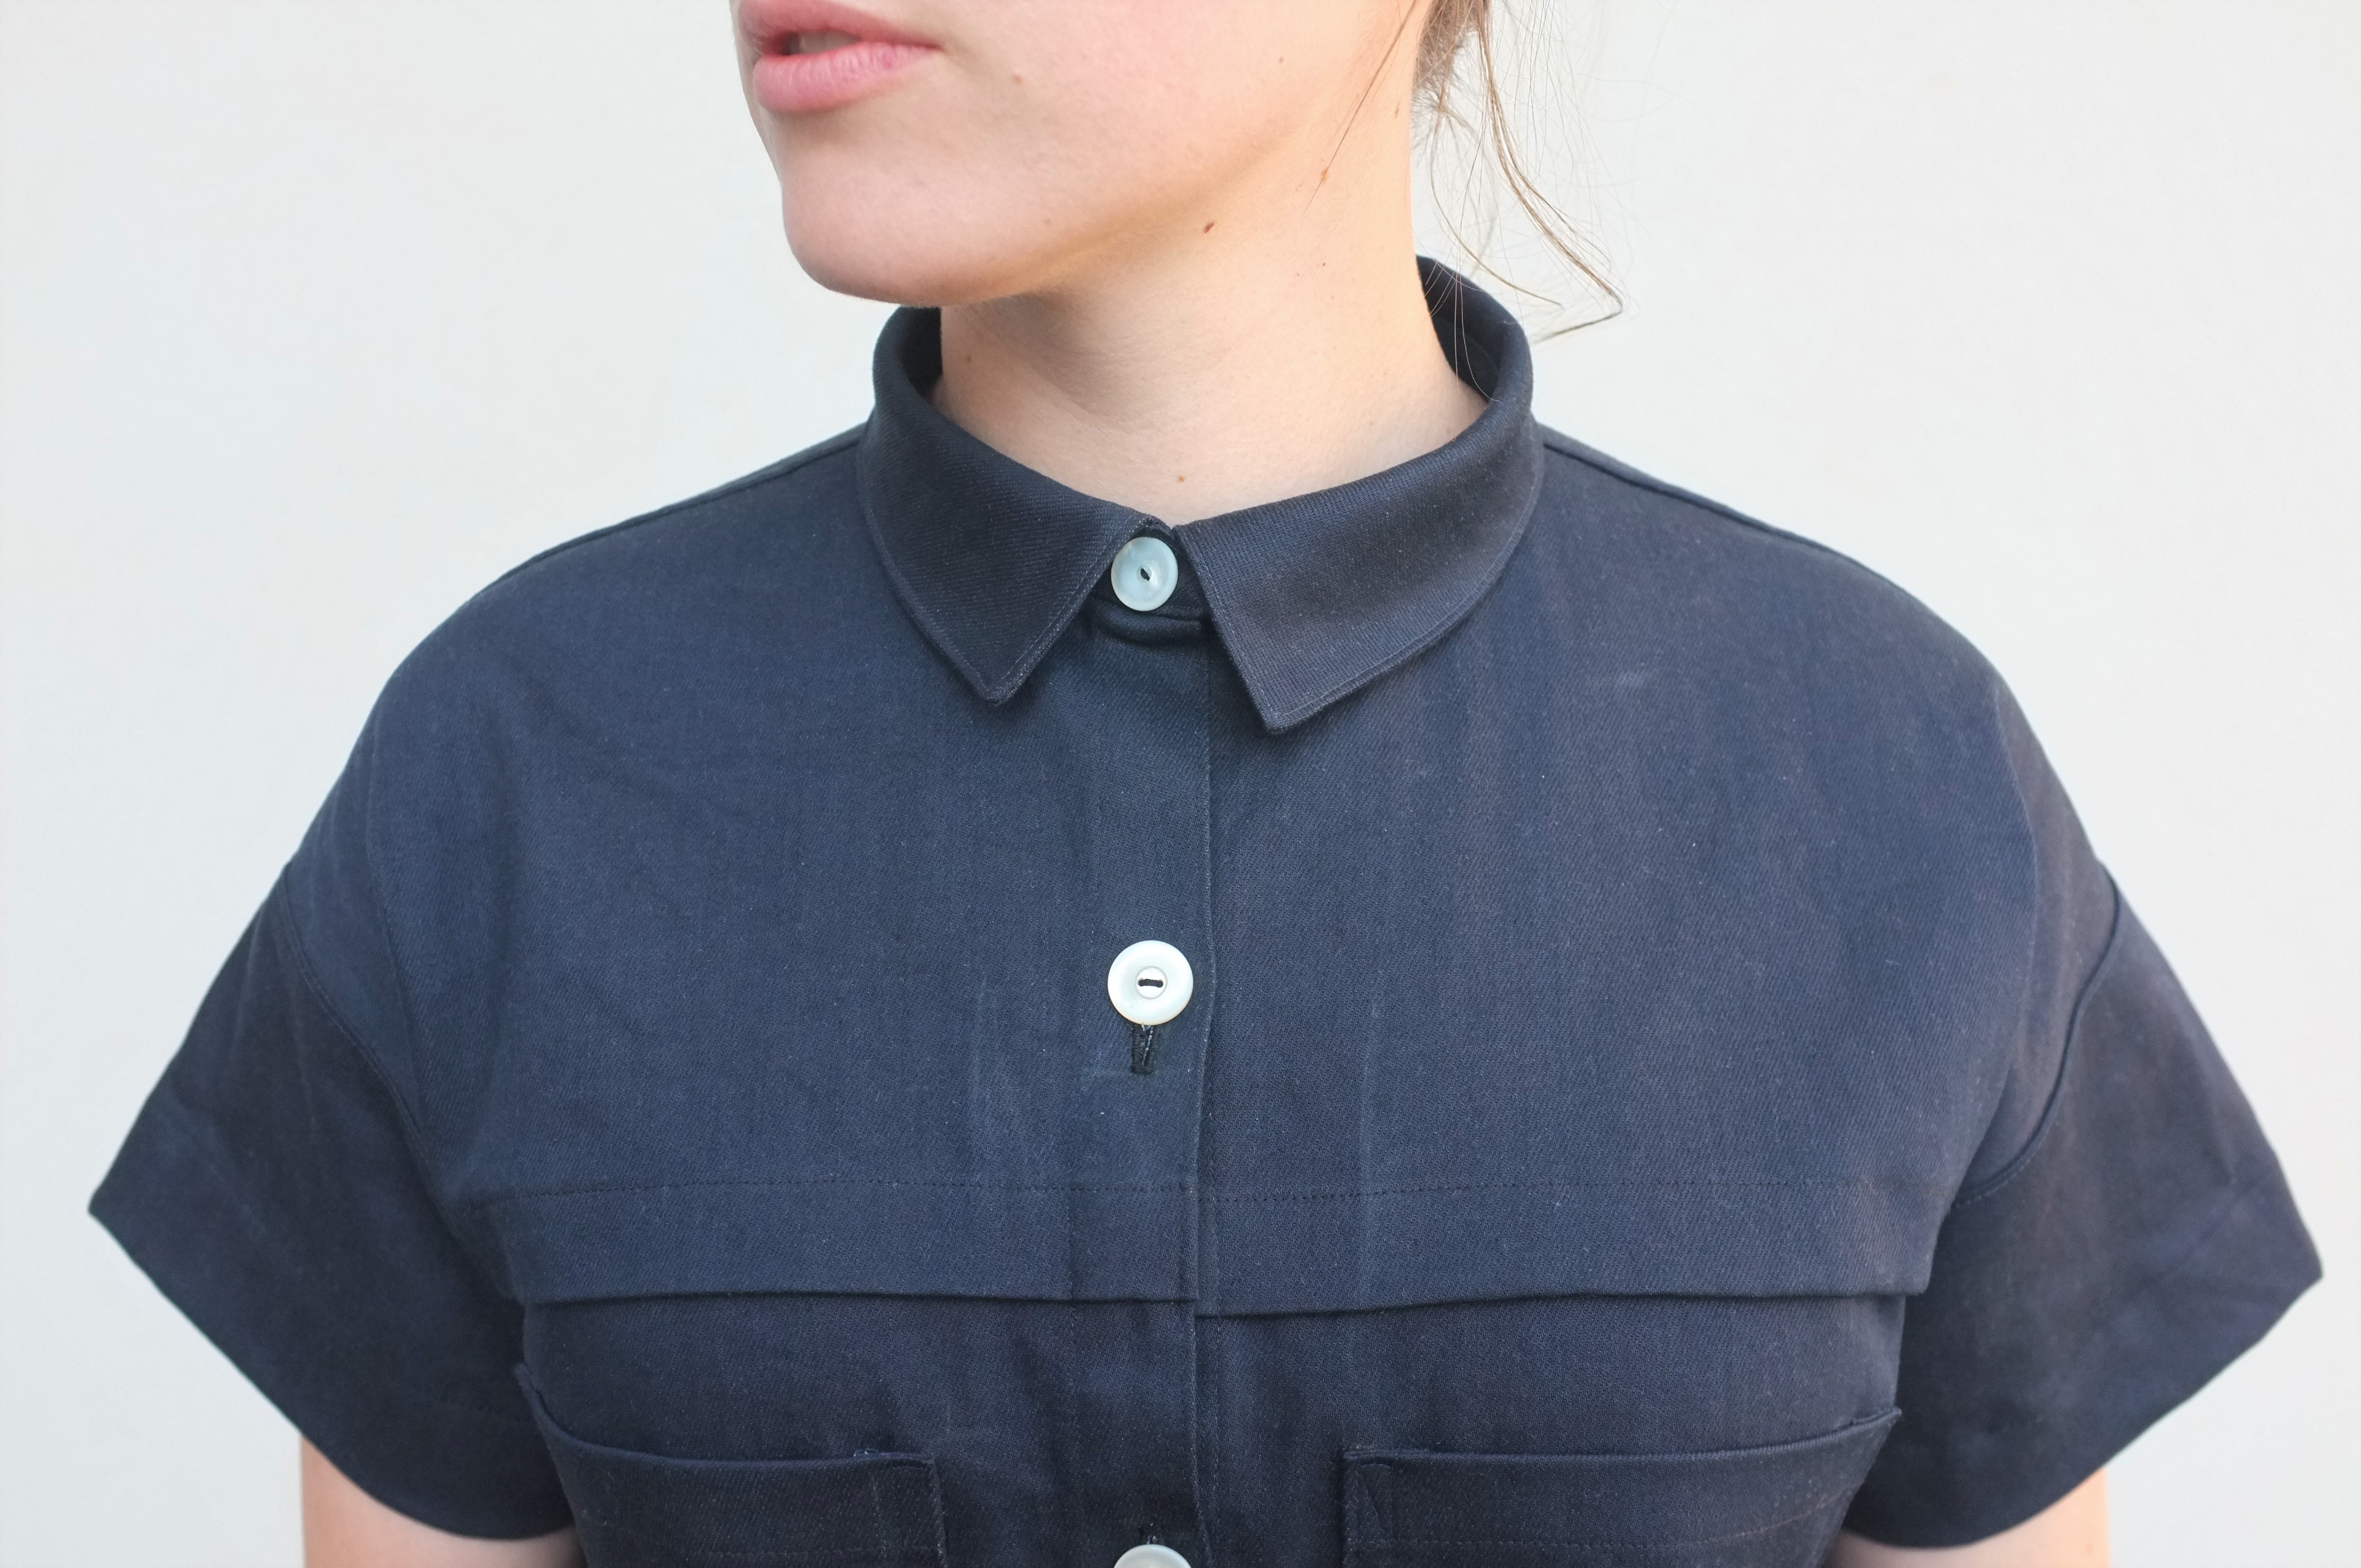
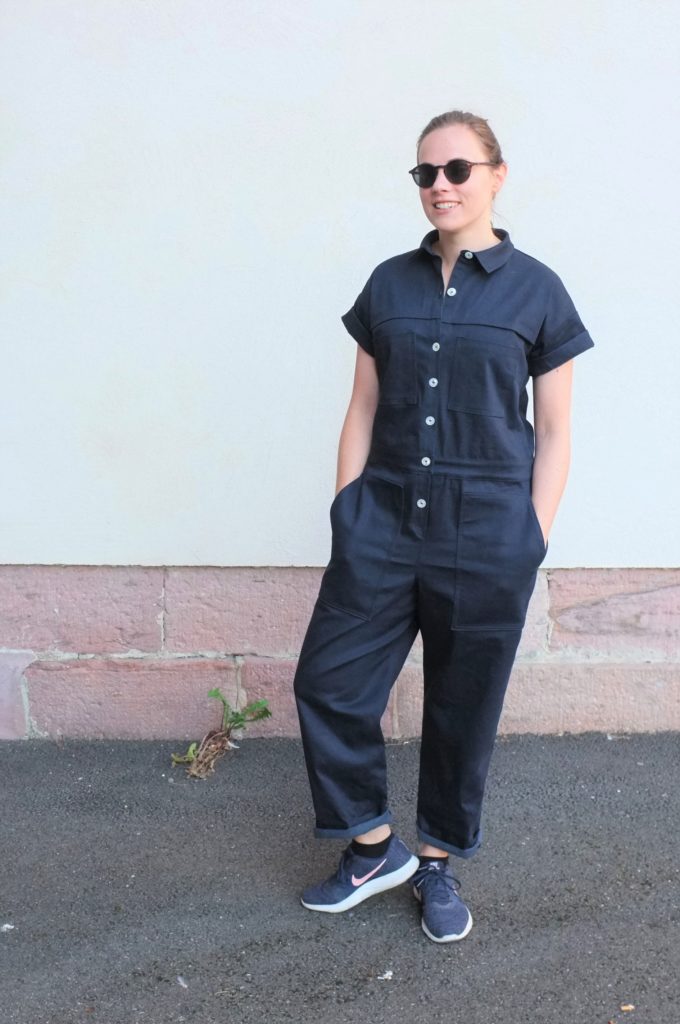
 For the main piece I used a medium weight navy twill with a tiny bit of stretch (the pattern calls for non-stretch fabric). It’s the same fabric that I used for my Persephone Shorts, quite a cheap remnant that I picked up at a fabric store in Colmar. I wanted to make the boiler suit in a heavy duty fabric, for the ultimate work wear feel. It’s definitely super robust, however, for everyday wear it’s a tad heavy. The buttons are from the flea market. I’m still on the fence about the contrast colour, so maybe I’ll replace them with navy ones.
Due to a lack of fabric, I had to make the short-sleeved view but I’m intrigued to make the longer sleeve version too. The pattern has an option for a martingale to cinch in the waist, which I decided to try out. Instead of using the pattern piece, I put the final suit on and pinched out the excess fabric to determine the length of my martingale. Again I’m not sure about the white buttons for this look (somehow reminds me of taillights, haha) but overall the martingale is a fun detail.
The construction was very enjoyable, I love all the tailoring details and top-stitching (I made my life easy with using the same colour thread). Overall the whole thing came together quickly. I made this when I was visiting my parents and used my old Pfaff machine. While that meant that I had to finish all the seams with a zigzag stitch I really enjoyed working on my old machine again.
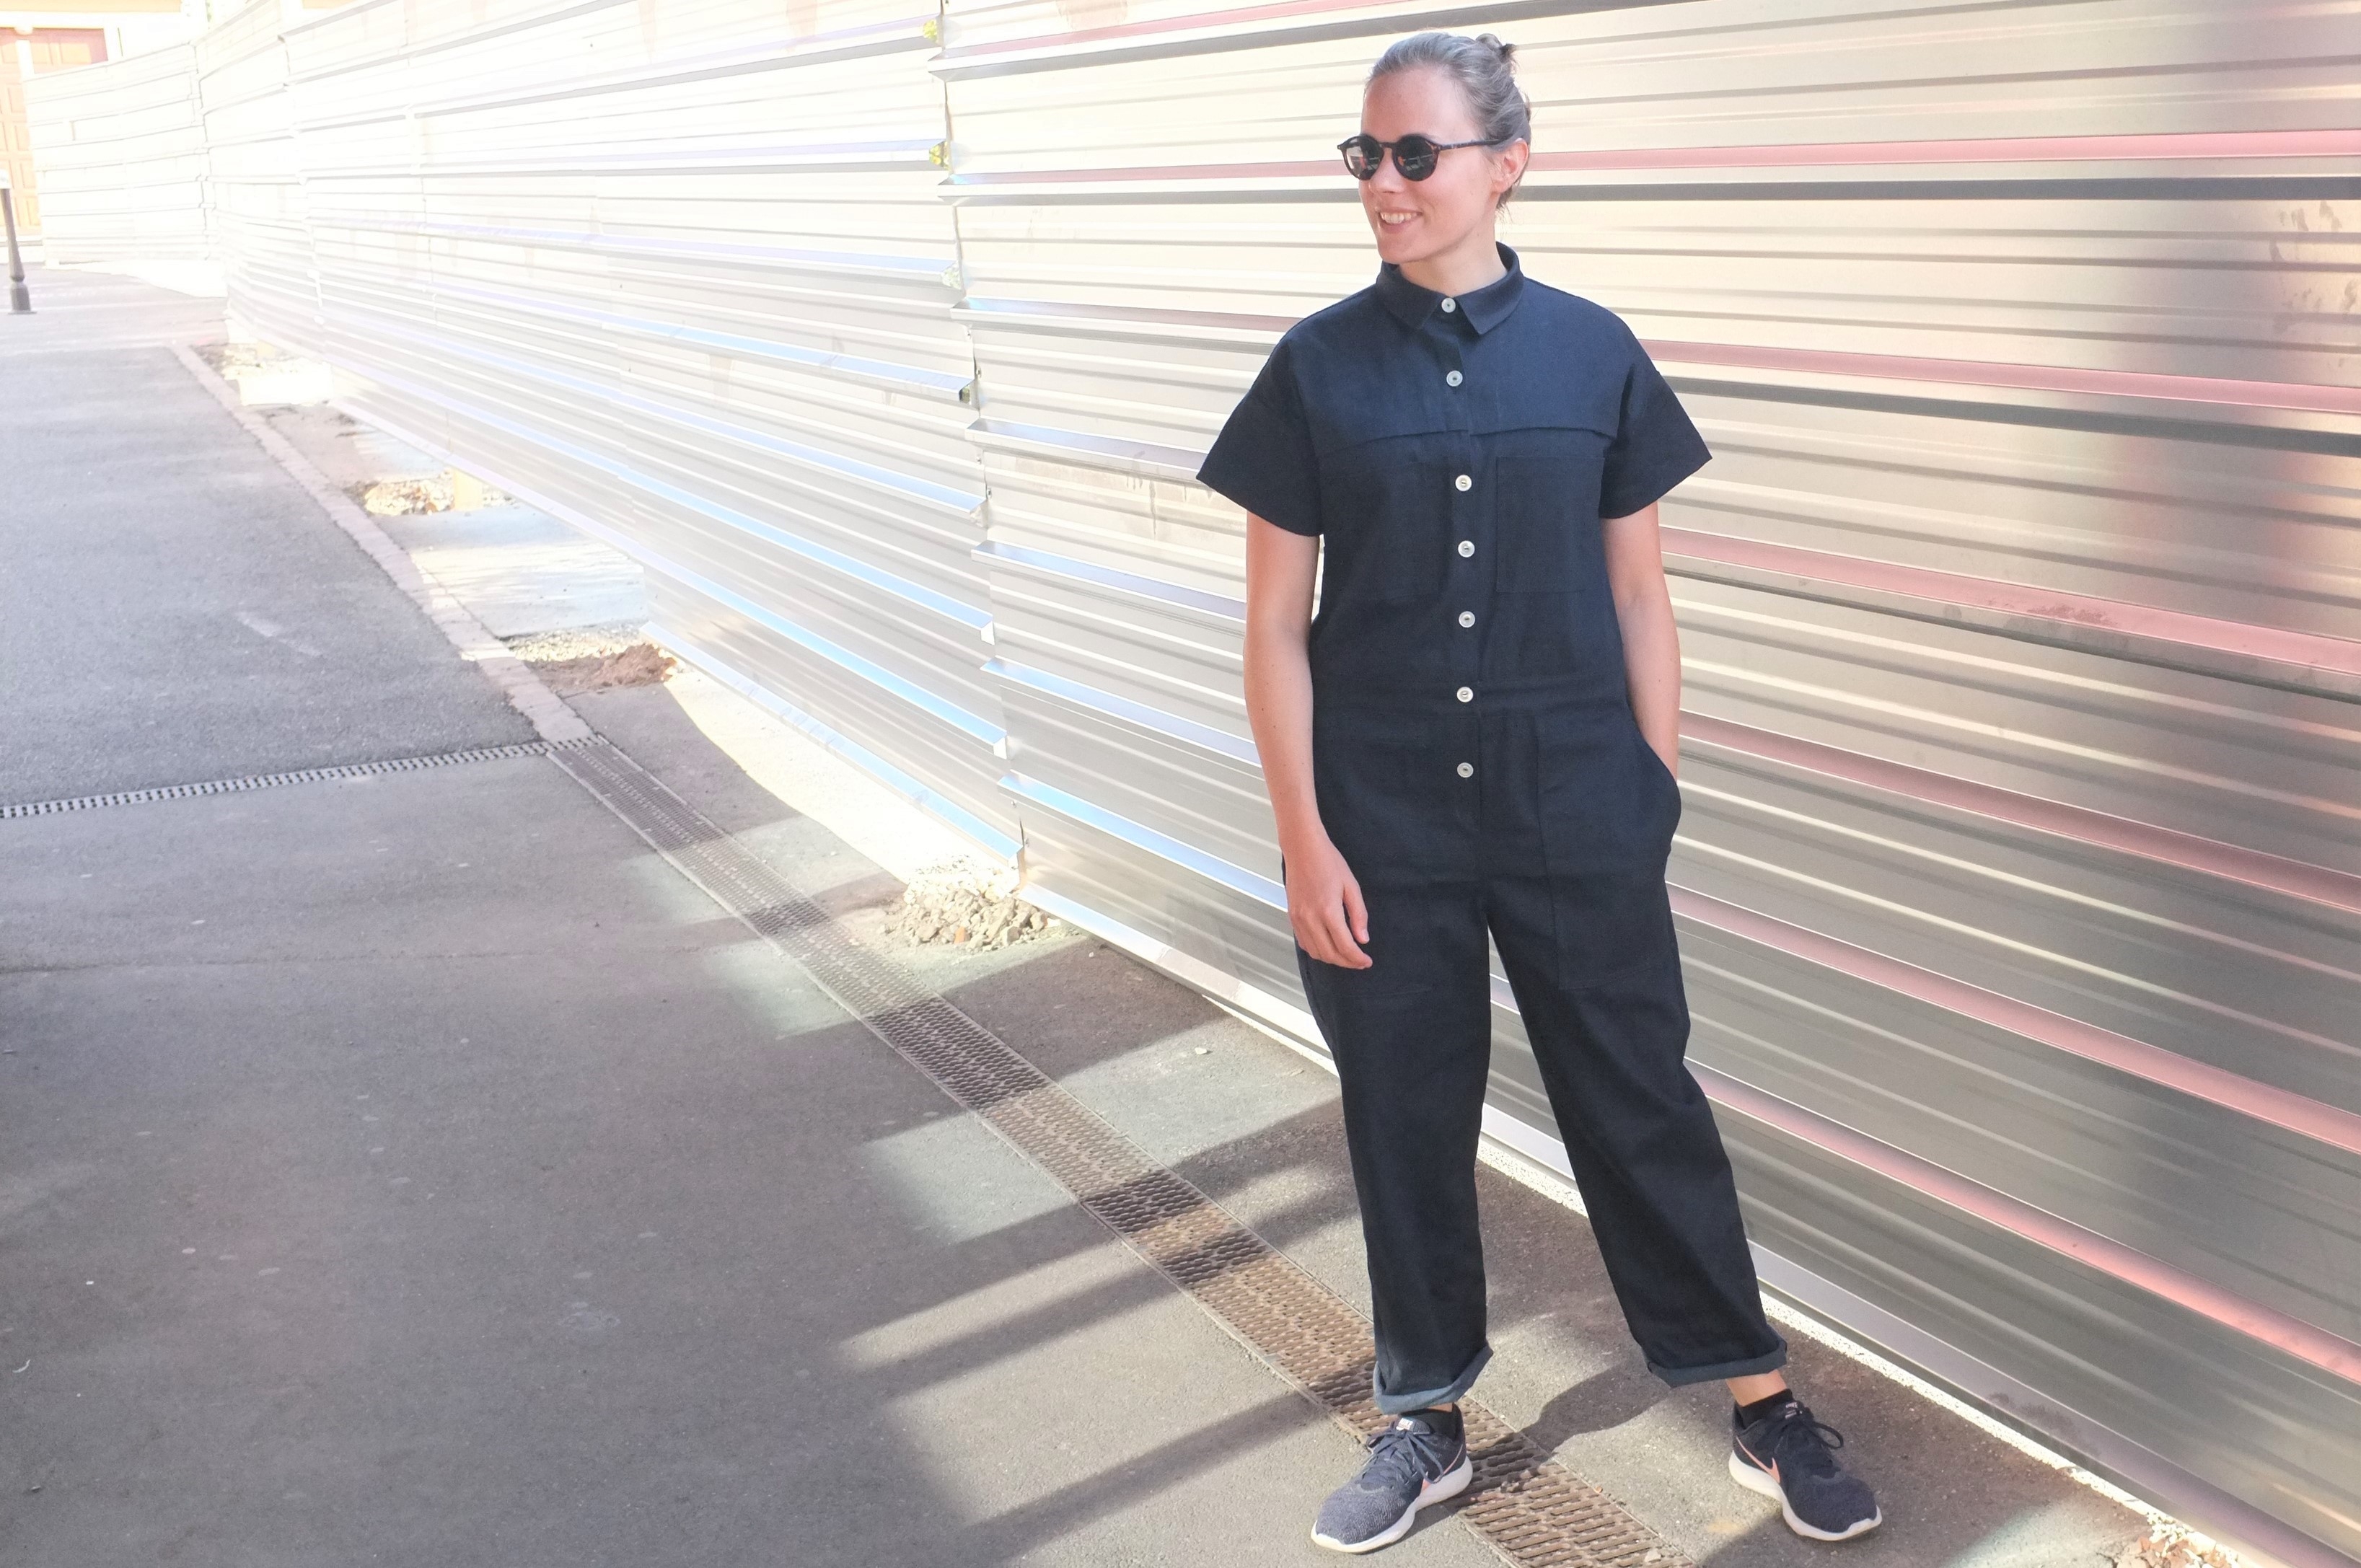
The fit of the final garment is good. I think this fits like a boiler suit should, roomy enough to move around in it but with some feminine shaping. I’m still debating if I should slim down the legs slightly which would make them look a little bit more fashionable. Also the legs are a tad too short on me, especially since they are drafted to be rolled up. I might add some cuffs with leftover fabric to add some length. Raphaëlle did a great job with incorporating the tester feedback and the final version has a slightly shorter crotch as well as longer and slimmer legs. So most of the issues I had should not come up in the final pattern.


 So what is my verdict then?
The Jean-Paul is a great pattern in terms of the detail of the instructions and the overall drafting. It’s and advanced sew, but it’s all so well described that with a little bit of patience you end up with a modern and professional looking boiler suit.
In my opinion a boiler suit in a heavy fabric like this works best in one of two scenarios, either as a very fashion forward piece (potentially in a bright colour) or in an atelier/workshop where it can actually be worn as a work outfit. Since I don’t live in a big city with stylish people nor own my own studio (I wish), I struggle to find opportunities to wear this. However, in a drapier fabric and maybe a fun colour I can see how this could work for daily wear. Make sure to check out the #JPReadyToSew hashtag, the other testers have made some amazing versions! I’m also intrigued to hack this into a shirt, maybe in some tencel twill. That pleat detail is just so much fun and I could use more work wear style tops.
If you’ve ever dreamed of your own stylish boiler suit, this is the pattern for you. In the meantime I’ll be here planning my imaginary sewing/crafting atelier…