This is one of these patterns, that I hesitated to buy because I felt like I could either draft it myself or adapt a pattern that I already have. However, after seeing so many beautiful versions of this dress online, I decided to purchase it after all, and I’m glad I did! I love everything that Jenny designs; the patterns are always great wardrobe workhorses and super stylish. The Wiksten Shift Dress of course is no exception.
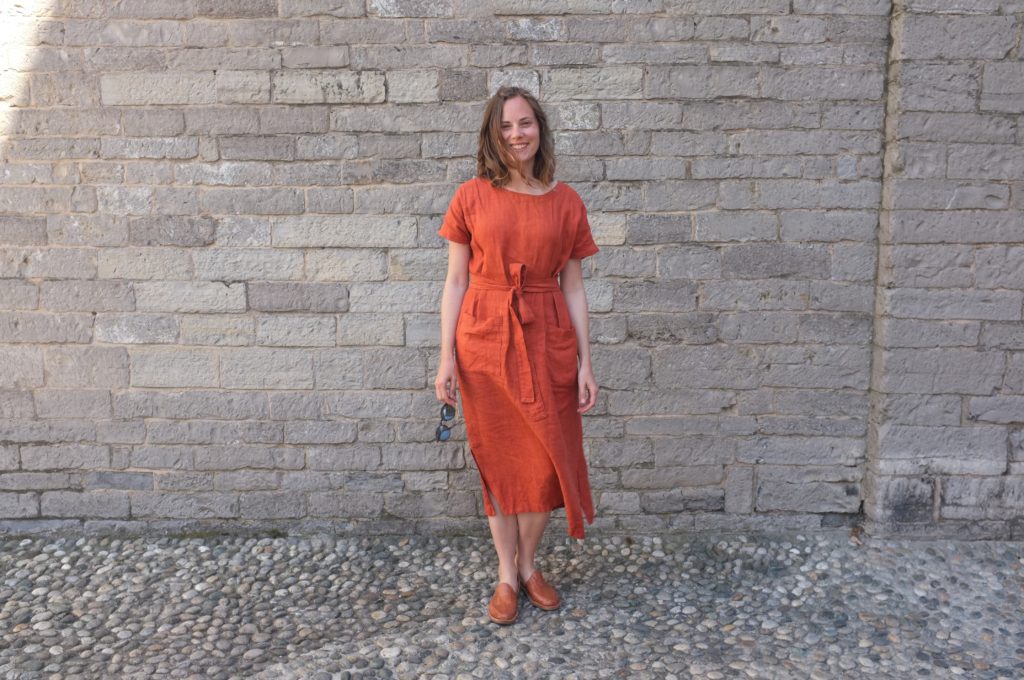
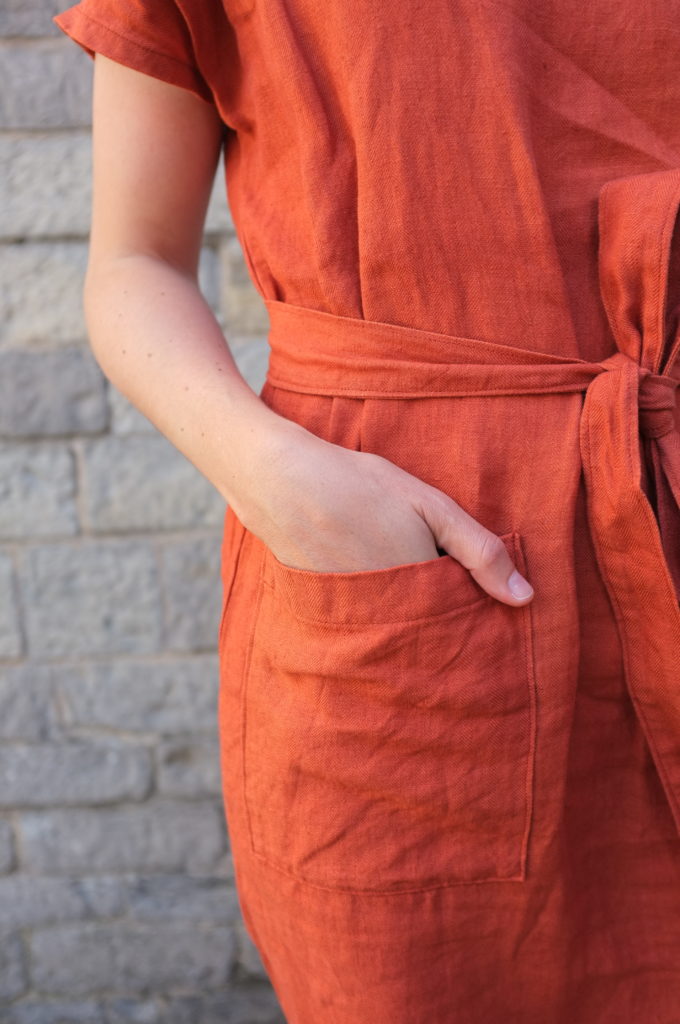
Luckily I had a good amount of orange linen in my stash for a perfect fabric-pattern match. Two years ago I experimented with dyeing fabric, aiming for a terracotta colour, which turned out a lot brighter than planned. This is how I ended up with a lot of bright orange linen (which I used for example for my Highlands Wrap Dress). The colour really has grown on me and lately I’ve seen it become more and more popular. There are quite a few beautiful orange Wiksten dresses out there, so I’m in very good company.
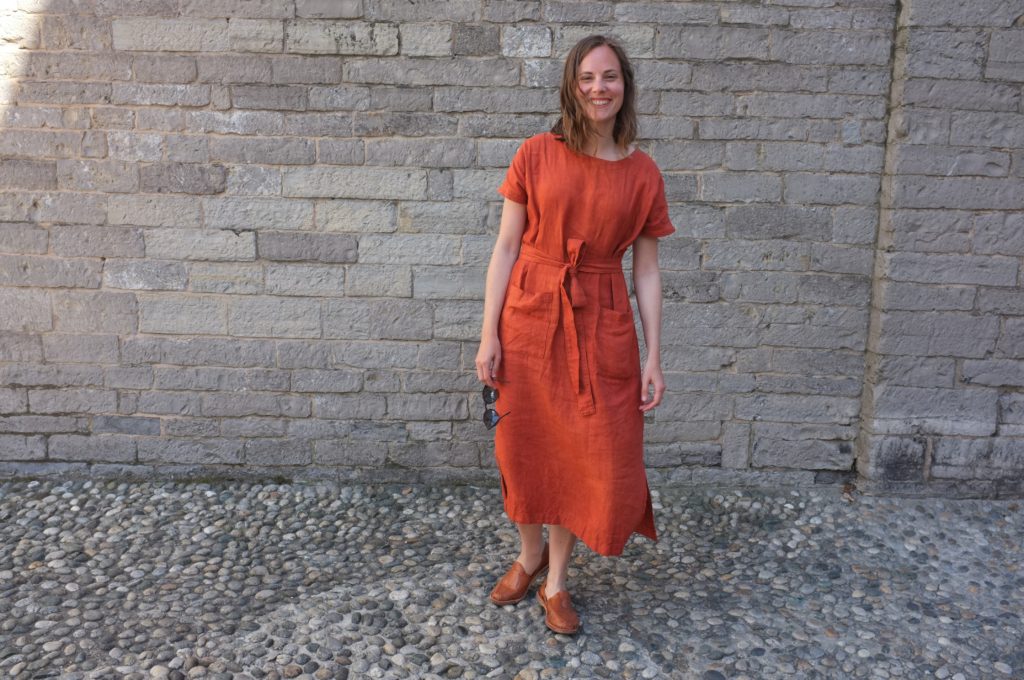
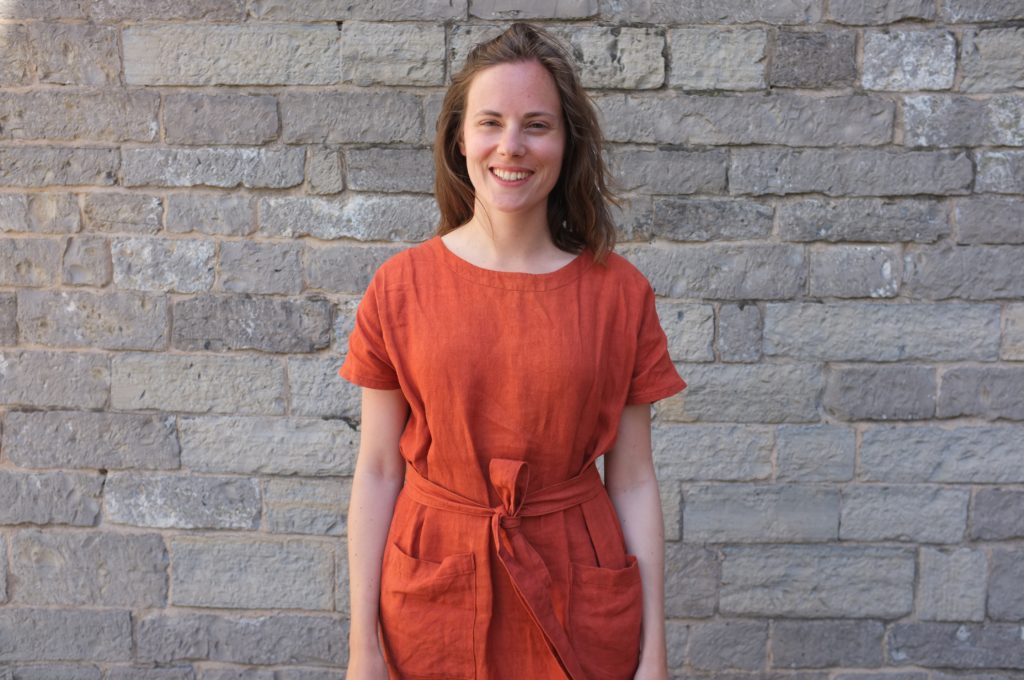
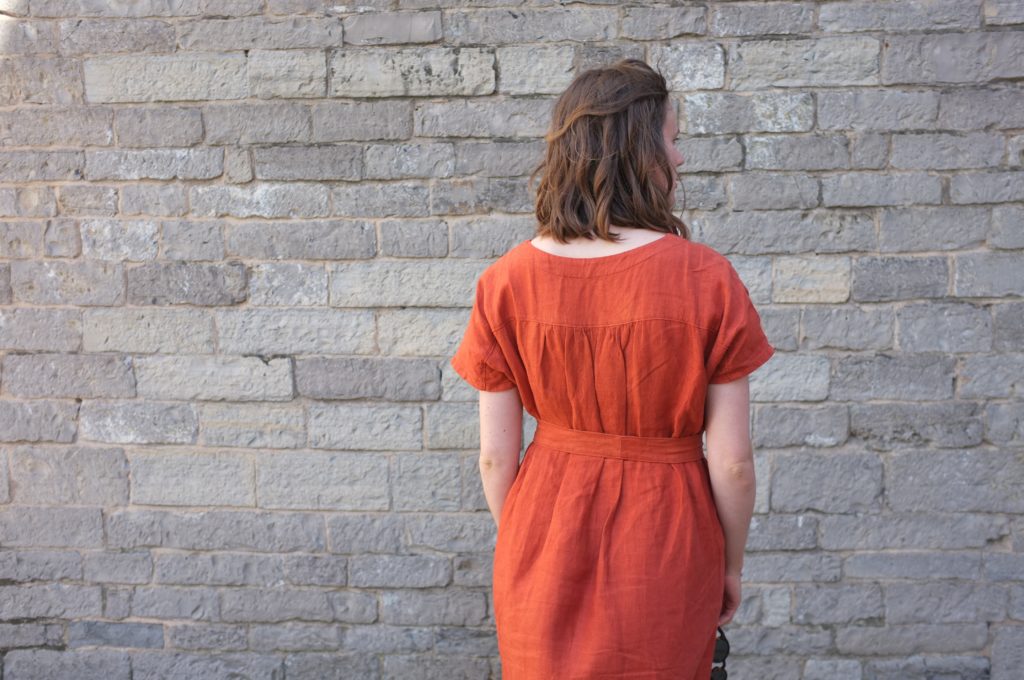
The pattern is designed to be quite oversized, which I’m totally into. Knowing that it would have enough ease, I decided to select the size based on my bust measurements (a size 8) and not grade out in the hips. It worked out well as I have plenty of room all around. The fit is good, though I might try doing a forward-shoulder adjustment next time. The shoulder seams don’t want to stay put. I didn’t make any modifications in terms of construction and sewed this up as instructed.
The finished dress, is so easy to wear! It’s loose and breezy, just as I like my summer dresses. The pattern has thoughtful details, like the large pockets, the side slits and the gathered back. I’m sure I’ll be making more variations of both the dress and the top. I already cut the top version from a Japanese gingham fabric and am very excited to sew it up!
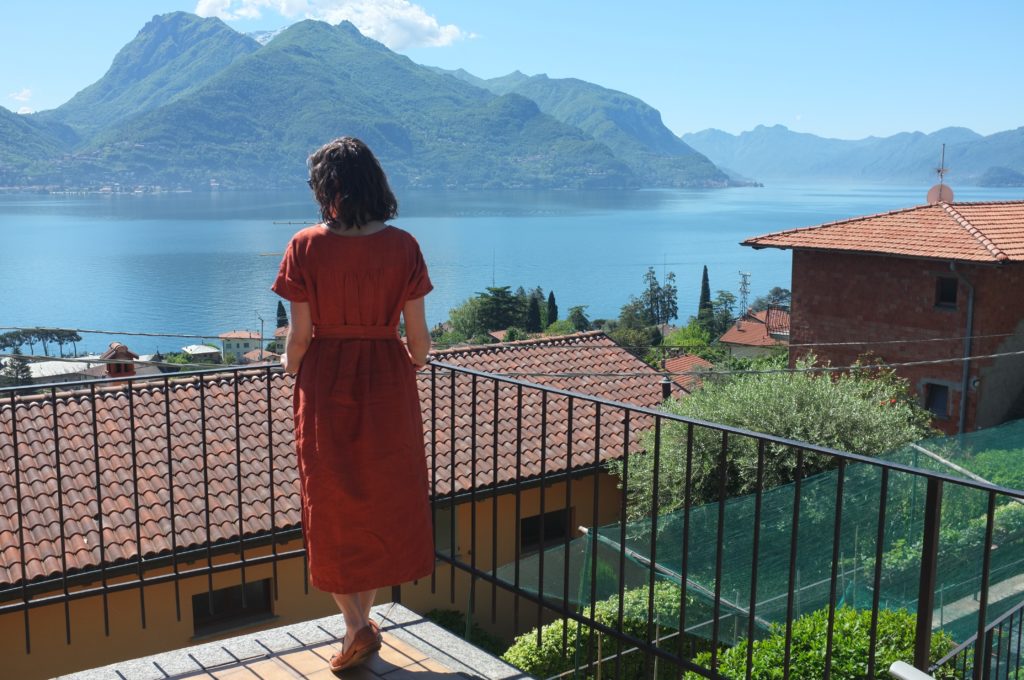
This was a perfect speedy sew and I managed to finish it just in time for our Italy holiday (back in May). It was ideal for strolling through Bellagio on a super warm day. I’ve also worn this dress quite a bit since. This orange is my happy colour for summer!
Now I’ll leave you with the view from the terrace of our AirBnB at Lake Como. Take me back!
It’s official, my husband and I have finally booked our holiday to Japan. We’ve been planning to go for two years now (it was supposed to be sort of our honeymoon) and we finally managed to find a date. We’ll be there from the beginning of April until the beginning of March, travelling around the country. I’m very excited!
So what is the first thing a sewist does when they booked a holiday? Dream up a travel wardrobe of course and make a list of things to sew. This list I’ve sketched out focuses on some key pieces I felt I was missing. Clearly I’m already dreaming of warm weather sewing. No worries I’ll take thermals and jackets too.
This list got me so excited that I’ve already sewn half way through it. Today I’m showing you the Claudia Dress and the Stellan Tee. The leather fanny pack is done too (check out my Instagram for a preview) and I’m currently working on the Raspberry Rucksack.
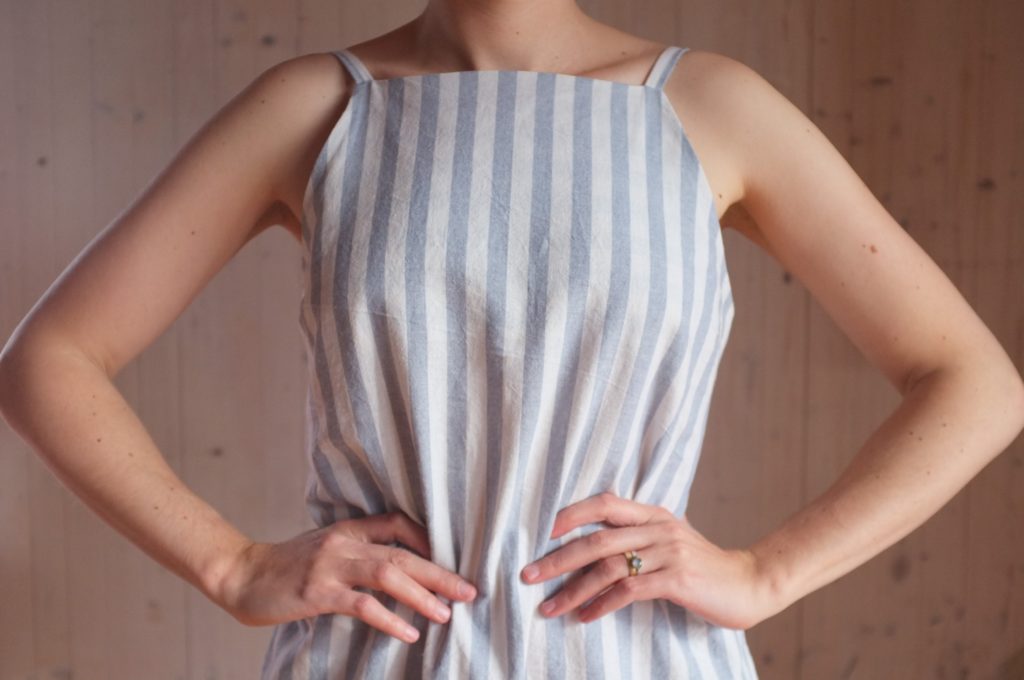
The Claudia Dress by Tessuti has been on my to-sew list since it came out. I love the neckline, the length, the side slits; basically it’s my dream summer dress. I used a Robert Kaufmann cotton-linen mix that I got from Ray Stitch a while ago. It’s a beautiful fabric but it took me a long time to decide what exactly to make with it. I’m glad I decided to pair it with the Claudia dress. It’s the perfect weight for this dress and the stripes work well with this simple shape.
Talking of stripes, I totally copied the idea of playing with stripe direction from Ellen (@ejc______). I saw her version of the Claudia on Instagram and immediately wanted to make my own. I broke up the front pattern piece into two (actually just at the place where you would stick the two pattern pieces together) and cut one piece on grain, the other one cross-grain. The back stripes are aligned with the ones of the lower part of the front. I made sure to pattern match just above the slit where both sides meet and love this little detail.
In terms of sizing I graded from a size S at the top to a size M in the hips. The amount of ease around the hips is perfect, at the top though I had to take the dress in quite a bit through the side seams. Now it sits close enough to not show any boob but it’s still relatively loose so that I can wear a T-shirt or turtleneck underneath. I tried to be super careful with the armhole stitching to not stretch it out (I stay stitched instead of using tear-away vilene as suggested in the pattern), still it gapes a little. Something to improve on the next version.
For the facings I used the main fabric, but decided to also invert the stripe. I figured rather than trying to match up the stripe I would create a sort of checkered pattern if the fabric was to sheer. And indeed you can see a faint pattern in the right light, which I think is quite fun.
The dress has pockets that are topstitched to the front. While I like the construction and the fact that they are there, I feel the pockets are really tiny, and I don’t even have big hands! Something to keep in mind if you ever make this pattern.
While I like the dress loose as drafted (unfortunately I forgot to take a picture), I also sewed up a tie to cinch in the waist. It breaks up the front bodice and adds a little bit more to the stripe play.
All in all it’s a wonderful pattern. For my next version I might hack it into a top for summer.
Next up is the Stellan Tee by French Navy. It’s a FREE pattern and a great contemporary version of a tee. I love the high neck and the relaxed fit.
The fabric is the ochre merino from The Fabric Store. I don’t really wear yellow/mustard colours, but it suits my husband so I had ordered some to make him a T-shirt. While the fabric was sitting in my stash, I got curious and decided to give this colour a try. So I stole a piece to make the Stellan Tee (don’t worry, there is still enough left for my husband).
It’s a simple tee, nevertheless, the instructions are nice and thorough. I’m not much of a T-shirt sewer, so this was actually the first time that I used the technique to enclose the back neck seam allowance with tape. I love how clean it looks and will definitely add that to any future T-shirts.
I don’t have a coverstitch machine, so I used a small zig zag stitch to finish the neck and hems. I always thought it looked a little bit amateurish though these days I actually really like the look of it.
The sizing for me is spot on. I made a size S based on my bust measurements and there is plenty of room even at the hips.
The hem is drafted as curved, which was a bit fiddly to sew. It’s a cute detail, though I might straighten it out next time to give it an even cleaner look.
Such a quick and satisfying sew and this merino is a dream to wear! My husband only wears merino shirts these days and I can understand why. It’s perfect for any climate and will be great for travelling.
I’m so excited to show you my project for this year’s Refashioners community challenge. The Refashioners challenge organised by Portia Lawrie was the first community challenge that I participated in when I started my blog four years ago. For a little throw-back you can read about the shirt refashion I did back then here.
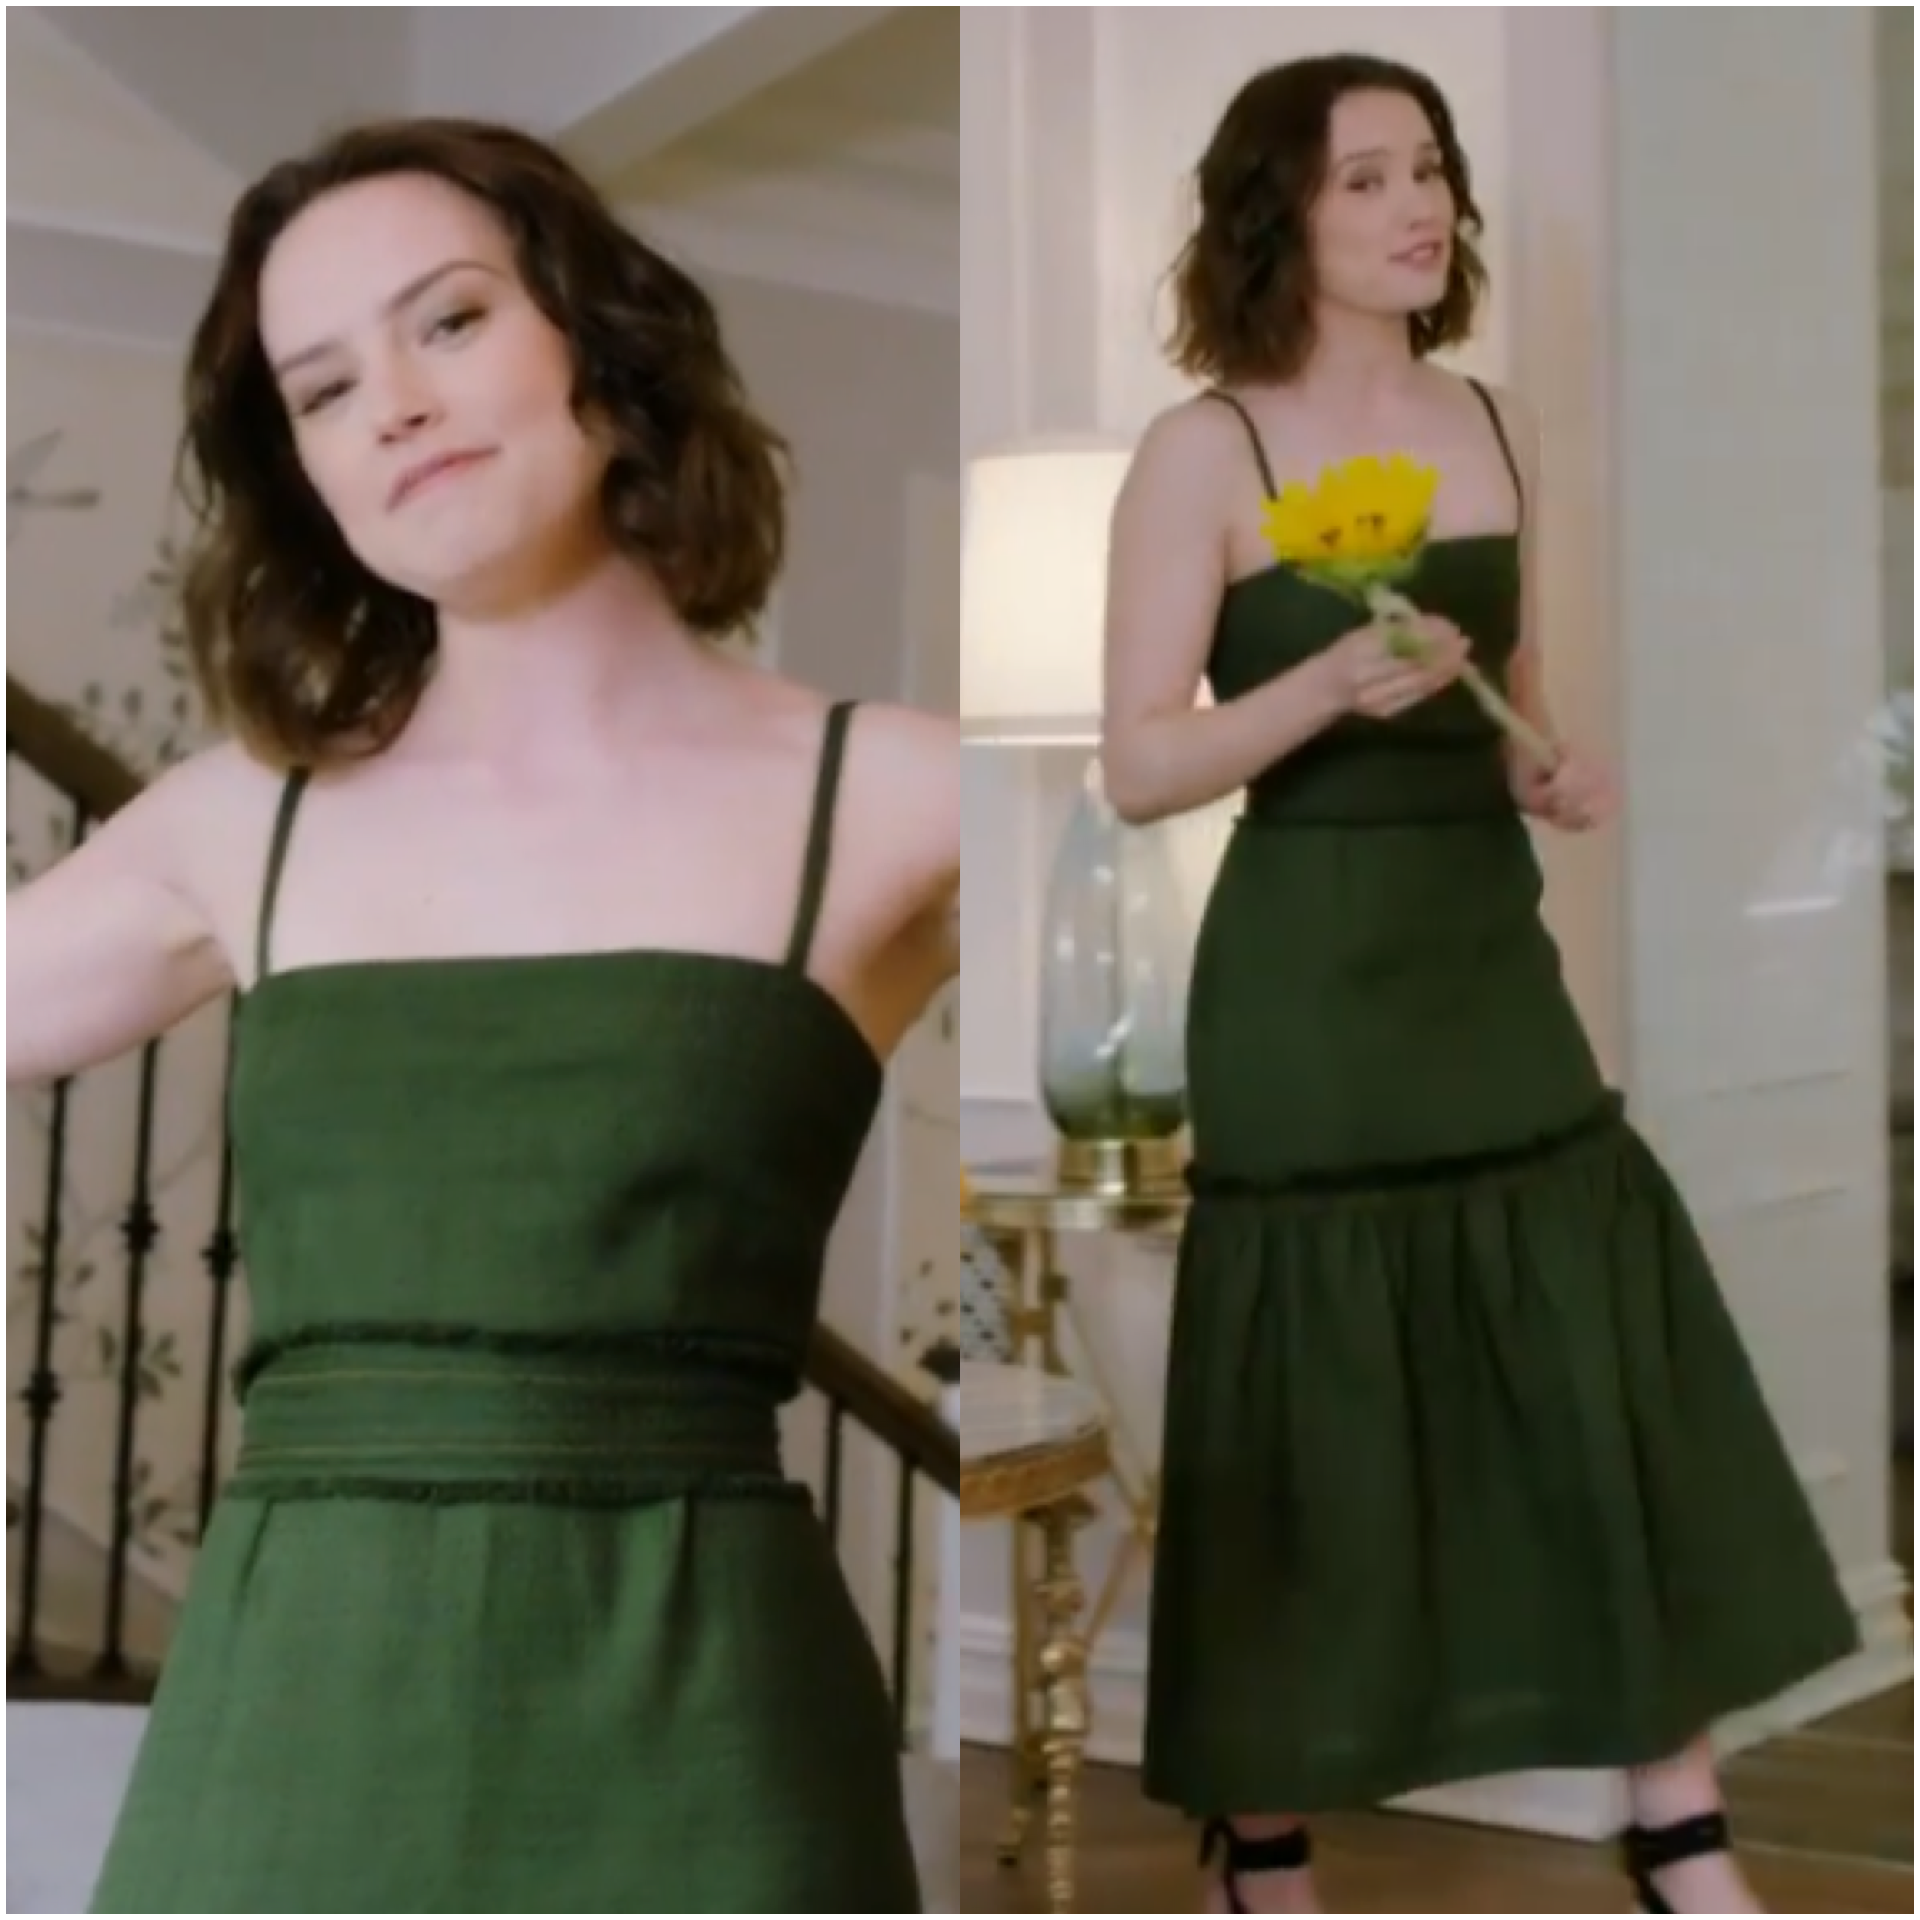
This year the theme is “Inspired by” which means that instead of focusing on a specific garment to refashion the aim is to be inspired by a look and then to try and recreate it through refashioning any type of second hand find. Since I have more time for sewing than usual at the moment I decided I wanted to participate again. However, this brief is a tricky one. From years of experience with thrifting I know that it is impossible to go into a thrift store with a specific idea. Instead you need to go in with an open mind and see what’s available. So I went into this challenge with the attitude that I would only participate if I could find something that matched my vision. As soon as the theme was announced I knew exactly which look I wanted to recreate, the Bonnie Young dress that Daisy Ridley wore for her 73 questions interview with Vogue (you can watch it here if you are interested). I’m not really a party dress person, but I couldn’t get this one out of my head. The colour, the shape, the movement; I just loved it. But, would I be able to find something suitable to recreate this look? Source
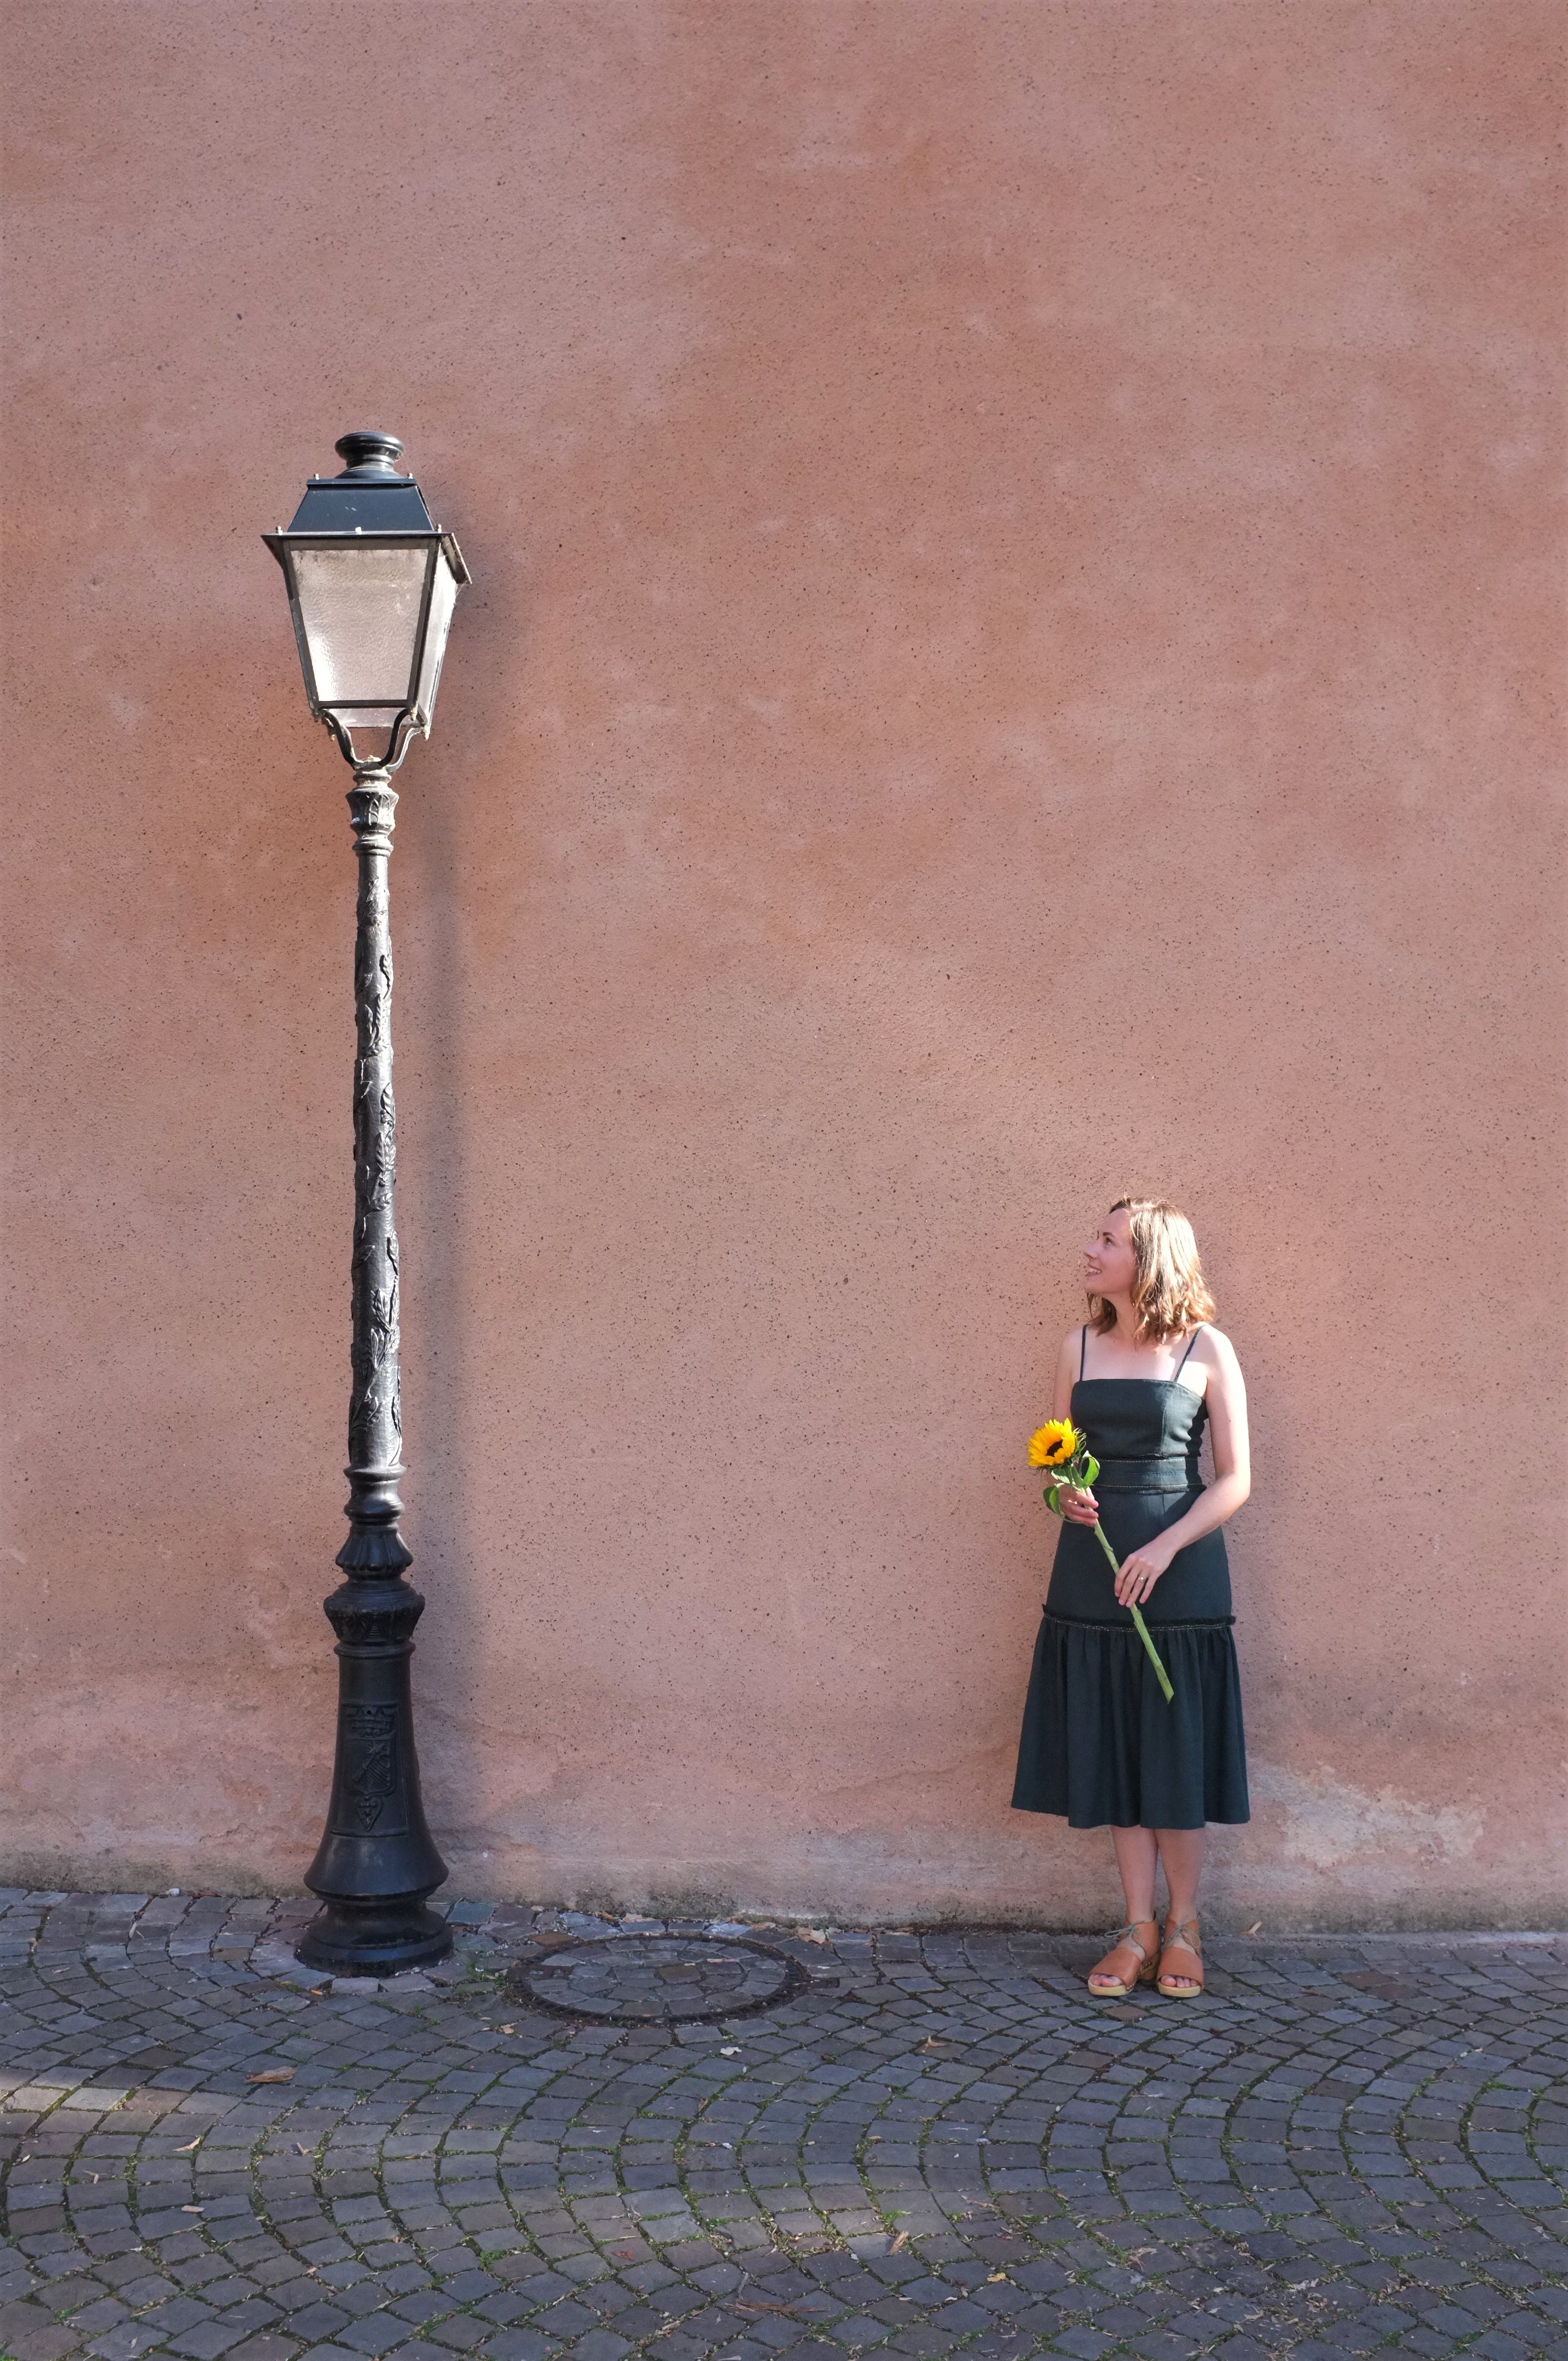
I was visiting my sister in Chemnitz when I decided to check out some second hand shops and see what I could find. Amazingly I hit gold in the second shop I went into. This dress below might not look like much but I was perfect:
Made from a linen viscose mix it would take dye easily and the original fabric already was a grey/green so it wouldn’t distort the forest green colour I was going for.
It was several sizes too big, which meant that there was room to play around with the fit.
It had a back zip and other details which I could re-use.
The skirt was wide enough to create a voluminous ruffle.
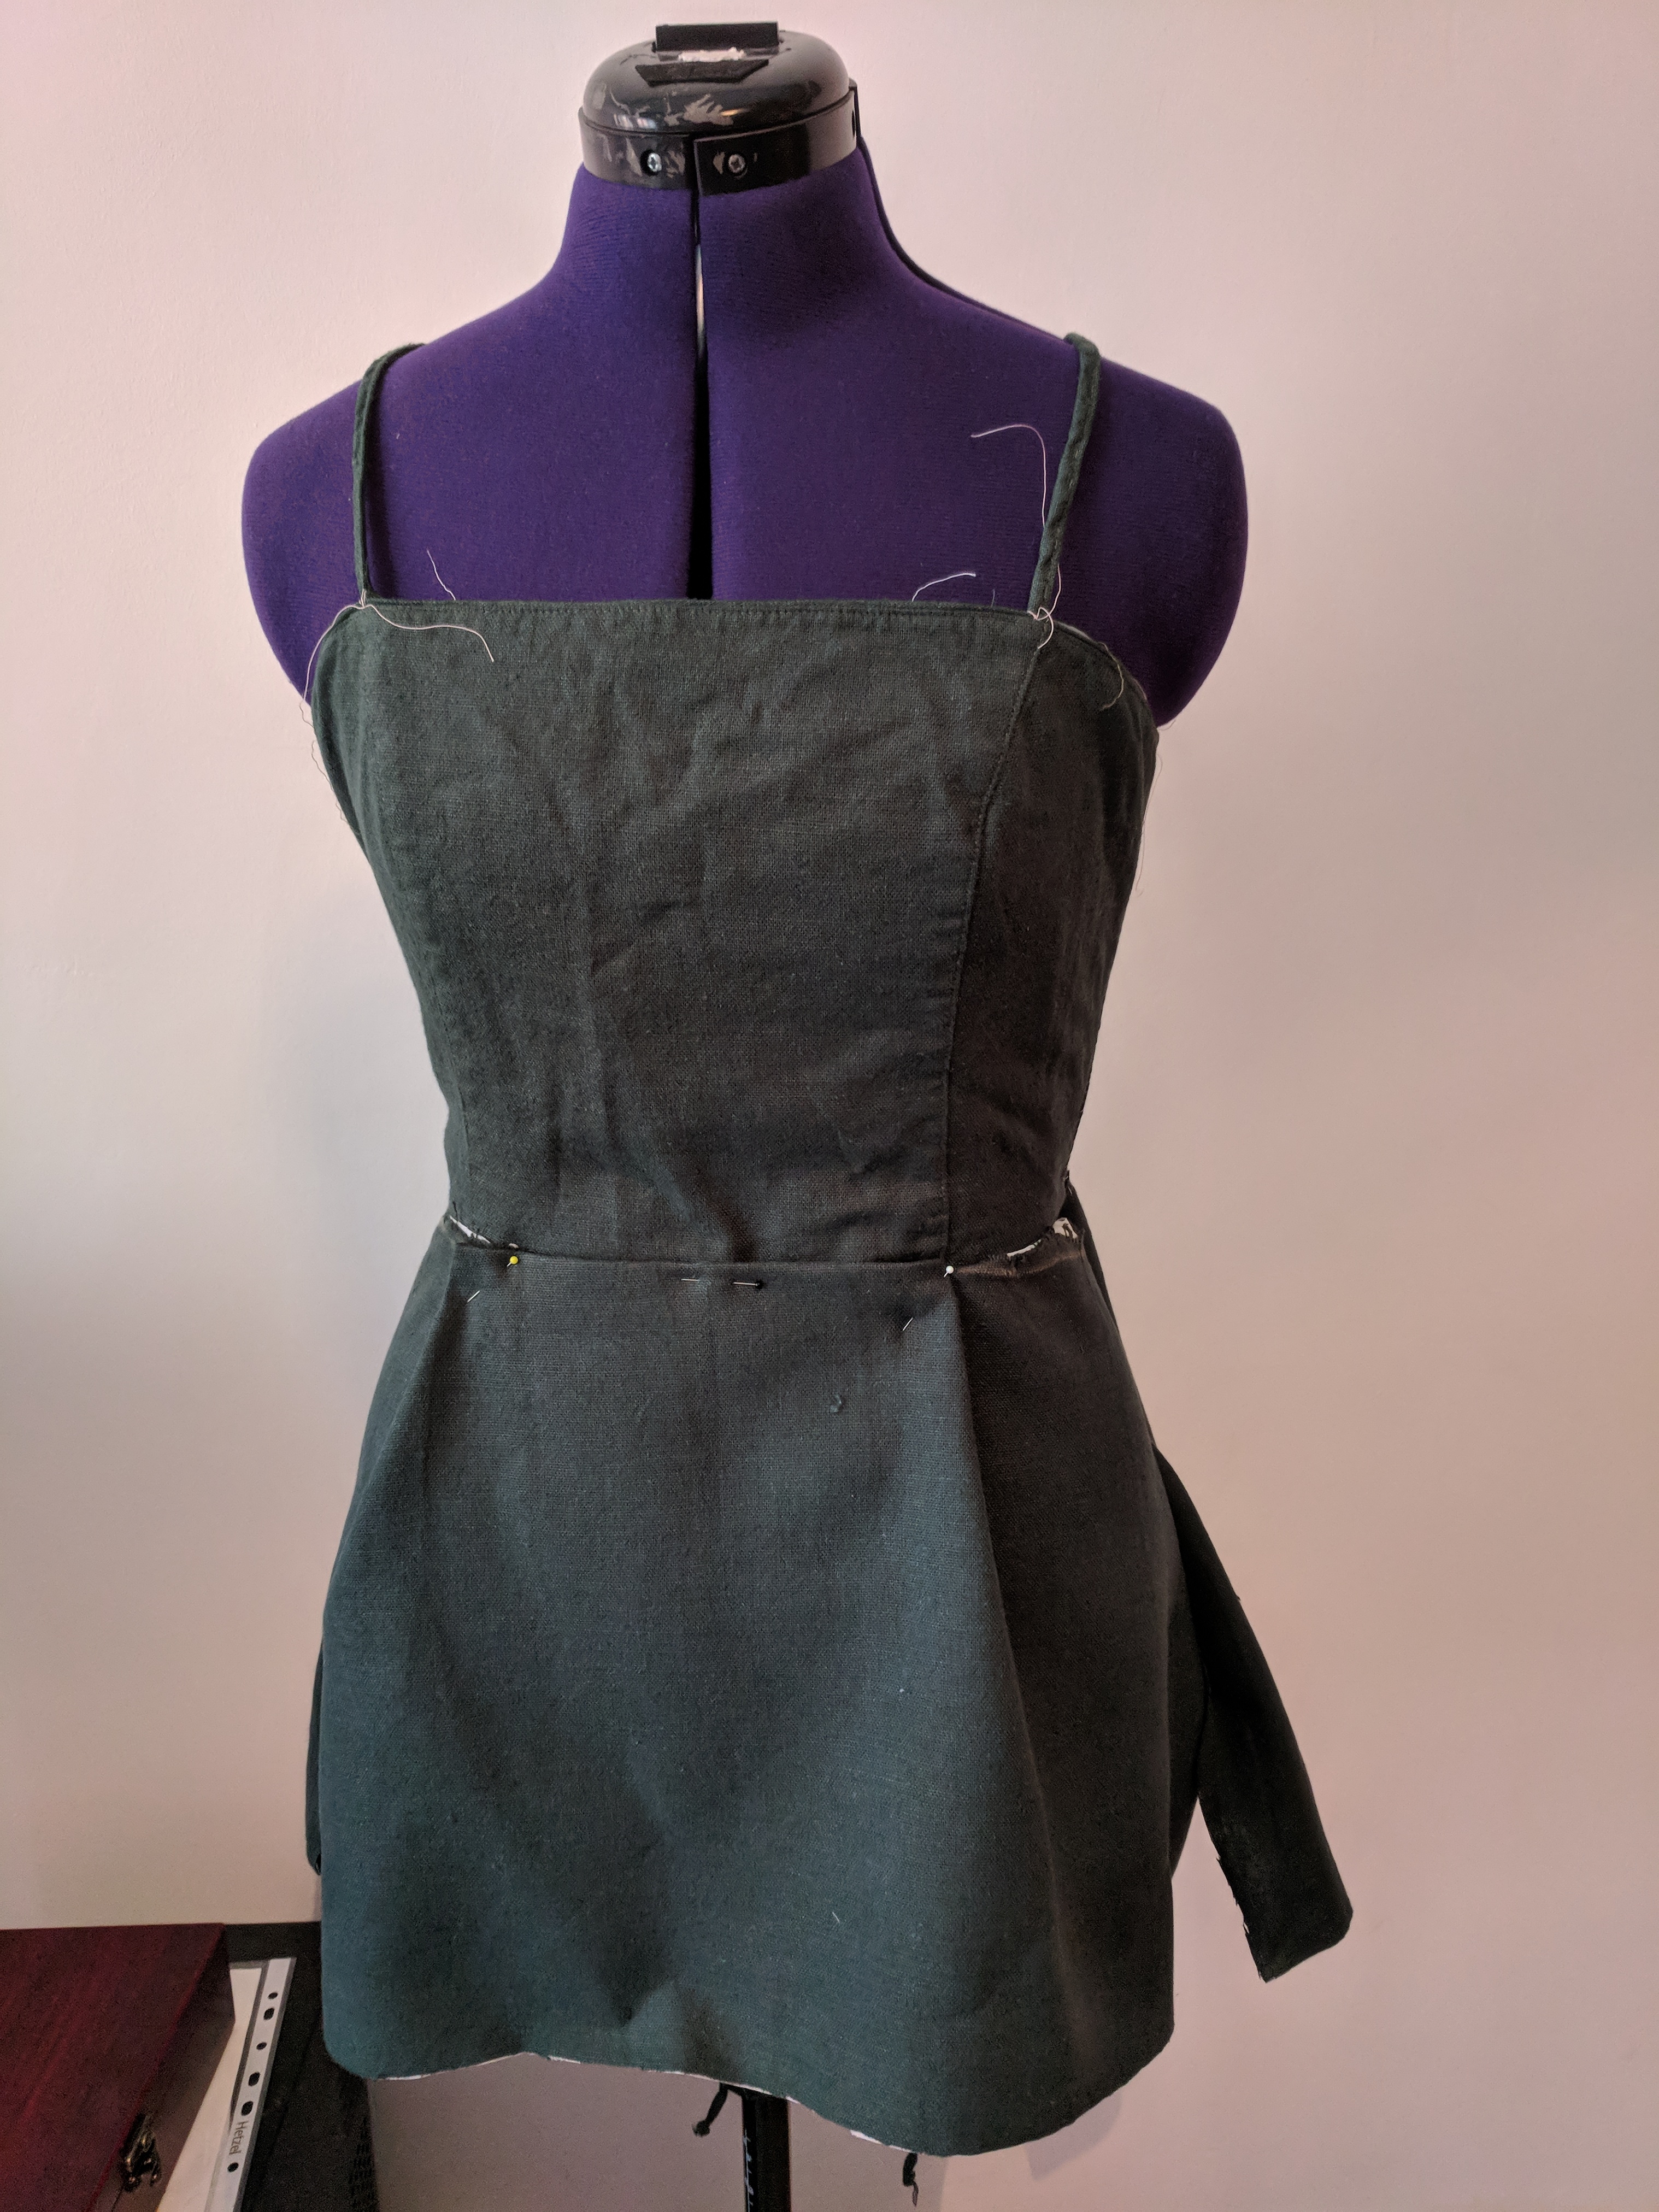
The first thing I did was to remove the weird buckles and then throw the whole dress into a forest green dye bath. As expected the fabric took the dye beautifully and it came out in a nice dark green. Next I cut off the top part of the back bodice including the straps. The original dress has a lace up detail on both sides, which I removed, hoping that the bodice would not be too small when sewn back together without it. I hand basted the bodice together and amazingly the bodice fit like a glove (below a picture of the first baste fitting). No further adjustments were necessary, it’s like the dress was made for me! Situations like that are the reason why I love refashioning so much. There is nothing more satisfying than being able to re-use some of the original details of a garment.
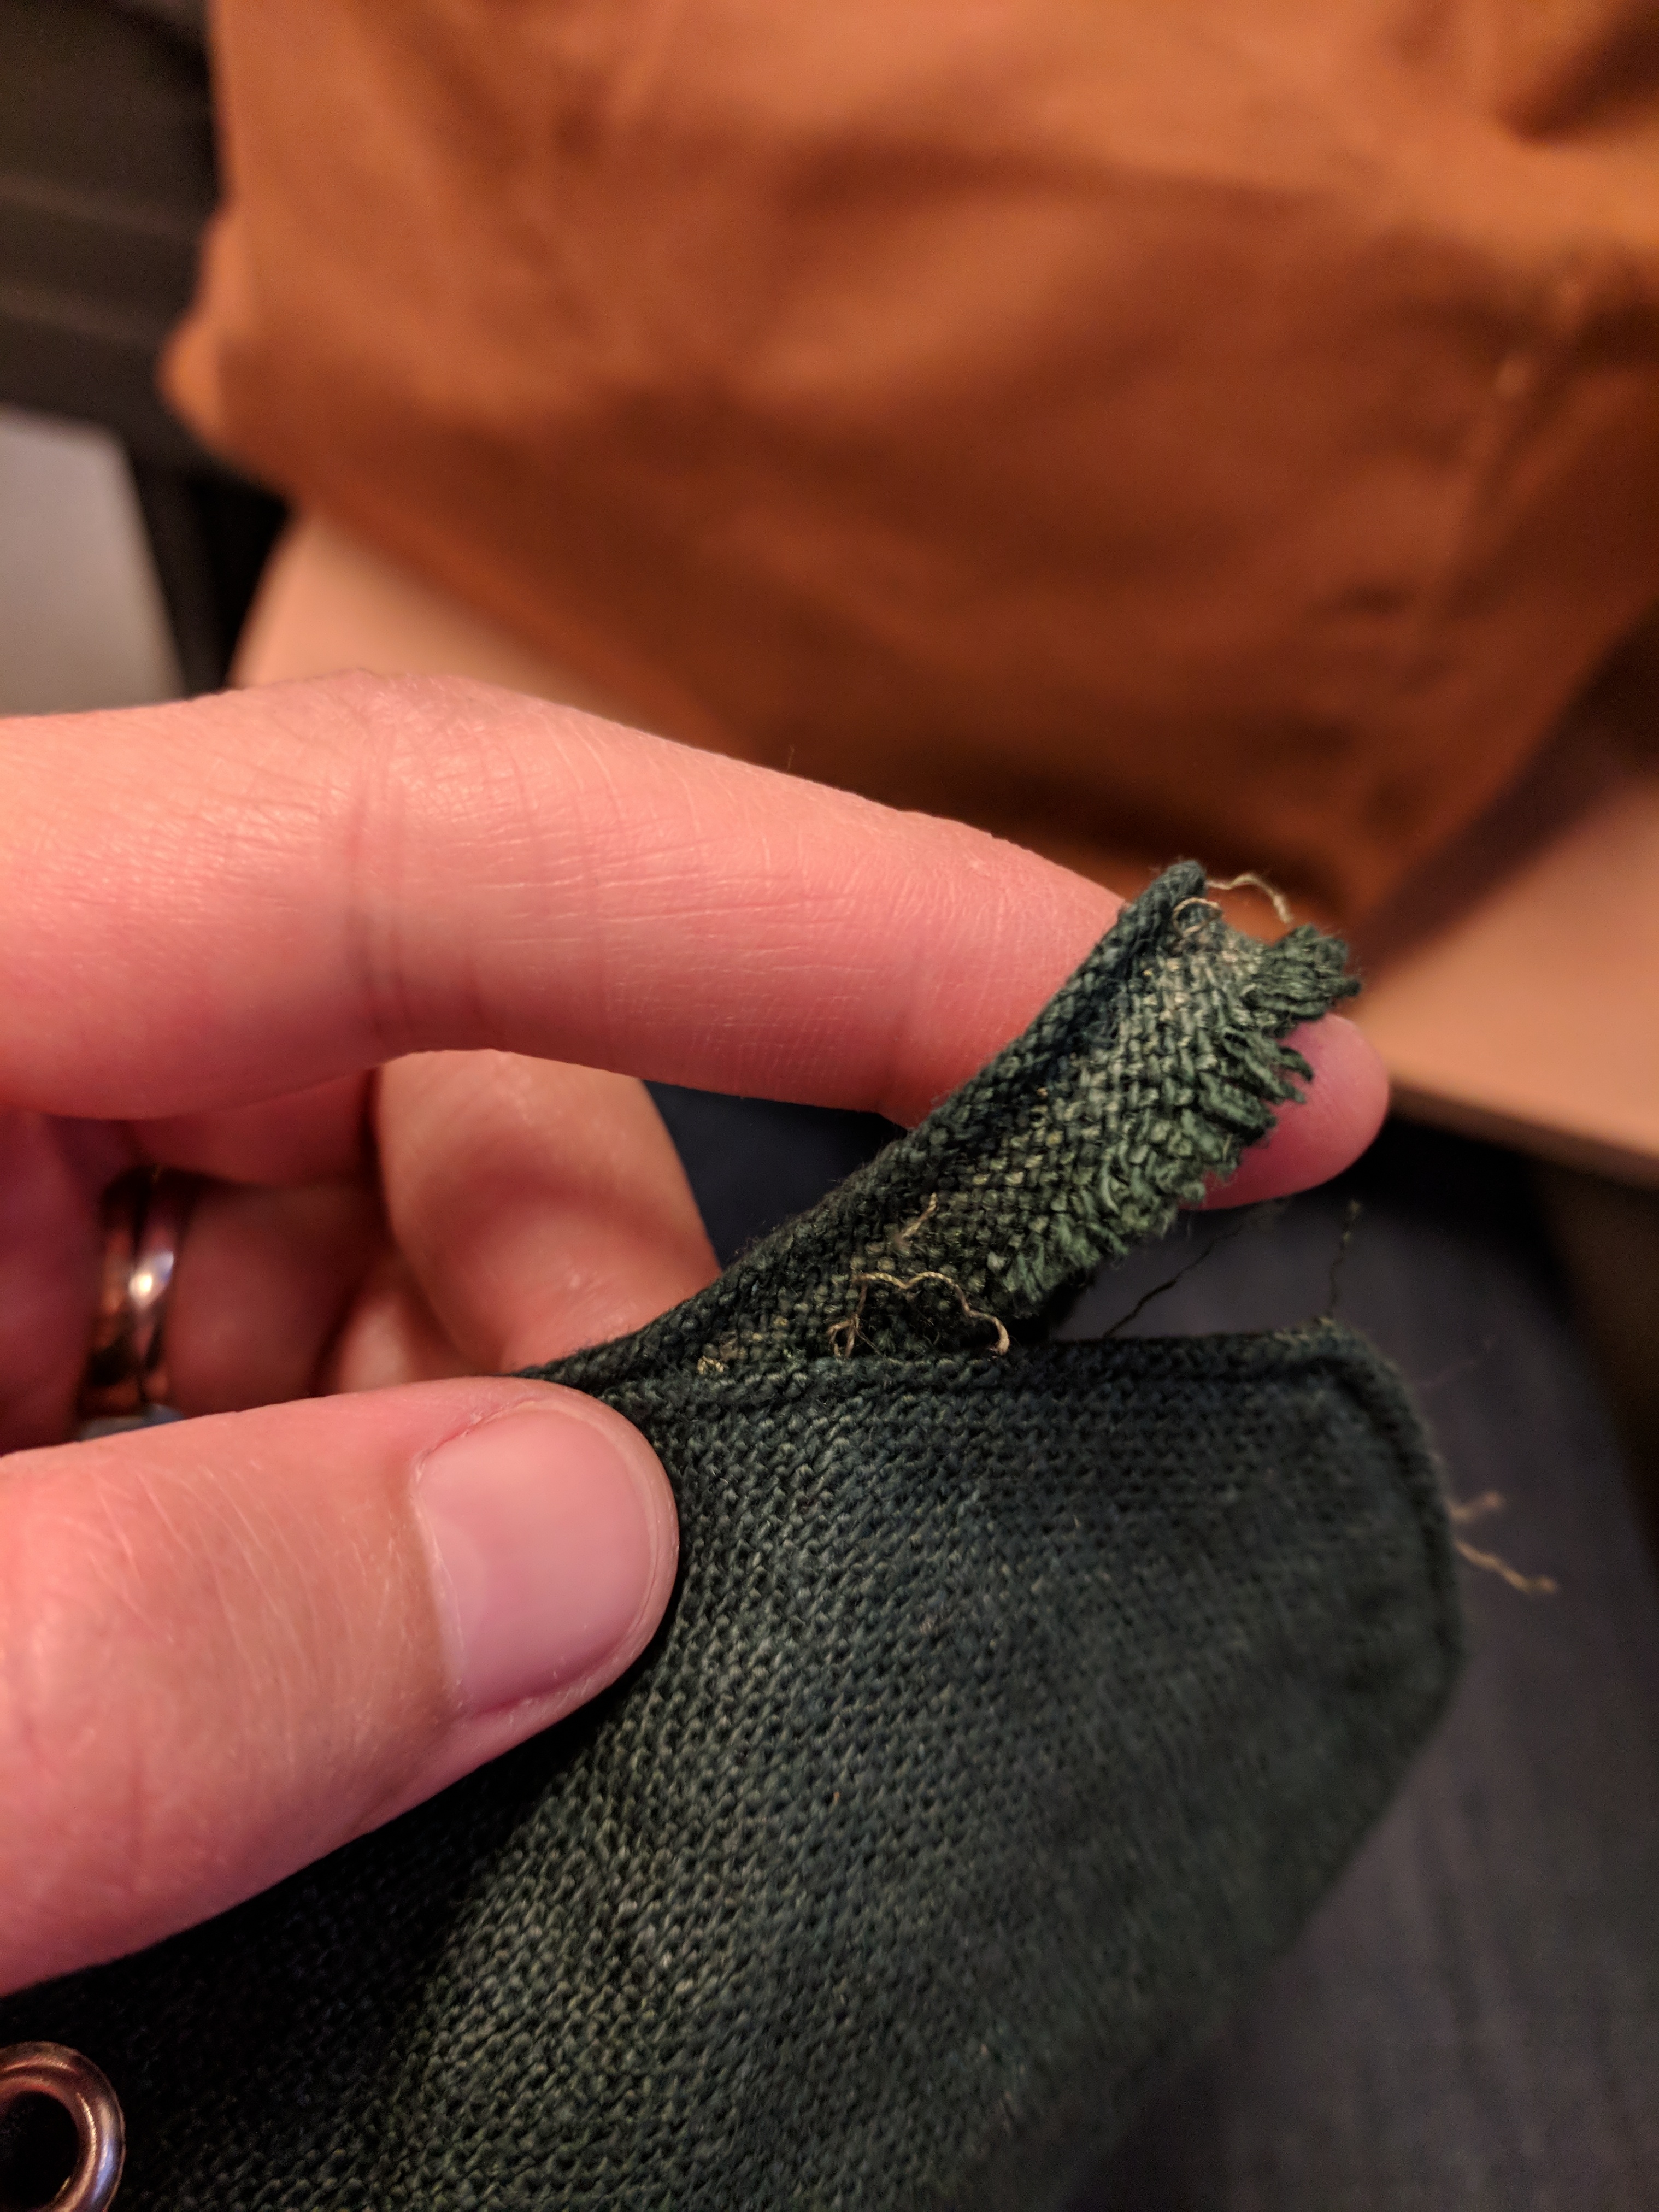
The original dress had some lovely piping along the top edge and while I was able to preserve that feature at the front I lost it in the back where I had cut off the top part. So I unpicked the piping from the straps that I wouldn’t be using for anything else and re-sewed the top edge of the back inserting the piping. The straps for this dress are the ties from the original lace-up detail, so no need for making fiddly spaghetti straps, yay!
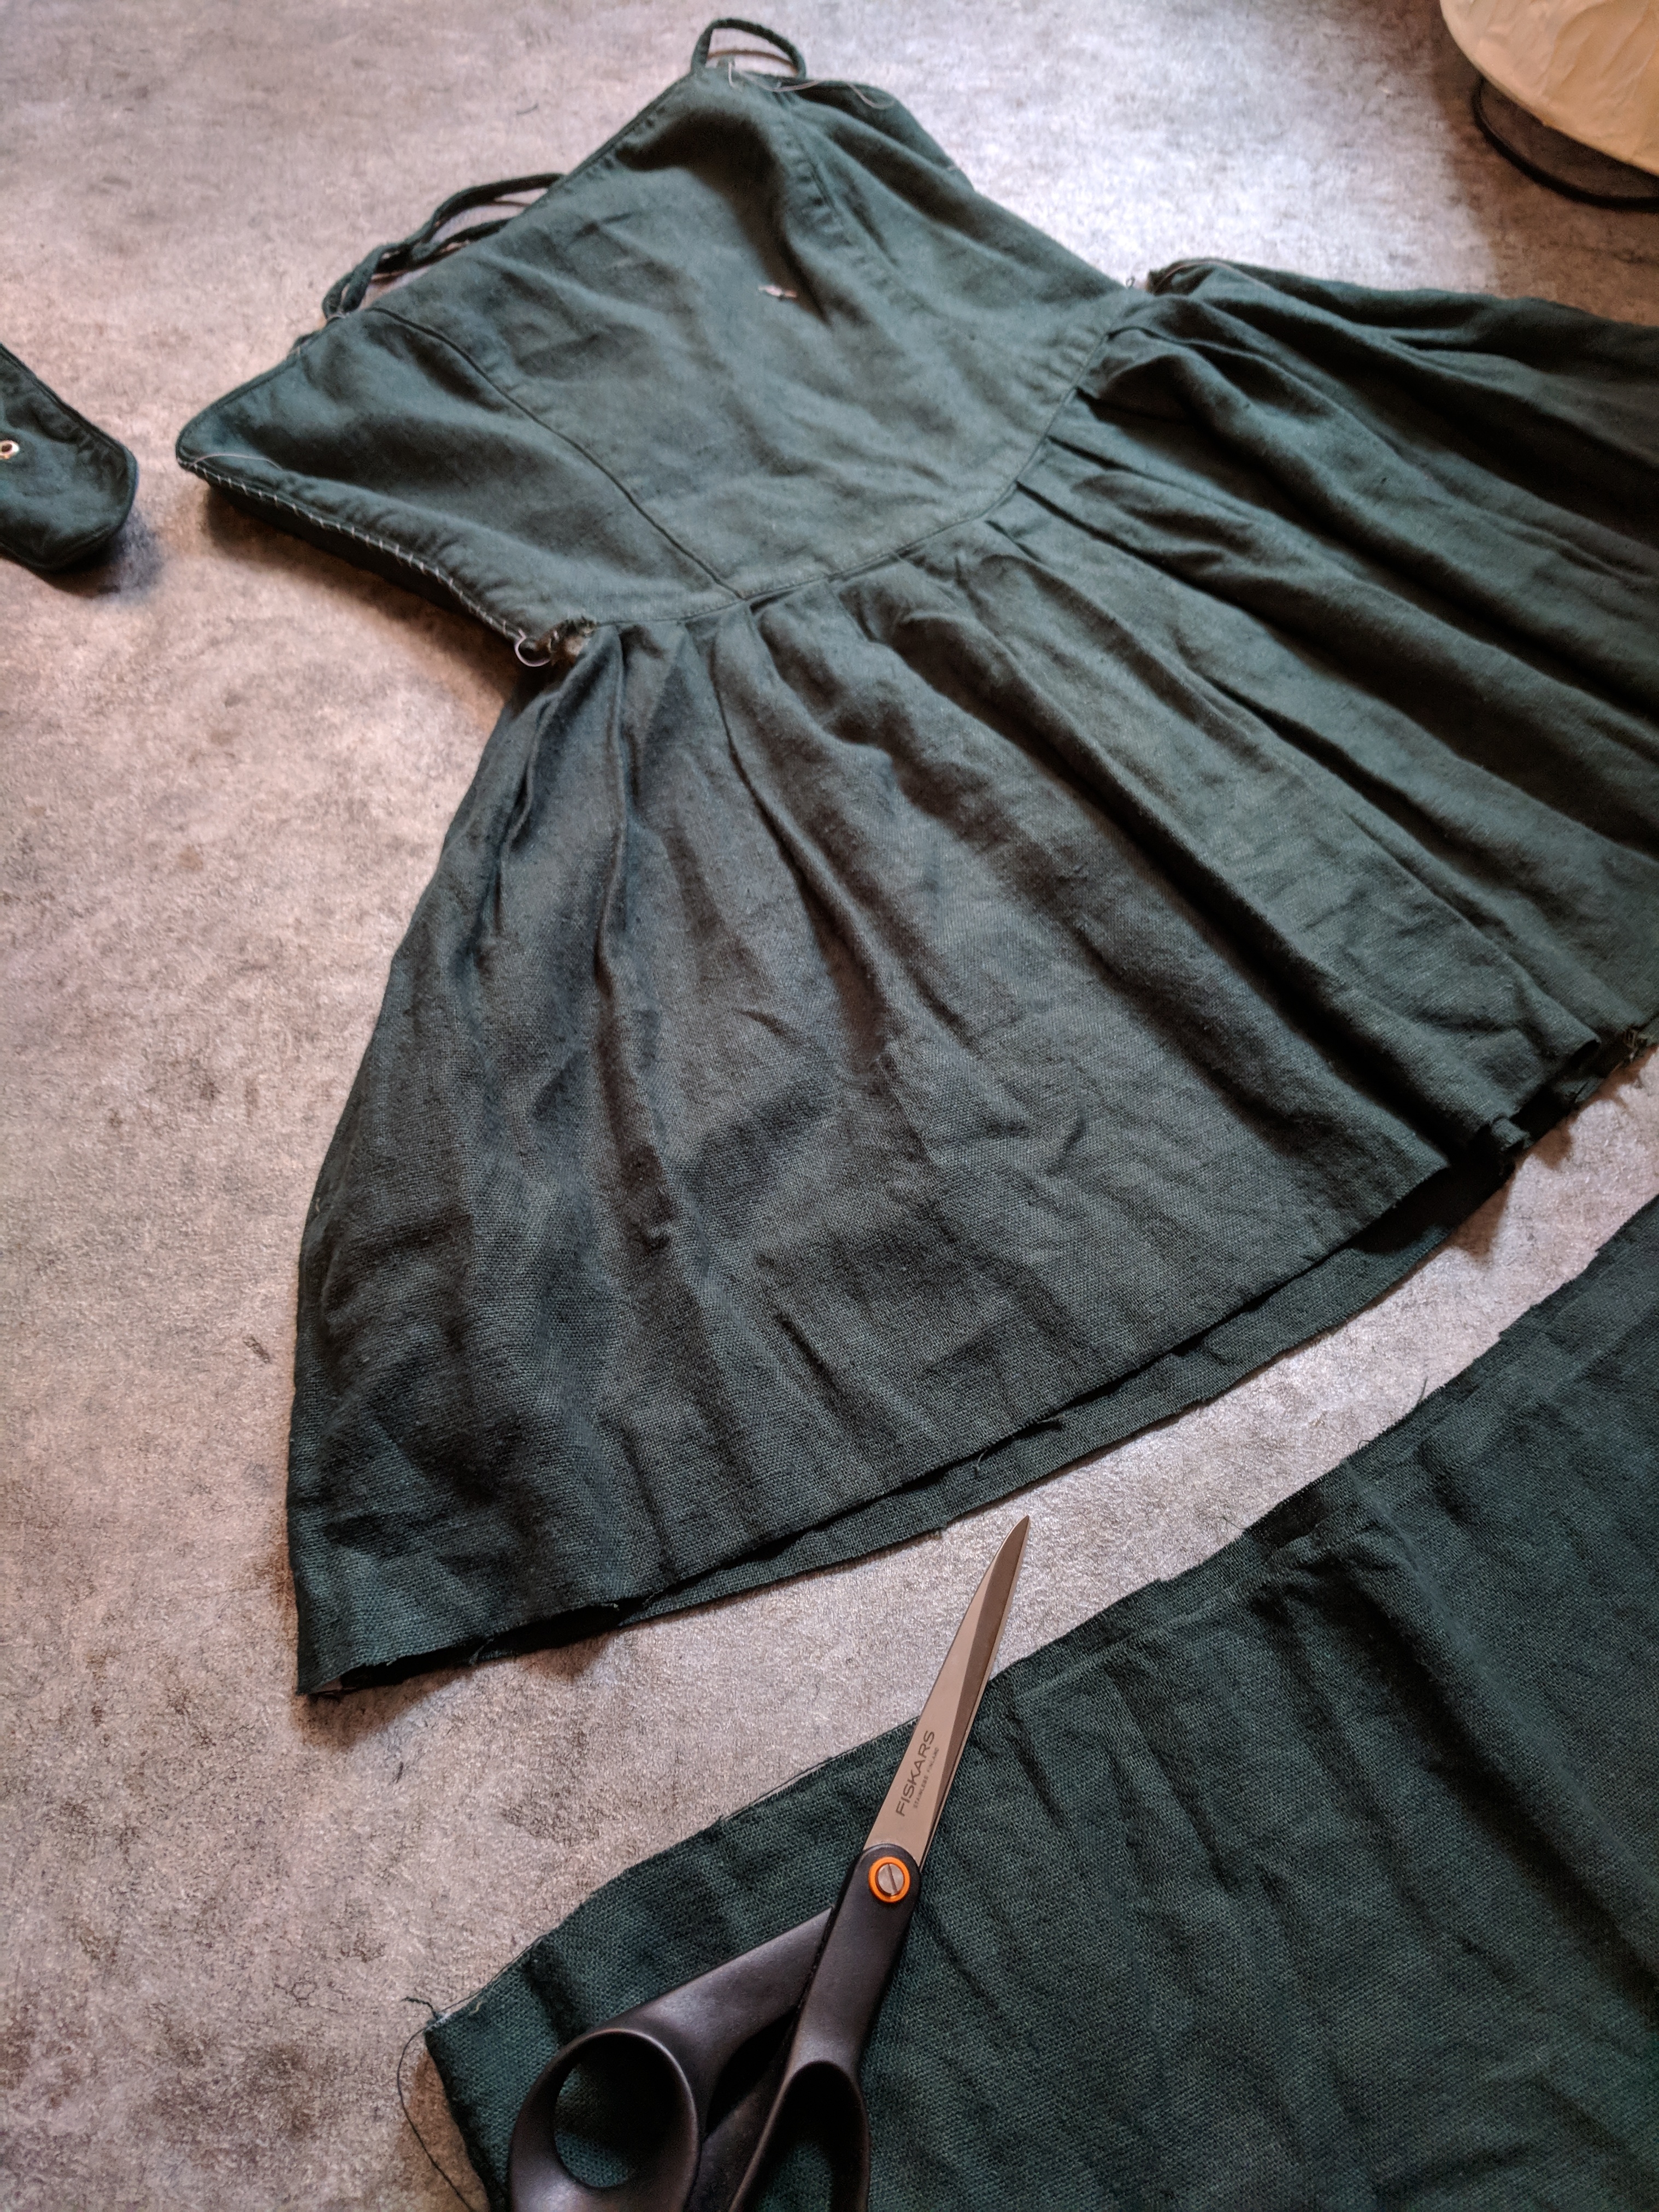
Next I moved on to the skirt, which I cut in half horizontally, keeping the bottom part for the ruffle. Then I had to make the top part of the skirt more fitted. I was determined to keep the back zip in place so I worked around it. The rest of the skirt, however, was detached from the bodice. I interfaced the skirt section to make sure it would keep the shape and that it would be able to support the weight of the ruffle. Then I added darts in the front and the back, aligning them with the princess seams of the bodice. I joined the side seams and cut off the excess fabric (keeping the leftovers to construct the waistband). Finally, I re-attached the skirt to the bodice, evening out the pointy shape of the front bodice in the original garment.
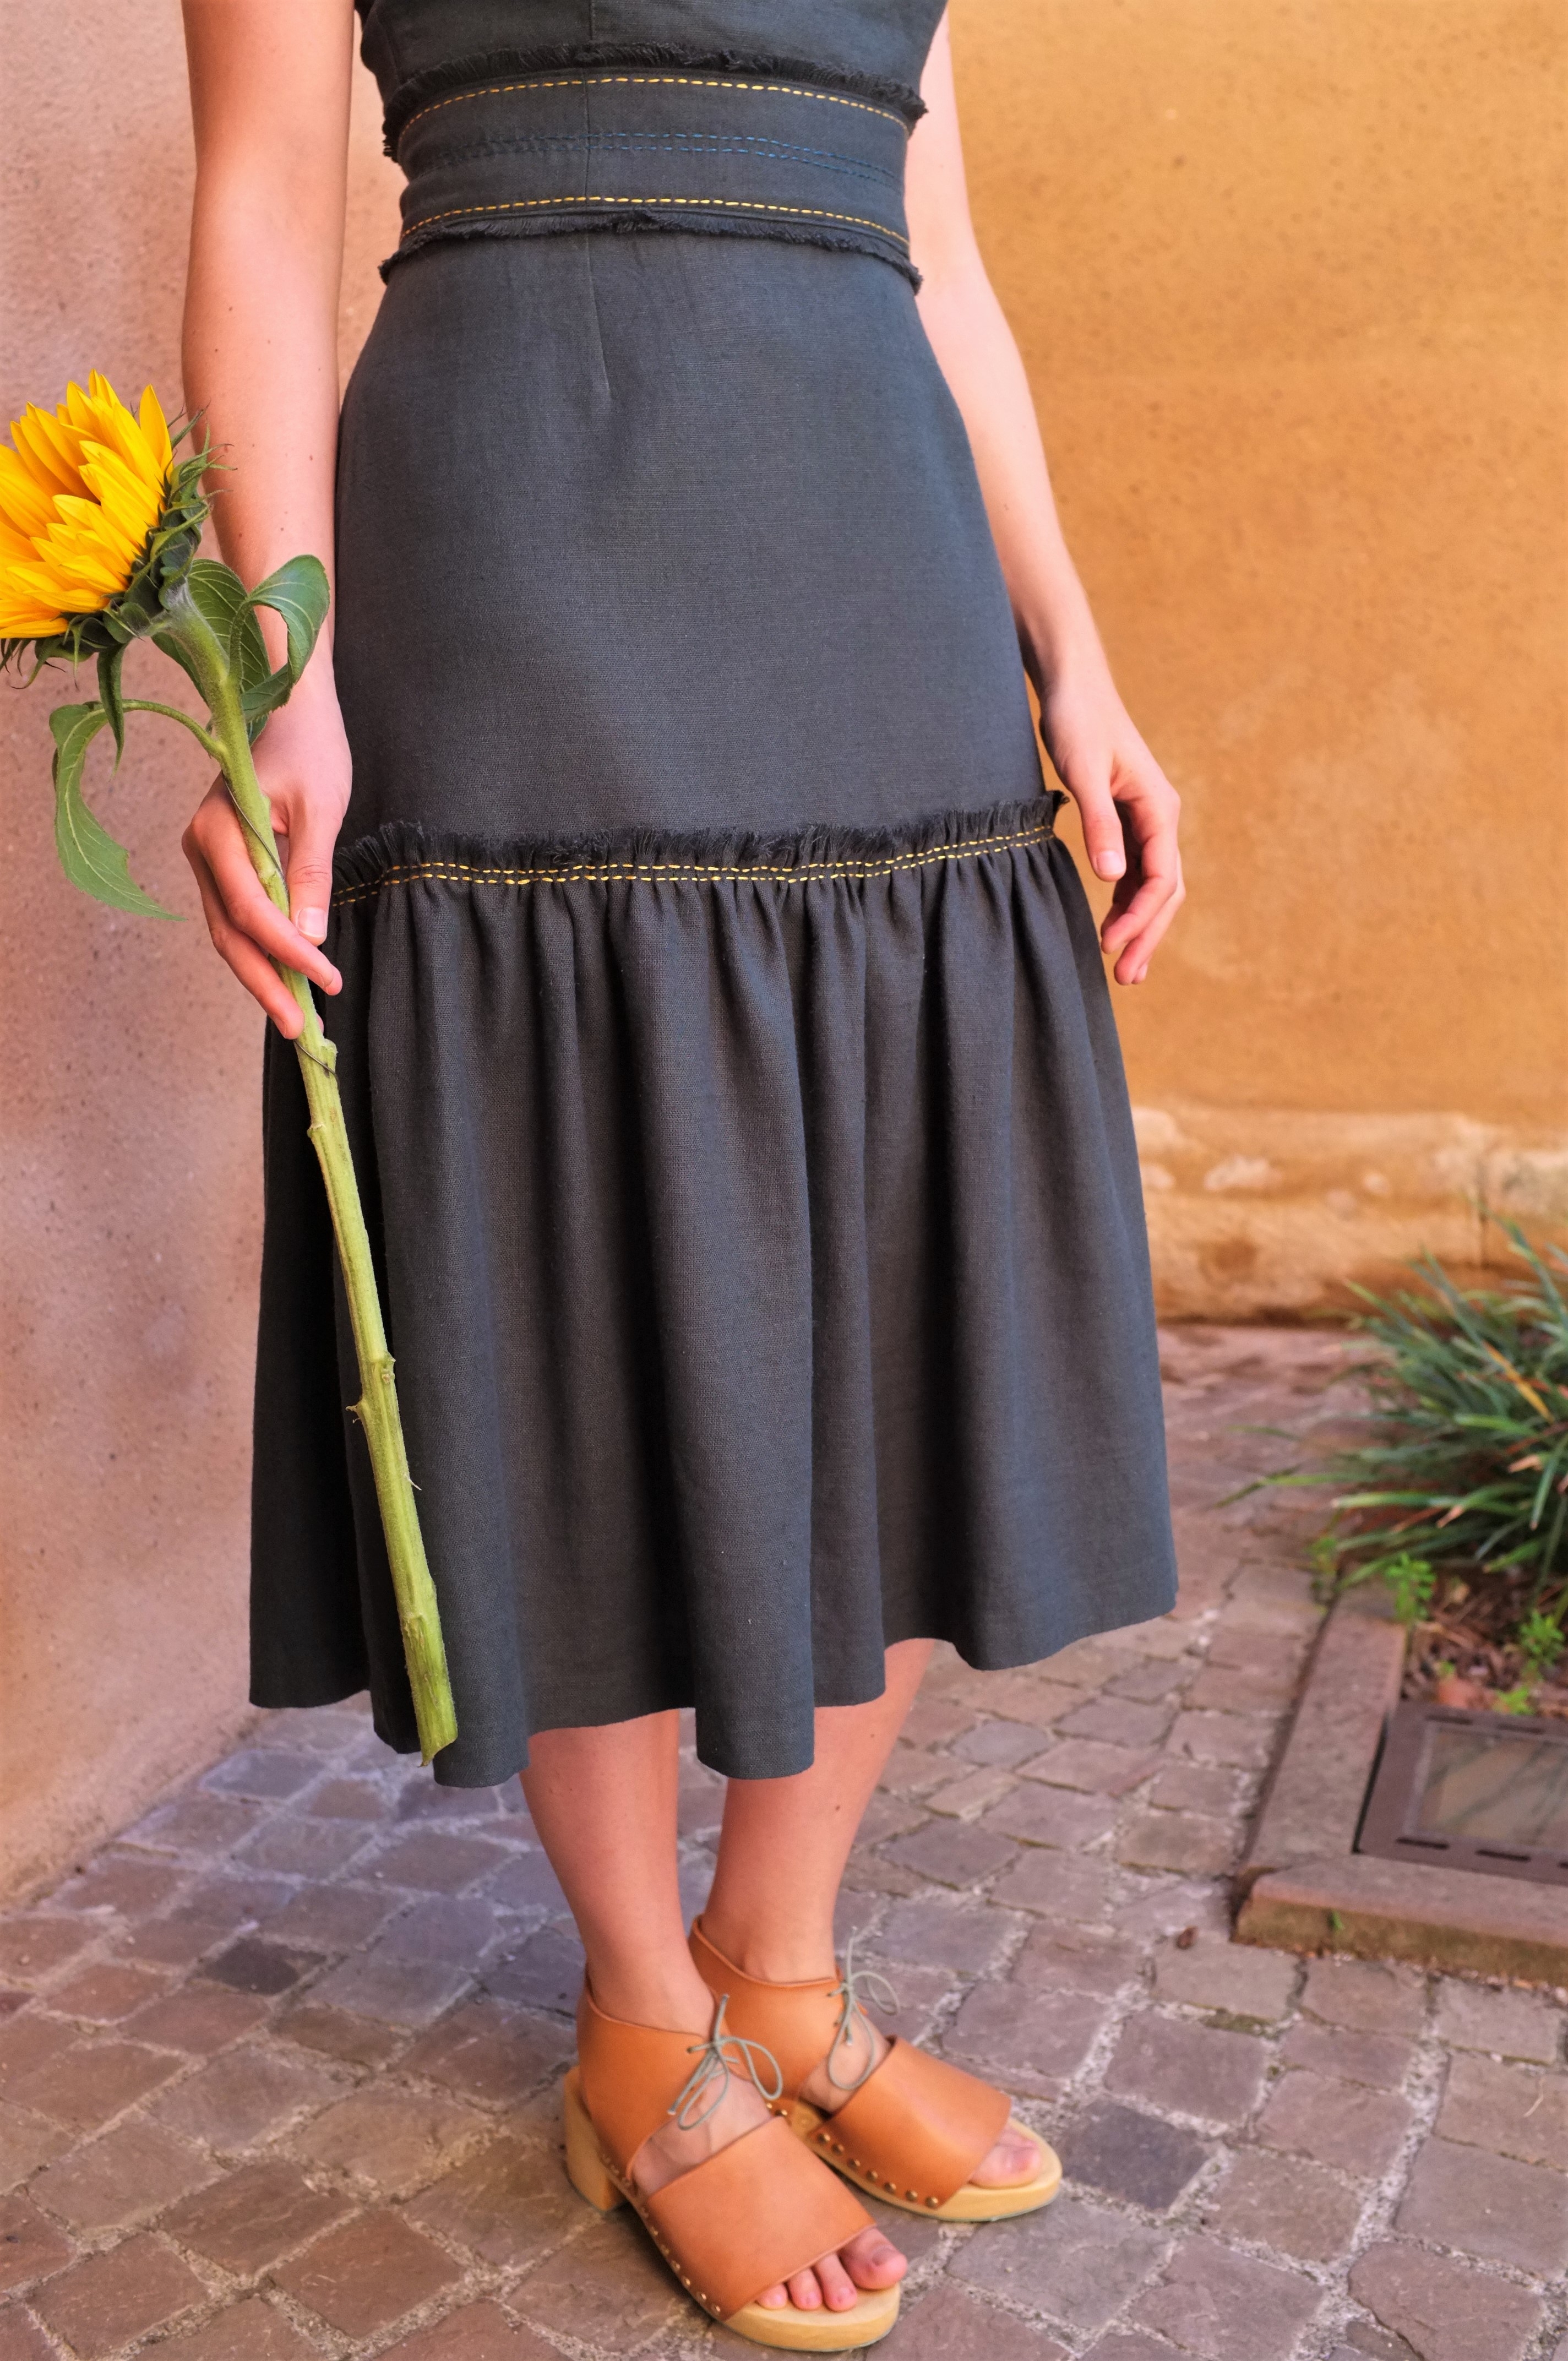
For the ruffle, I re-stitched the blind hem that was on the original dress as it had started to unravel. For the fringe detail I ran a line of stitching along the top and pulled out the horizontal threads. I didn’t know that making fringes is so much fun; I should definitely add more fringe details to my clothes! To attach the ruffle I hand-basted the gathers in place, using maths to distribute the fabric evenly. While that took longer than using two rows of stitching and pulling the threads to create the gathers, it gave me a lot more control and the gathers turned out nicely.
Since I didn’t have a lot of fabric left over, I had to piece the waistband, matching the seams with the front princess seams. The fringe is made from several strips of fabric that I sandwiched between the waistband and the bodice like a piping. Finally it was time to add the contrast stitch details. I believe the original dress uses some machine top stitching in yellow. However, I was keen to try out the sashiko needles from my Summer of Basics prize package and decided to do the details by hand. With some yellow embroidery floss, I stitched once around the whole waistband and twice along the fringe of the ruffle. When I was done I felt like there was still some detail missing on the waistband so I added two rows of stitching along the mid-line in a dark teal colour.
Et voilà, after many hours of unpicking, fringing and hand stitching I had my final dress. Is it exactly the same as the original? Of course not, I had to work with what I had (the colour doesn’t match exactly, the bottom ruffle isn’t wide enough and I took some creative liberties with the embroidery) but I would say it’s damn close. I squeezed out every centimetre of fabric and only had a small pile of random scraps left over. Also, I re-used as many details of the original dress as I could. So I would call this a big win.
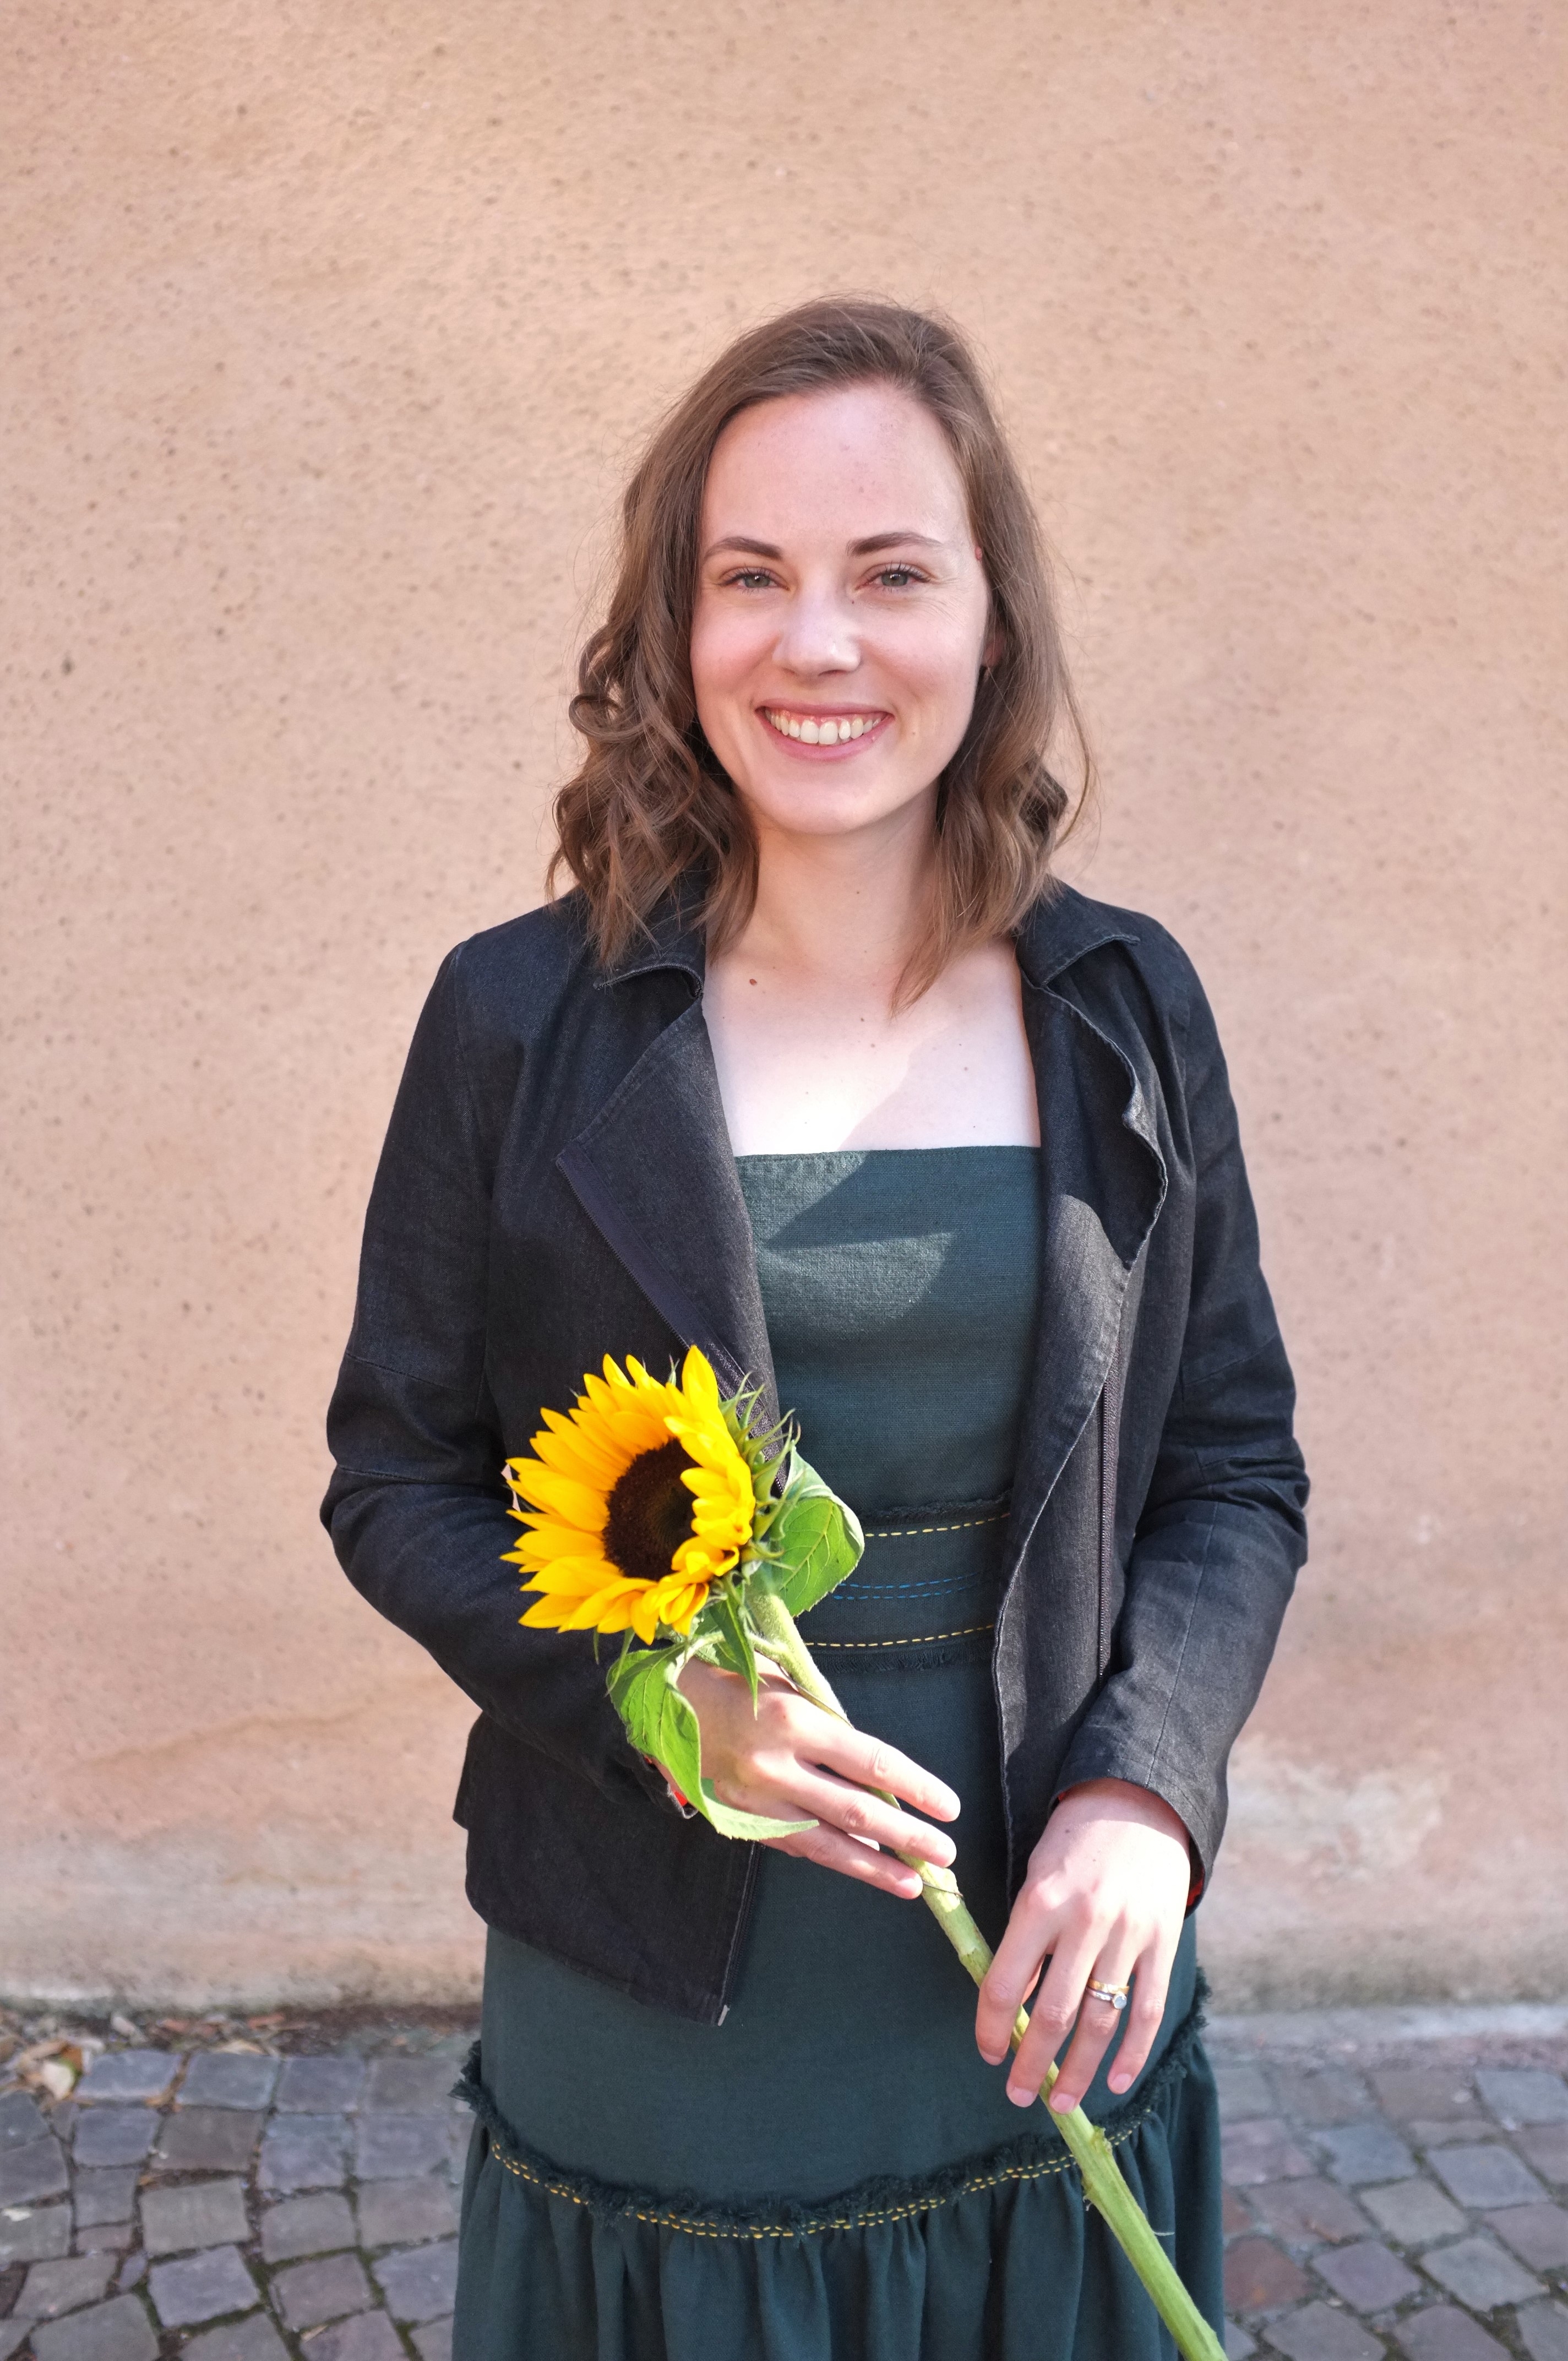
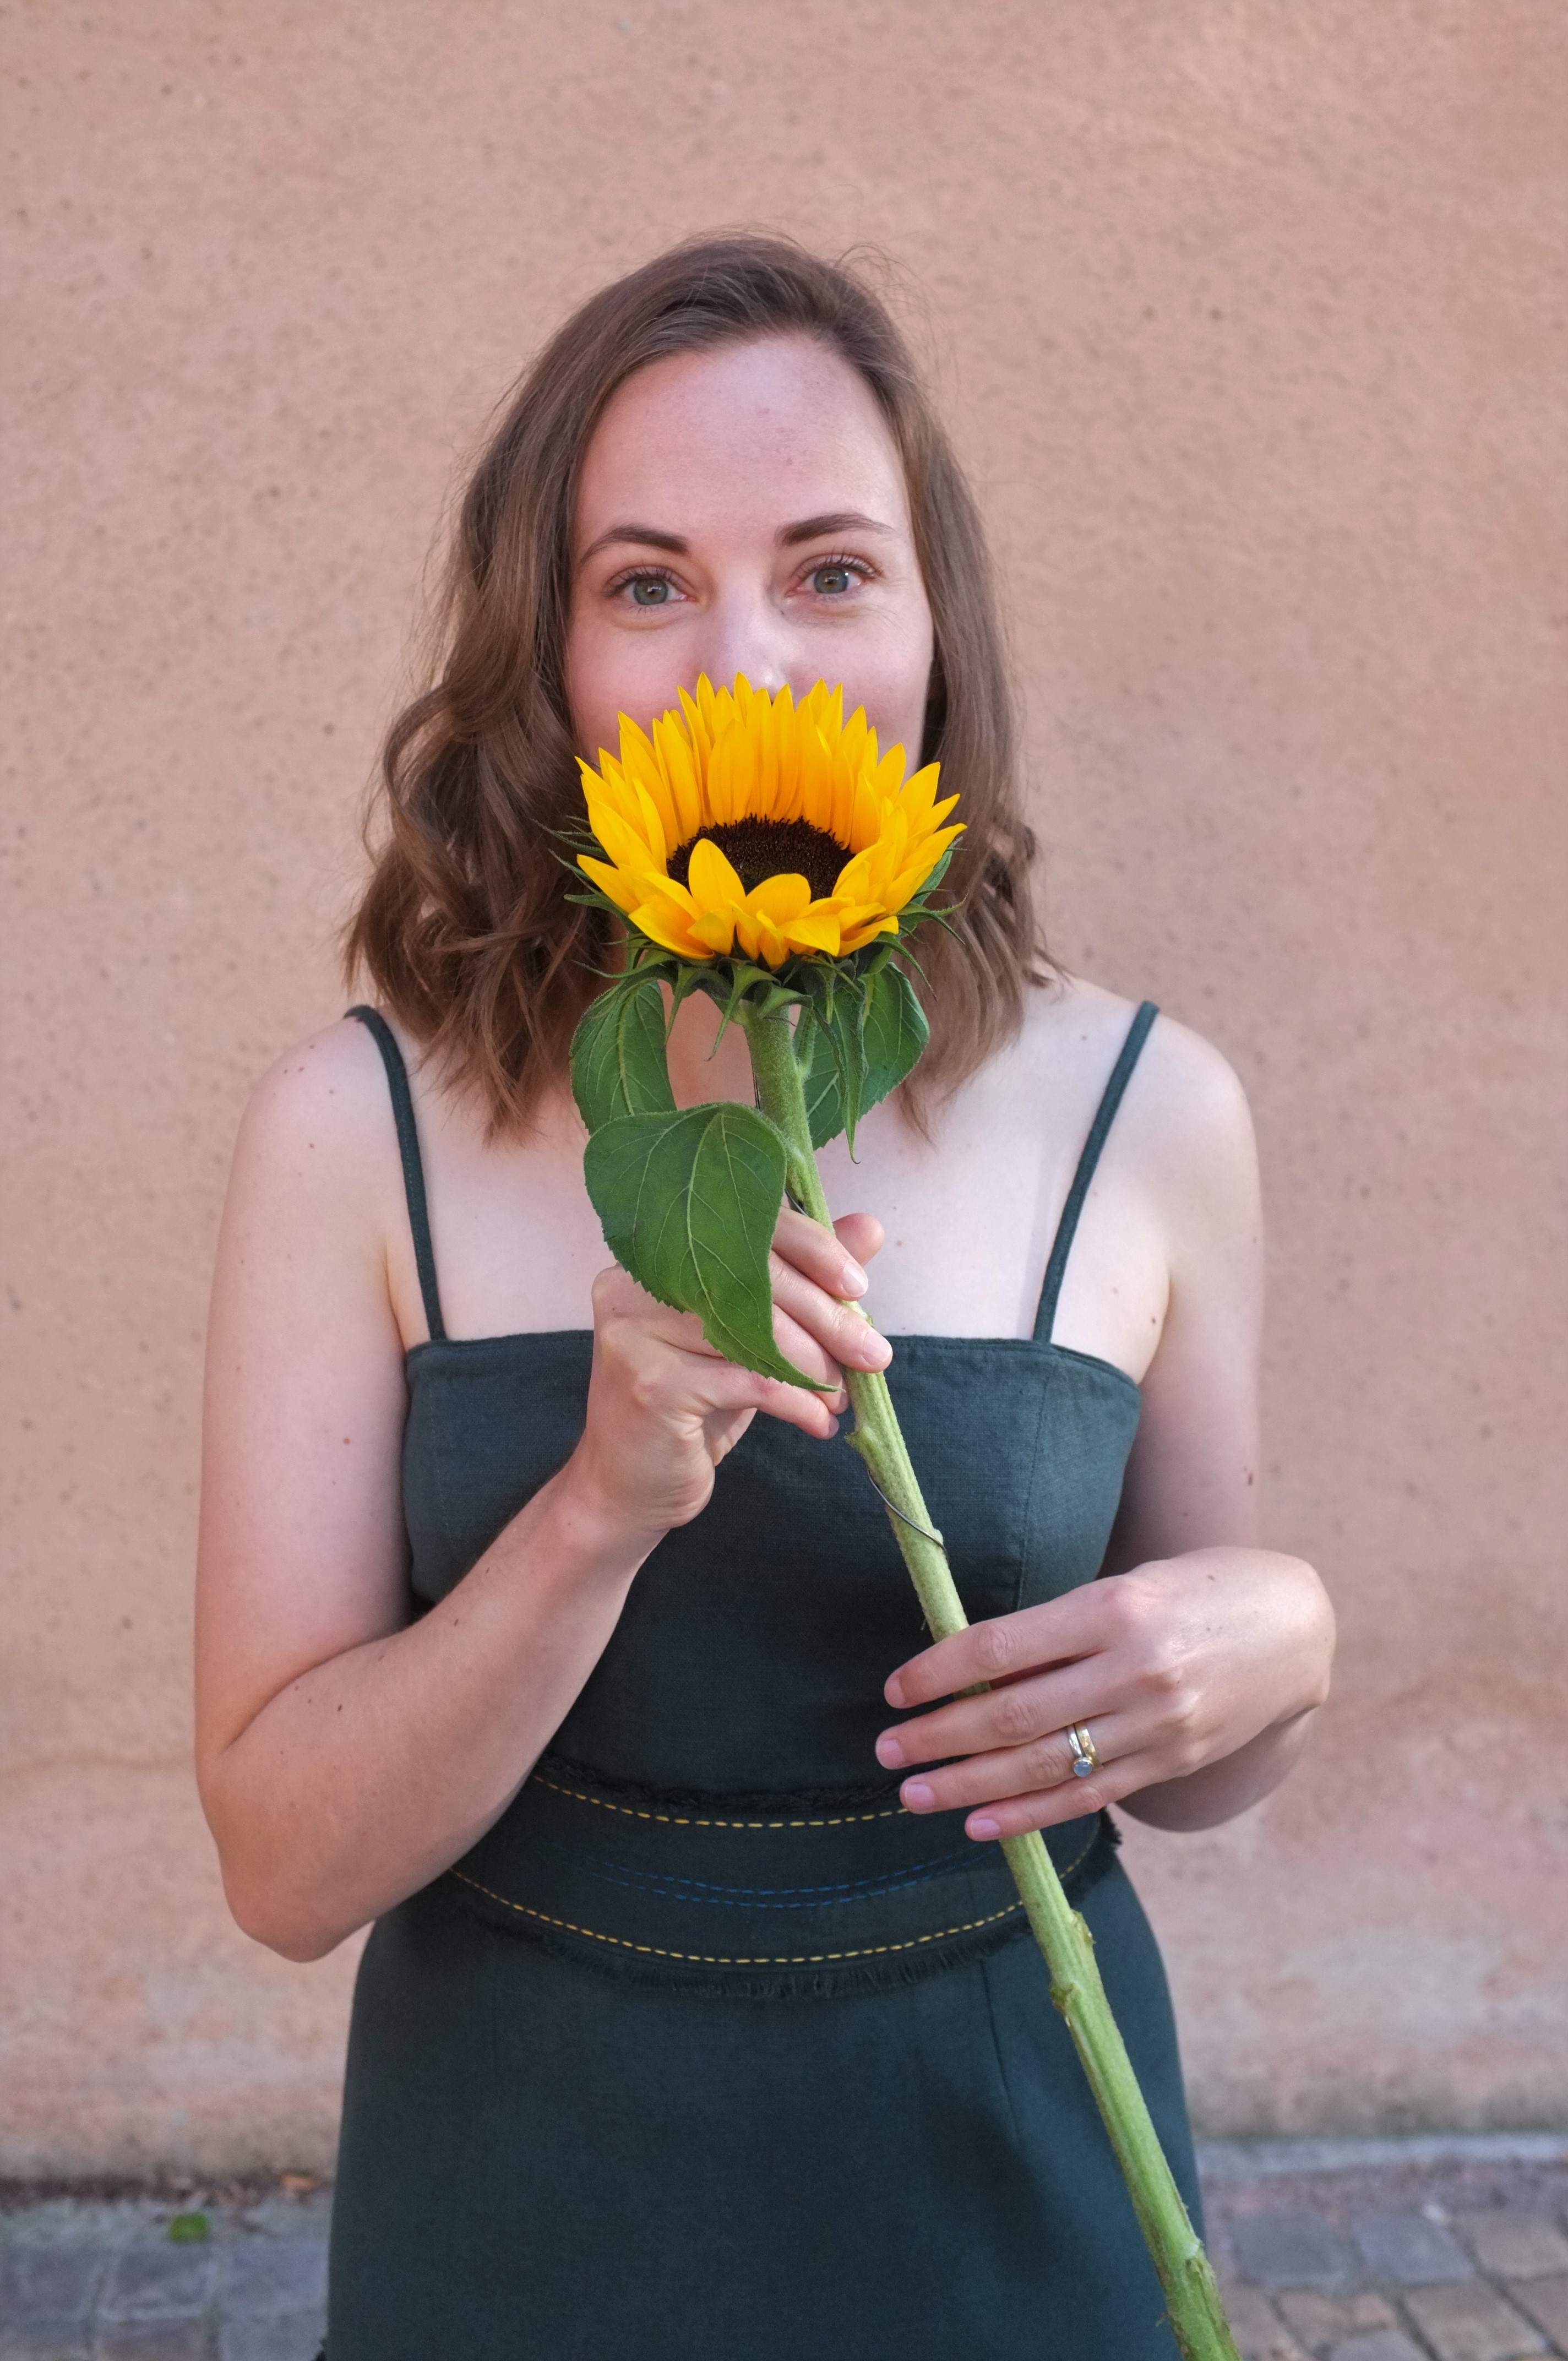
Best of all, the final dress makes me feel as elegant and cool as I imagined it (a clear up-cycle). It’s the perfect amount of ruffle for my taste (However, too much for my husband still. His comment “why is there a curtain at the bottom of the skirt?” Haha.) and I’m surprised by how much I love the fringe and embroidery details. I’m so glad I participated in the Refashioners this year (I hear it might be the last time this is being hosted) and I’m excited to see what everyone else comes up with (the feed for the hashtag #therefashioners2018 on Instagram is already super inspiring). Thanks Portia for, once again, hosting a wonderful event!
And for everyone who has been thinking about participating, do it! The challenge runs until the end of the month so there is still time.