Landers and a cosy sweater

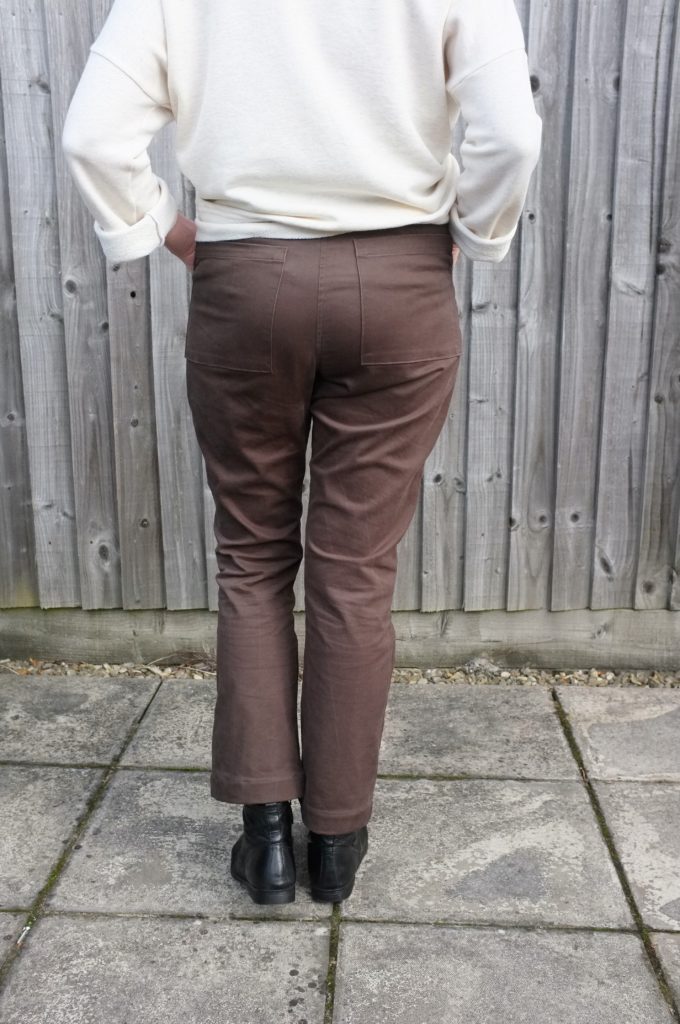
Hi everyone, it’s been a while. I’ve been struggling with the usual winter blogging issues: no daylight during the week and a lot of grey weekends which just didn’t give me a chance to get decent blog pictures. So today we finally managed to take a couple of pictures of a new outfit: an oversized sweatshirt and a pair of Lander pants.

Let’s start with the sweatshirt. When I was fabric shopping on Goldhawk road two weeks ago I came across this french terry at Misan West. I’m always on the look-out for cosy knits which are surprisingly hard to find. But this one was perfect, it’s super soft and the perfect ivory colour. It’s definitely on the lighter side, but thus perfect for summer and it works for layering in winter. My initial intention was to make a cardigan but then I realised that the fabric would be perfect for creating a copy of one of my favourite sweaters. It’s a white cotton cable knit sweater which I bought back in 2012 when I was studying in Copenhagen. It will have to be retired soon, but I adore the oversized shape which just always reminds me of the effortless Danish style. So I traced of the shape which is super simple. Basically it’s just a big rectangle for the body and smaller ones for the sleeves. It could probably be re-created by using the Grainline Studio Hemlock Tee.

The construction was quick and easy. I assembled the pieces with a stretch stitch on my sewing machine and finished the seams on my overlocker. The sleeve hems are just overlocked and then rolled up. The bodice hem and the neckline are finished with bands using the loopy side of the fabric, to mirror the rolled up sleeves. The neckline did need two tries to sit nicely. As the fabric is not very stretchy my first attempt of the neckline just didn’t lie flat. I decided to re-cut it with a slightly shorter length but twice as wide. Once attached I folded the neckband under and secured it with top-stitching around the neckline. This gives the neckline a nice structured look due to the 4 layers of fabric.

The final sweater has a lot of volume which I love but I do have to roll up the sleeves quite high to make sure I don’t dip them in food etc. So for a future iteration I might play around and slim them down a little. All in all this sweater is very close to its inspiration and will be really good replacement. Isn’t it great how sewing allows you to copy your favourite clothes? That way it is slightly easier to say goodbye to well-worn pieces.

Now let’s talk about these trousers, the True Bias Lander Pant. When this pattern came out it was love at first sight and judging by the reaction of the sewing community I wasn’t the only one. However, in real life our relationship turned out to be a little bit more complicated… But let’s start at the beginning. I picked up a 3 m remnant of this khaki green twill at a trousers fabric wholesaler in my hometown over Christmas. It’s not a colour I usually wear but I realised that it goes very well with my colour palette (especially my many blush pieces) and I thought it would be perfect to test the Lander pattern. The fabric is a medium weight with a little bit of stretch, which the pattern doesn’t call for but I thought it couldn’t hurt as I read a couple of reviews where people struggled to get the fit tight but comfortable. According to the size chart my waist was slightly smaller than an 8 and my hips slightly larger than a 12. I decided I could get away with a 12 in the hips due to the stretch in the fabric and that I could always adjust the fit in the waist through the side seams and the waistband.

The construction was really quick and straight forward thanks to the instructions being very thorough. The button closure really saves a lot of time compared to a full zip fly. And the exposed buttons are really a nice feature. I love the brass colour of my jeans buttons against the green. The only thing slightly odd was the construction of the front pockets. You are supposed to line them by attaching the lining right side to right side to the pocket pieces and then turn them inside out. Then the whole thing is being top stitched to the front. While this helps with neat corners and pocket edges, it requires a lot of precision for the lining not to show at the seams. I did read the instructions in advance and realised that ideally I would need a lining in the same colour of the fabric. As self lining would have been too bulky and I couldn’t find a lining fabric in my stash in the right colour, I went with a scrap of ivory silk in the end, making sure to be extra precise with the pockets.

Then came the fitting and this is where the struggles started. Kelli includes a 1″ seam allowance at the outer leg seam, which in theory should make fitting easy, but in my case the trousers turned out way too big. Not only through the waist and hips but also in the legs there was a massive amount of volume. In combination with the colour, they gave off a serious army trousers vibe that I didn’t like at all. To avoid any rash decisions I decided to wear them around the house for a couple of days to see if I just needed to get used to the volume. I also went through the #landerpant hashtag to see how it was fitting on other people. The trousers are definitely intended to be loose from the hips, but I realised that I was most drawn to versions that were closer fitting through the thighs than mine. I also realised that my fabric was potentially too thin, which led to fabric pooling below my bum which probably would not occur in a very structured denim or twill like the samples.

So there was no way around it, the trousers had to be taken in. I took out as much as I could from the side seams but was restricted by the back pockets, which I cut out in the medium size. I also slimmed down the legs through the thighs but let them flare out again at the hem. I used the original straight waistband but could have benefited from drafting a curved waistband as it’s gaping slightly at the back.

Then I had to decide on the length. I had cut the full boot length without adding any additional length. While I am an average 1.70 m I have disproportionately long legs, but since the pattern called for a very wide hem, I thought I would have some wiggle room. Once it came to hemming though it turned out that even with a narrow hem, the trousers would be slightly too short (the story of my youth). I still hemmed them to see if I could get used to it but it just didn’t look intentional. After letting them sit for another couple of days I decided to shorten the legs a good 6 cm by just folding up the hem twice and top-stitching it. Now they are probably closer to the ankle length view of the pattern. I’m still not 100% sold, but I have worn them out and they turned out to be great for a rainy day, no water creeping up your legs.

So what’s my final verdict? It’s definitely a great pattern but it took a lot of work to get them to a stage where I would actually wear them. Unfortunately it’s not love, yet. I will see how I feel about them in summer, with some lighter shoes and bare ankles. When I make them again (I’ll definitely make the shorts, no leg drama foreseen there) I will size down and use a thicker fabric. I’ll also use the smaller size back pockets and a curved waistband. Then I might get closer to my original vision for these trousers, the perfect retro, high-waisted trousers. Until then I’ll just live through all the cool people out there, that are rocking their Lander pants. Until next time.

Top 5 Highlights of 2017

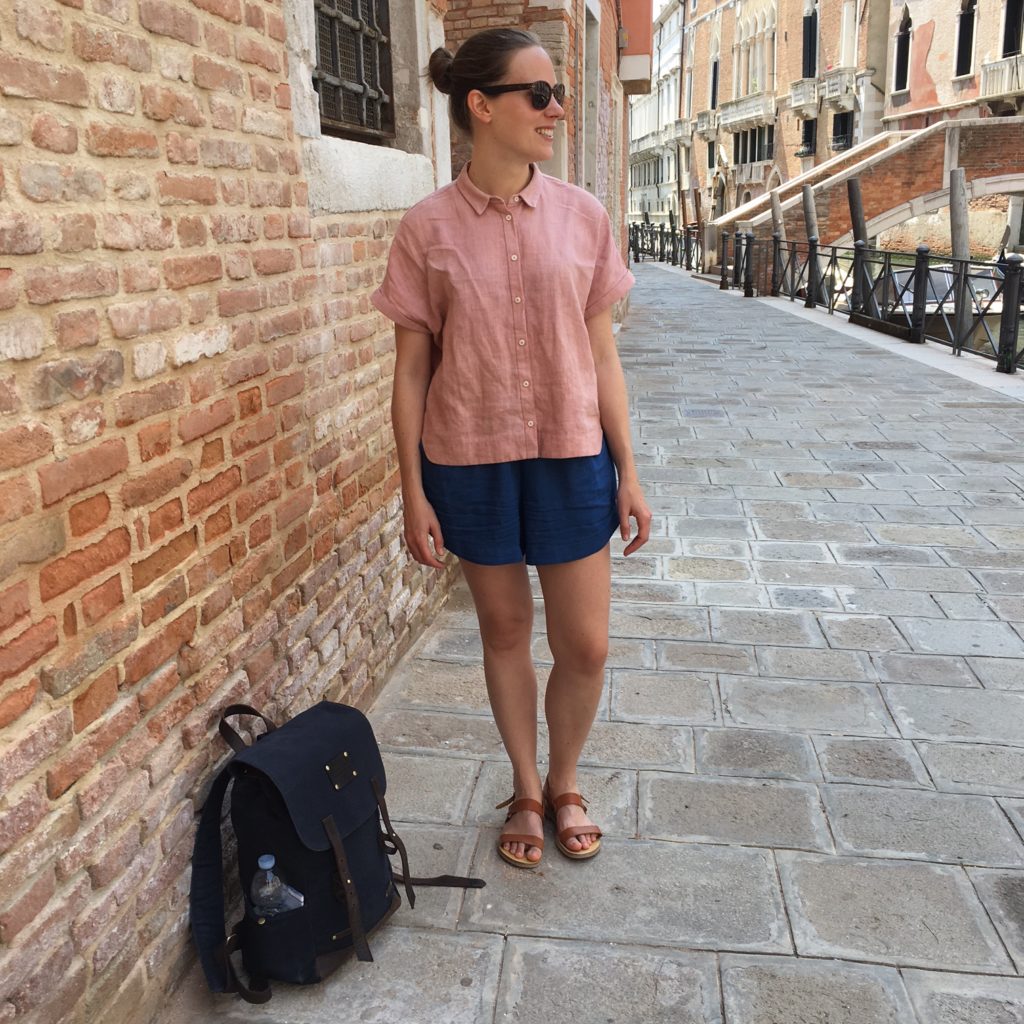
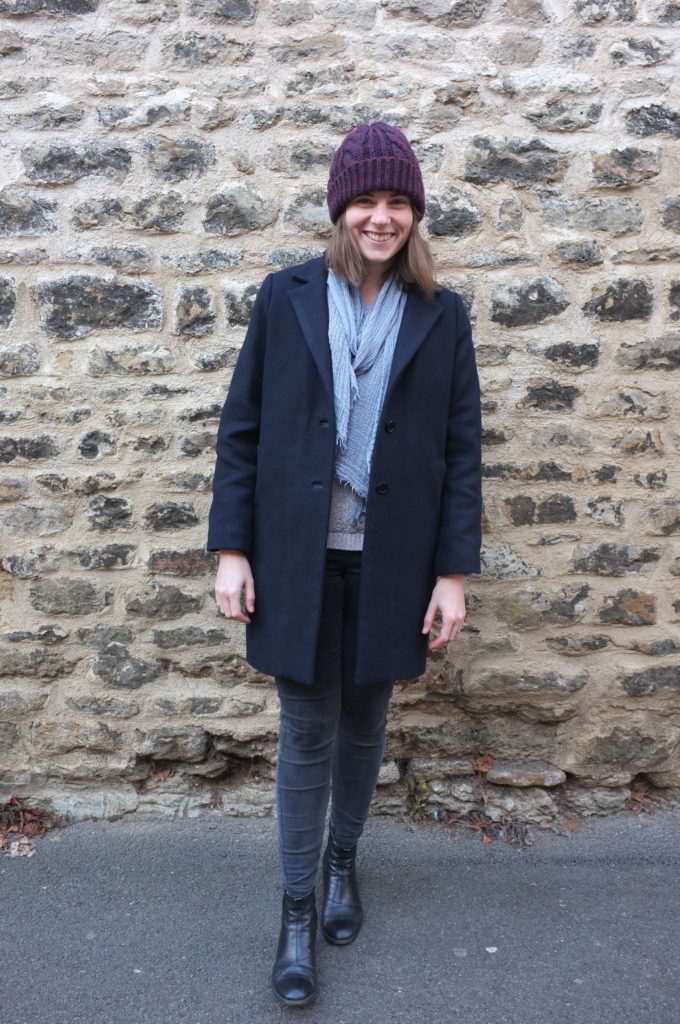
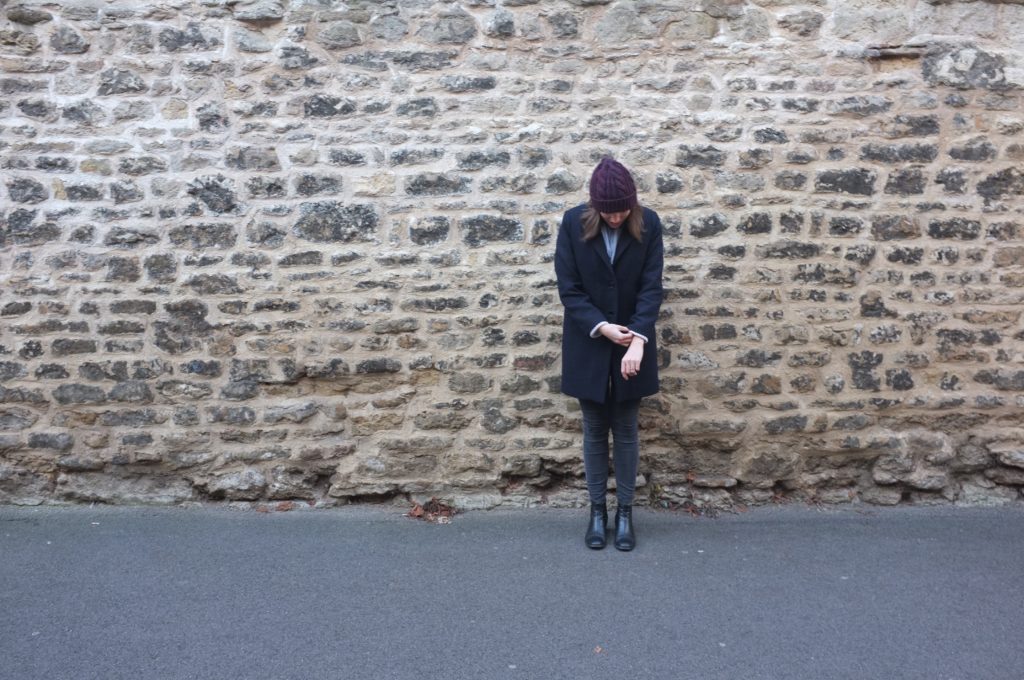
I’ve been loving all the end year reflection posts, so I decided to join Crafting Rainbow’s Sewing Top 5 again. As usual I don’t have that much sewing output for 5 hits and 5 misses so I’ll just focus on my 5 hits of 2017.This dress has become such a wardrobe staple. It’s perfect for any occasion, which is all down to the fabric. It’s made in a medium weight sand-washed raw silk that is amazing to wear. The fabric barely wrinkles so it’s perfect for travel and has been on all my work trips this year, even to Colombia. The shape is simple but works in summer as well as in winter layered over tights and under a cardigan. Now I just need to get back to Goldhawk Road to pick up some more of this fabric.This linen Blaire Shirt was my absolute summer favourite. I was lucky enough to spend some time in Venice this summer and three weeks in Germany, which meant that I had a proper summer for a change. To cope with the high temperatures (especially in Venice) this shirt was ideal. On top of that I had so much fun trying out natural dyeing with avocado for the first time. It was much simpler than I expected and I love the final colour. I can’t wait for next summer to dig this shirt out again.Some more linen…This Highlands Wrap Dress was a surprise favourite this year. While I’ve been wanting to make the pattern for a while, originally I had another fabric earmarked for it. Then I changed my mind and made it up in this linen twill on a whim. The original colour was a weird off-white which I knew I wanted to dye. With some dye getting lost in the post, the colour turned out a lot weaker than intended and more of an orange than the intended terracotta brown. After some initial doubts I’m now loving the colour. I wore the dress to a beautiful autumn wedding and to our company’s Christmas party this week and both times felt great in it.This coat has been such a long time in the making (read all about the odyssey here). There are so many firsts with this one: first winter coat, first time using proper tailoring techniques on wool, first time attending a sewing class. I thoroughly enjoyed the slow process and taking my time with each step. The final coat is a perfect winter staple, I’ve been wearing it non-stop. And the lining just makes me smile. Also, if you really want to impress someone with your sewing skills, make a coat. I’ve gotten so many comments on this one already.

Last, but definitely not least, I have to, of course, mention my wedding dress. This was a slightly challenging project, as we had a secret wedding and I didn’t have anyone to fit me. To get around fitting challenges I decided to work with simple shapes, and it worked out quite nicely. I decided to go for separates because the thought of having a white dress hanging in my closet unworn made me sad. These pieces I can wear separately in day to day life. The lace top I’ve worn since with a leather mini skirt and the skirt is now pink thanks to an Avocado dye bath, though still waiting for a second outing. The silk slip underneath comes in handy for my many unlined dresses. The wedding also gave me a good excuse to splurge on nice fabrics and I really enjoyed working with the silks as well as with lace for the first time. And of course the pieces bring back memories of a perfect day down in Cornwall.

So looking back at all this, what have I learned?

  • I love high quality natural fibres. Many of these pieces are on my favourites list because the fabric is hard wearing, versatile and lovely to wear.
  • I enjoy taking my time on bigger projects. I really enjoyed making that coat and practising proper tailoring techniques.
  • Sewing classes are fun and there is so much to learn. Next on my list is a pattern cutting class.

I hope you all had a successful sewing year! Enjoy your Christmas break!

My first winter coat

Hello everyone, I made a winter coat!

(Just a quick warning, this post is super long, so feel free to skip to the end if you are not interested in all the coat making details.)

I’ve been planning this coat for a long time. If you’ve been following me over at Instagram for a while, you will know that I started planning this coat last autumn. I’ve been wanting to make a coat for years now, but could never find the right pattern. I was looking for just a simple, classic design but it was surprisingly difficult to find a coat pattern that I liked (see my sketch below for what I envisioned). I even submitted my design to The Fold Line when they had a pattern competition last autumn. I didn’t win, but just after I had submitted my design, Waffle Patterns came out with the Bamboo Coat which was relatively close to my inspiration sketch. Knowing that it would have thorough instructions, I decided to go for it and just change some of the elements.

The next hurdle I had was finding the right fabric. Of course I would have loved to make the coat in this pink colour from the sketch (because I am still obsessed), but in the end I wanted to make a more versatile coat that could become a staple for any occasion. However, even after having decided to go for a more classic colour, I just couldn’t find a fabric that I was passionate about, and wool coating is quite expensive after all. In the end I ordered some inexpensive Melton wool from this ebay seller. The fabric was good value and very easy to work with, however, it really attracts lint. Then again, that’s probably always the case with navy fabric. For the lining the decision was a bit easier. Since I was using a rather boring outer fabric, I decided to go for a fun lining and settled on the gorgeous Liberty Print called Manning Green on silk satin (I got it from Ray Stitch though they don’t seem to carry it anymore). Unfortunately, the whole process of finding pattern and fabrics took forever and winter was basically over by the time I had everything together. So the project was set aside until the next winter.

The good thing this time round was that I had all the material and the pattern ready to get sewing. The reason why it still took me two months to finish the coat was my decision to make most of it in sewing class. For the first time in my adult life, I took a sewing class, with a wonderful teacher here in Oxford. She is a trained dressmaker with decades of experience and her class was perfect for such an involved project. I’m so glad I decided to do this coat in this class because I learned so many great tailoring techniques.

So let’s talk about this pattern. The Bamboo coat is quite a simple shape and was relatively close to what I wanted, nevertheless, after sewing a muslin with the pattern as intended (of view A, the longer version) I made some changes to match my inspiration more closely: I slimmed down the collar by 2.5 cm and went with a two-button closure instead the drafted three. I also omitted the hidden button stand. Finally we drafted a two-piece sleeve from my measurements, as the original one piece sleeve looked too boxy. In terms of sizing, I graded between a 38 at the bust and a 42 at the hip. I added some width across the back and slimmed the shoulders slightly. Finally I added 4 cm to the hem.

Once the fitting issues were sorted out, I moved on to the actual fabric, starting with the welt pockets. They were actually quite fun to make. I made a test version with some scrap fabric and then my teacher made me two additional samples using other techniques. In the end we deviated slightly from the pattern to ensure a cleaner finish. Next up the bound button holes. Again we made some samples and decided to make the lips of the bound button holes out of navy twill fabric instead of the wool for a cleaner finish and more durability. They involved quite a bit of hand sewing and turned out really pretty. The pictures below don’t really do them justice, in real life they actually are even.

Other techniques that I tried for the first time: a notched collar (surprisingly simple), the full shoulder treatment (including adding a wedge of felt as sleeve heading and some small shoulder pads) and a lined vent.

When it came to the lining, I decided that the coat as was would be too thin and I used some thinsulate to quilt the lining for the bodice. I love the look of the quilted silk and it’s made the coat a lot more winter proof .

Once I had attached the lining, I realised that the outer fabric was too thin and that where the fabric was not interfaced the quilted lining was showing. To resolve the issue I interfaced the rest of the bodice with some medium weight interfacing. On a side note, good quality interfacing makes such a difference! While I have always tried to buy good brands for interfacing I’ve only worked with webbed interfacing in the past and I used to hate to apply interfacing because I either would melt it or it wouldn’t stick properly. Then my teacher introduced me to iron-on interfacing that is literally a layer of thin fabric that irons on. It’s amazing and definitely worth the investment! I picked mine up at a local fabric shop, but I was told that The English Couture Company sells this type of interfacing online.

Back to the coat. The instructions don’t include a hanger loop but I knew I would need one so I added a loop out of braided waxed cotton cord that I had lying around. I love this little feature.

I attached the the lining to the shell at the underarm with a short ribbon, another added tailoring technique. Then it was time to sew the hem. I don’t know about you, but I think it’s always the hem that gives it away on homemade coats. They often don’t look as sharp as store bought ones, and I really wanted to avoid that. So I asked my expert for the best tailoring technique for hems and she suggested to add a strip of linen to the hem (the full 4 cm of the fold-up). Attached to the raw edge it was held in place temporarily with some wide stitches and then the shell hem was stitched in place with a blind catchstitch (i.e. instead of on the edge, the stitch runs just slightly inside the edge). The lining was then attached falling over the stitch line in a soft fold to allow for body movement. For the front facing to lie completely flat I attached the facing with invisible stitches to the shell.

To finish the coat off, I added two buttons (just simple navy plastic buttons) with small purple buttons on the other side for reinforcement.

And, simple as that I was done with my coat. But jokes aside, this was such a lovely project to work on! Since I mainly worked on it during my weekly sewing classes I worked in smaller chunks, which really helped me focus on the individual tasks. The class setting also motivated me to practice certain techniques until I felt comfortable to move on to the real thing, which is different to my usual approach to sewing where I tend to jump right in. Even though I’ve changed up the pattern quite a bit and added some more tailoring details, the pattern is actually really detailed and the steps are well explained. The bones of the pattern are great, especially the slight cocoon shape through the body, which feels really modern.

So what about the final garment? I have to say I’m really proud of how it turned out. It looks pretty neat and doesn’t give away that it was my first winter coat. Since the thinsulate was added as an afterthought the coat is a little bit more snug than originally planned but it doesn’t affect the wearability. I’m still undecided on the length of the sleeves, I might drop the hem a little bit. Also the collar around the neck turned out a little bit too slim and the undercollar shows a little bit. When I trimmed the collar along the front lapels I had to take some width off the neck collar too in order to keep the proportions right.

All in all though it’s a great coat which fills a massive hole in my wardrobe. I’ve been living in heavy winter parkas over the last five years and it’s nice to finally have a sleeker winter coat option.

I hope you are prepared for a lot of pictures. We had such a gorgeous winter weekend here in Oxford and enjoyed playing tourists in front of the Radcliffe Camera.