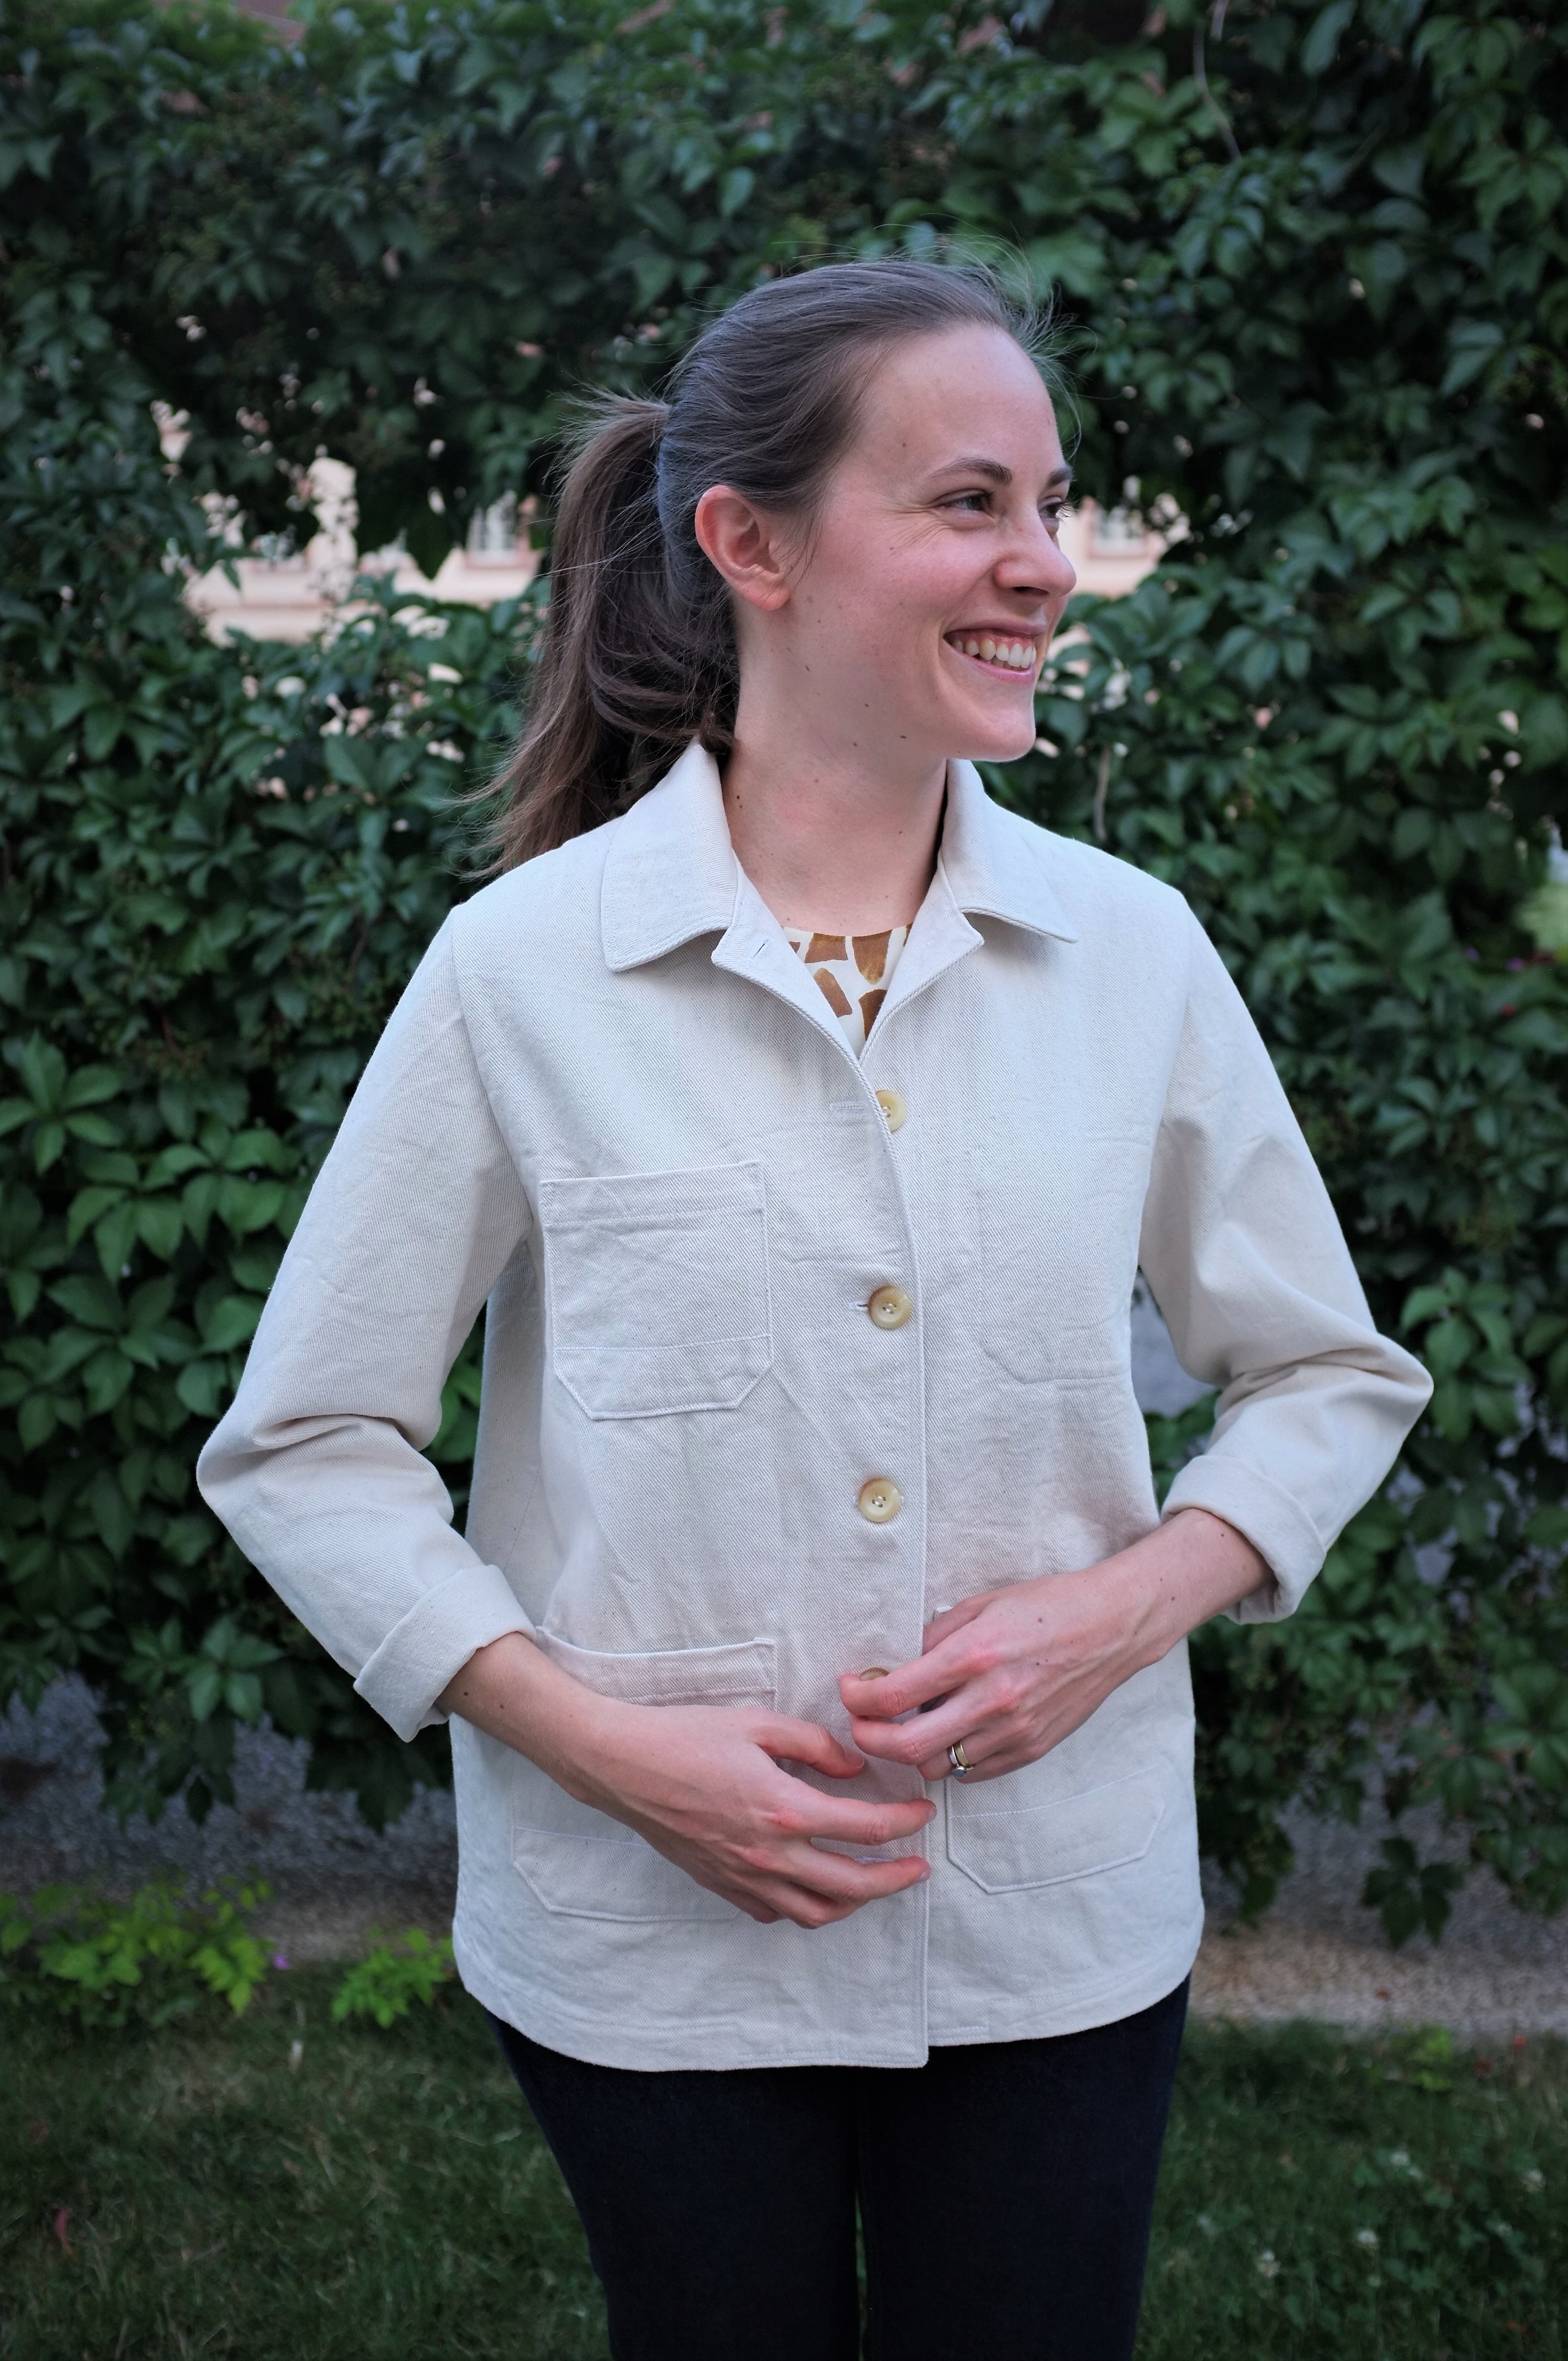
 After all the fun I had last year with my Summer of Basics (here the final outfit from 2017) I knew that I wanted to participate this year as well. I love the concept of focusing on making three basics over the course of the summer. I’ve already shared my plans for this year on Instagram (see here). Like last year I’m planning to make a full outfit. The first garment from my list (my June project) was a work wear jacket, and (spoiler alert) I love the final garment!
But let’s start from the beginning. I love sewing outerwear and wanted to make a casual jacket that I could easily throw over everything. Lately I’ve been seeing a lot of workwear inspired jackets in the shops and after trying some of them on I was determined to create something similar. Here a couple of my favourites.
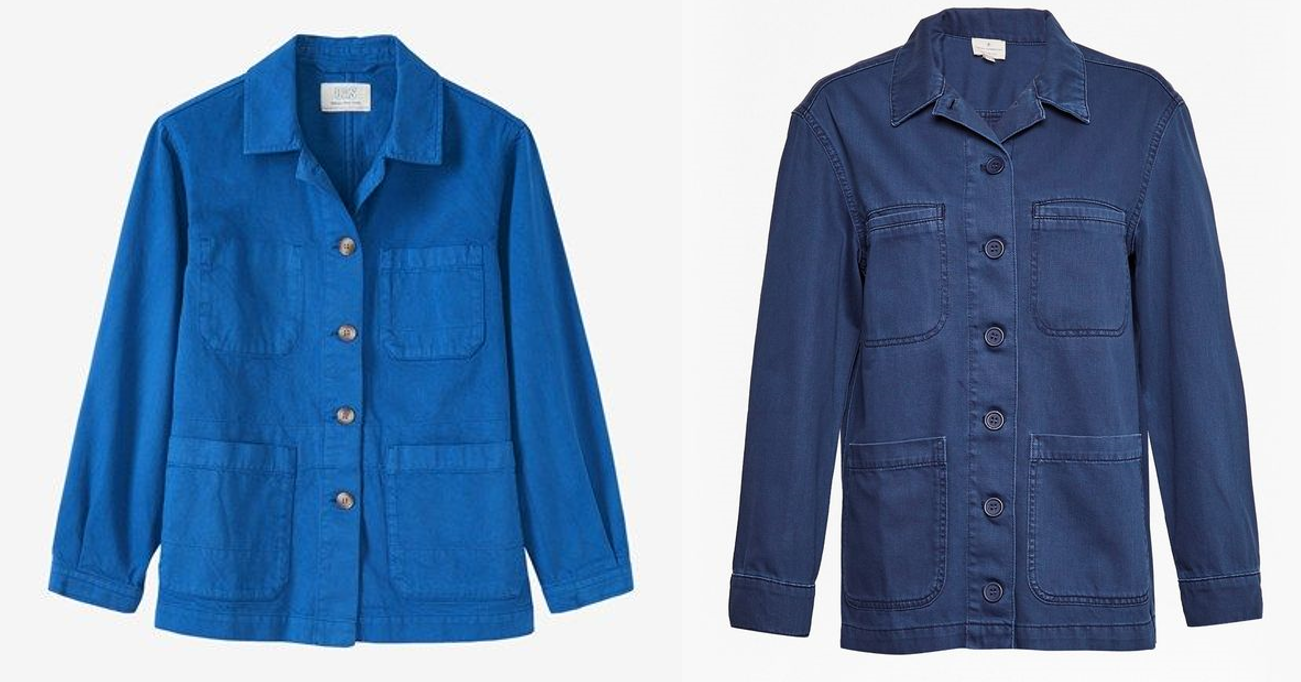 Source: Toast, French Connection
Looking for a pattern, the Tello Jacket by Pauline Alice Patterns immediately came to mind. I’ve been seeing some lovely versions popping up recently (e.g. Sara’s or Clare’s). While the design is slightly different to what I was looking for, I knew it would be easy to adapt it.
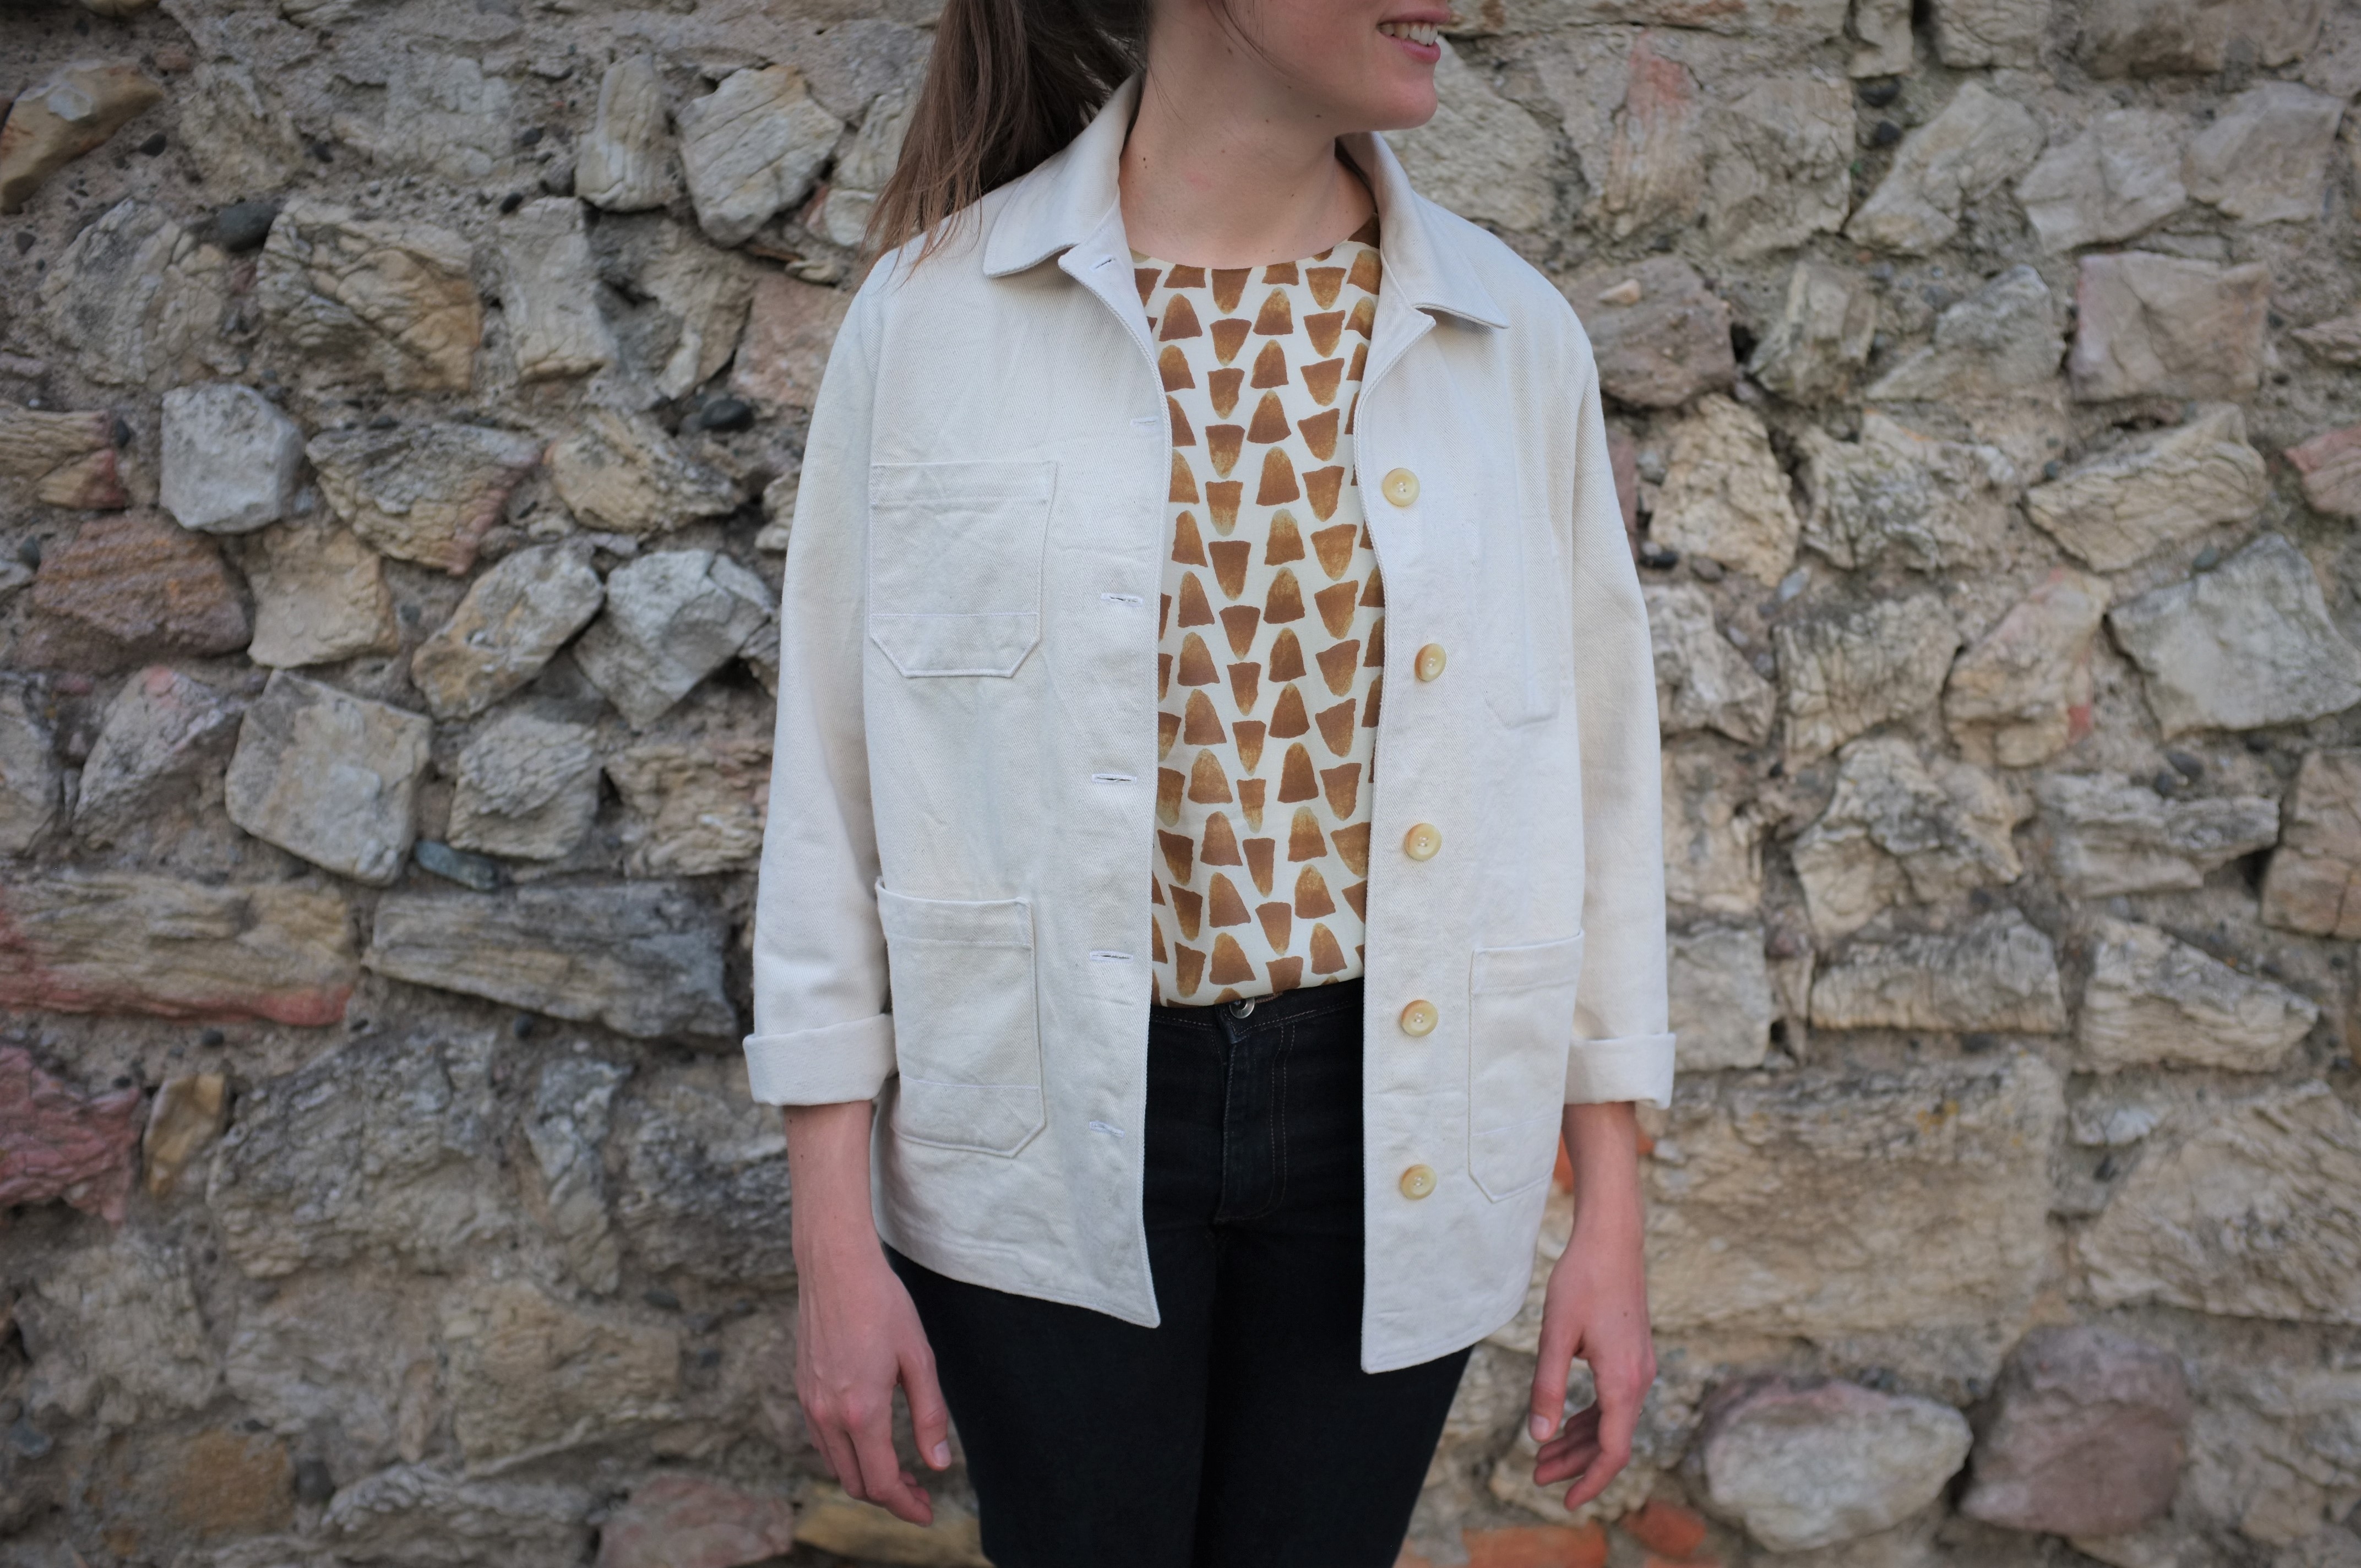
Regarding the fabric, I had ordered some natural bull denim from Empress Mill, originally to make some Lander pants. When it arrived I loved the texture but thought it might be slightly too thick and stiff for trousers, perfect for a jacket though.
To get the style I was after, I made a number of changes to the pattern
- First I made a straight size 42, which corresponds to my hip measurements but is two sizes larger than my bust. Since I was going for an oversized look, I decided to size up slightly.
- The front facing of the original is curved at the bottom but I wanted a straighter look so I squared it off.
- I slightly widened the sleeves for a more relaxed fit, necessary with this heavy fabric.
- The original collar is a lot more pointy. I sewed it up as is first, but decided it was looking too 70s; I however was going for more of a Japanese style look. At that point the collar was already attached to the jacket, so I decided to just opened the seam at the collar points, make them more square and top stitch them down. Surely not best sewing practice but I don’t think it’s noticeable.
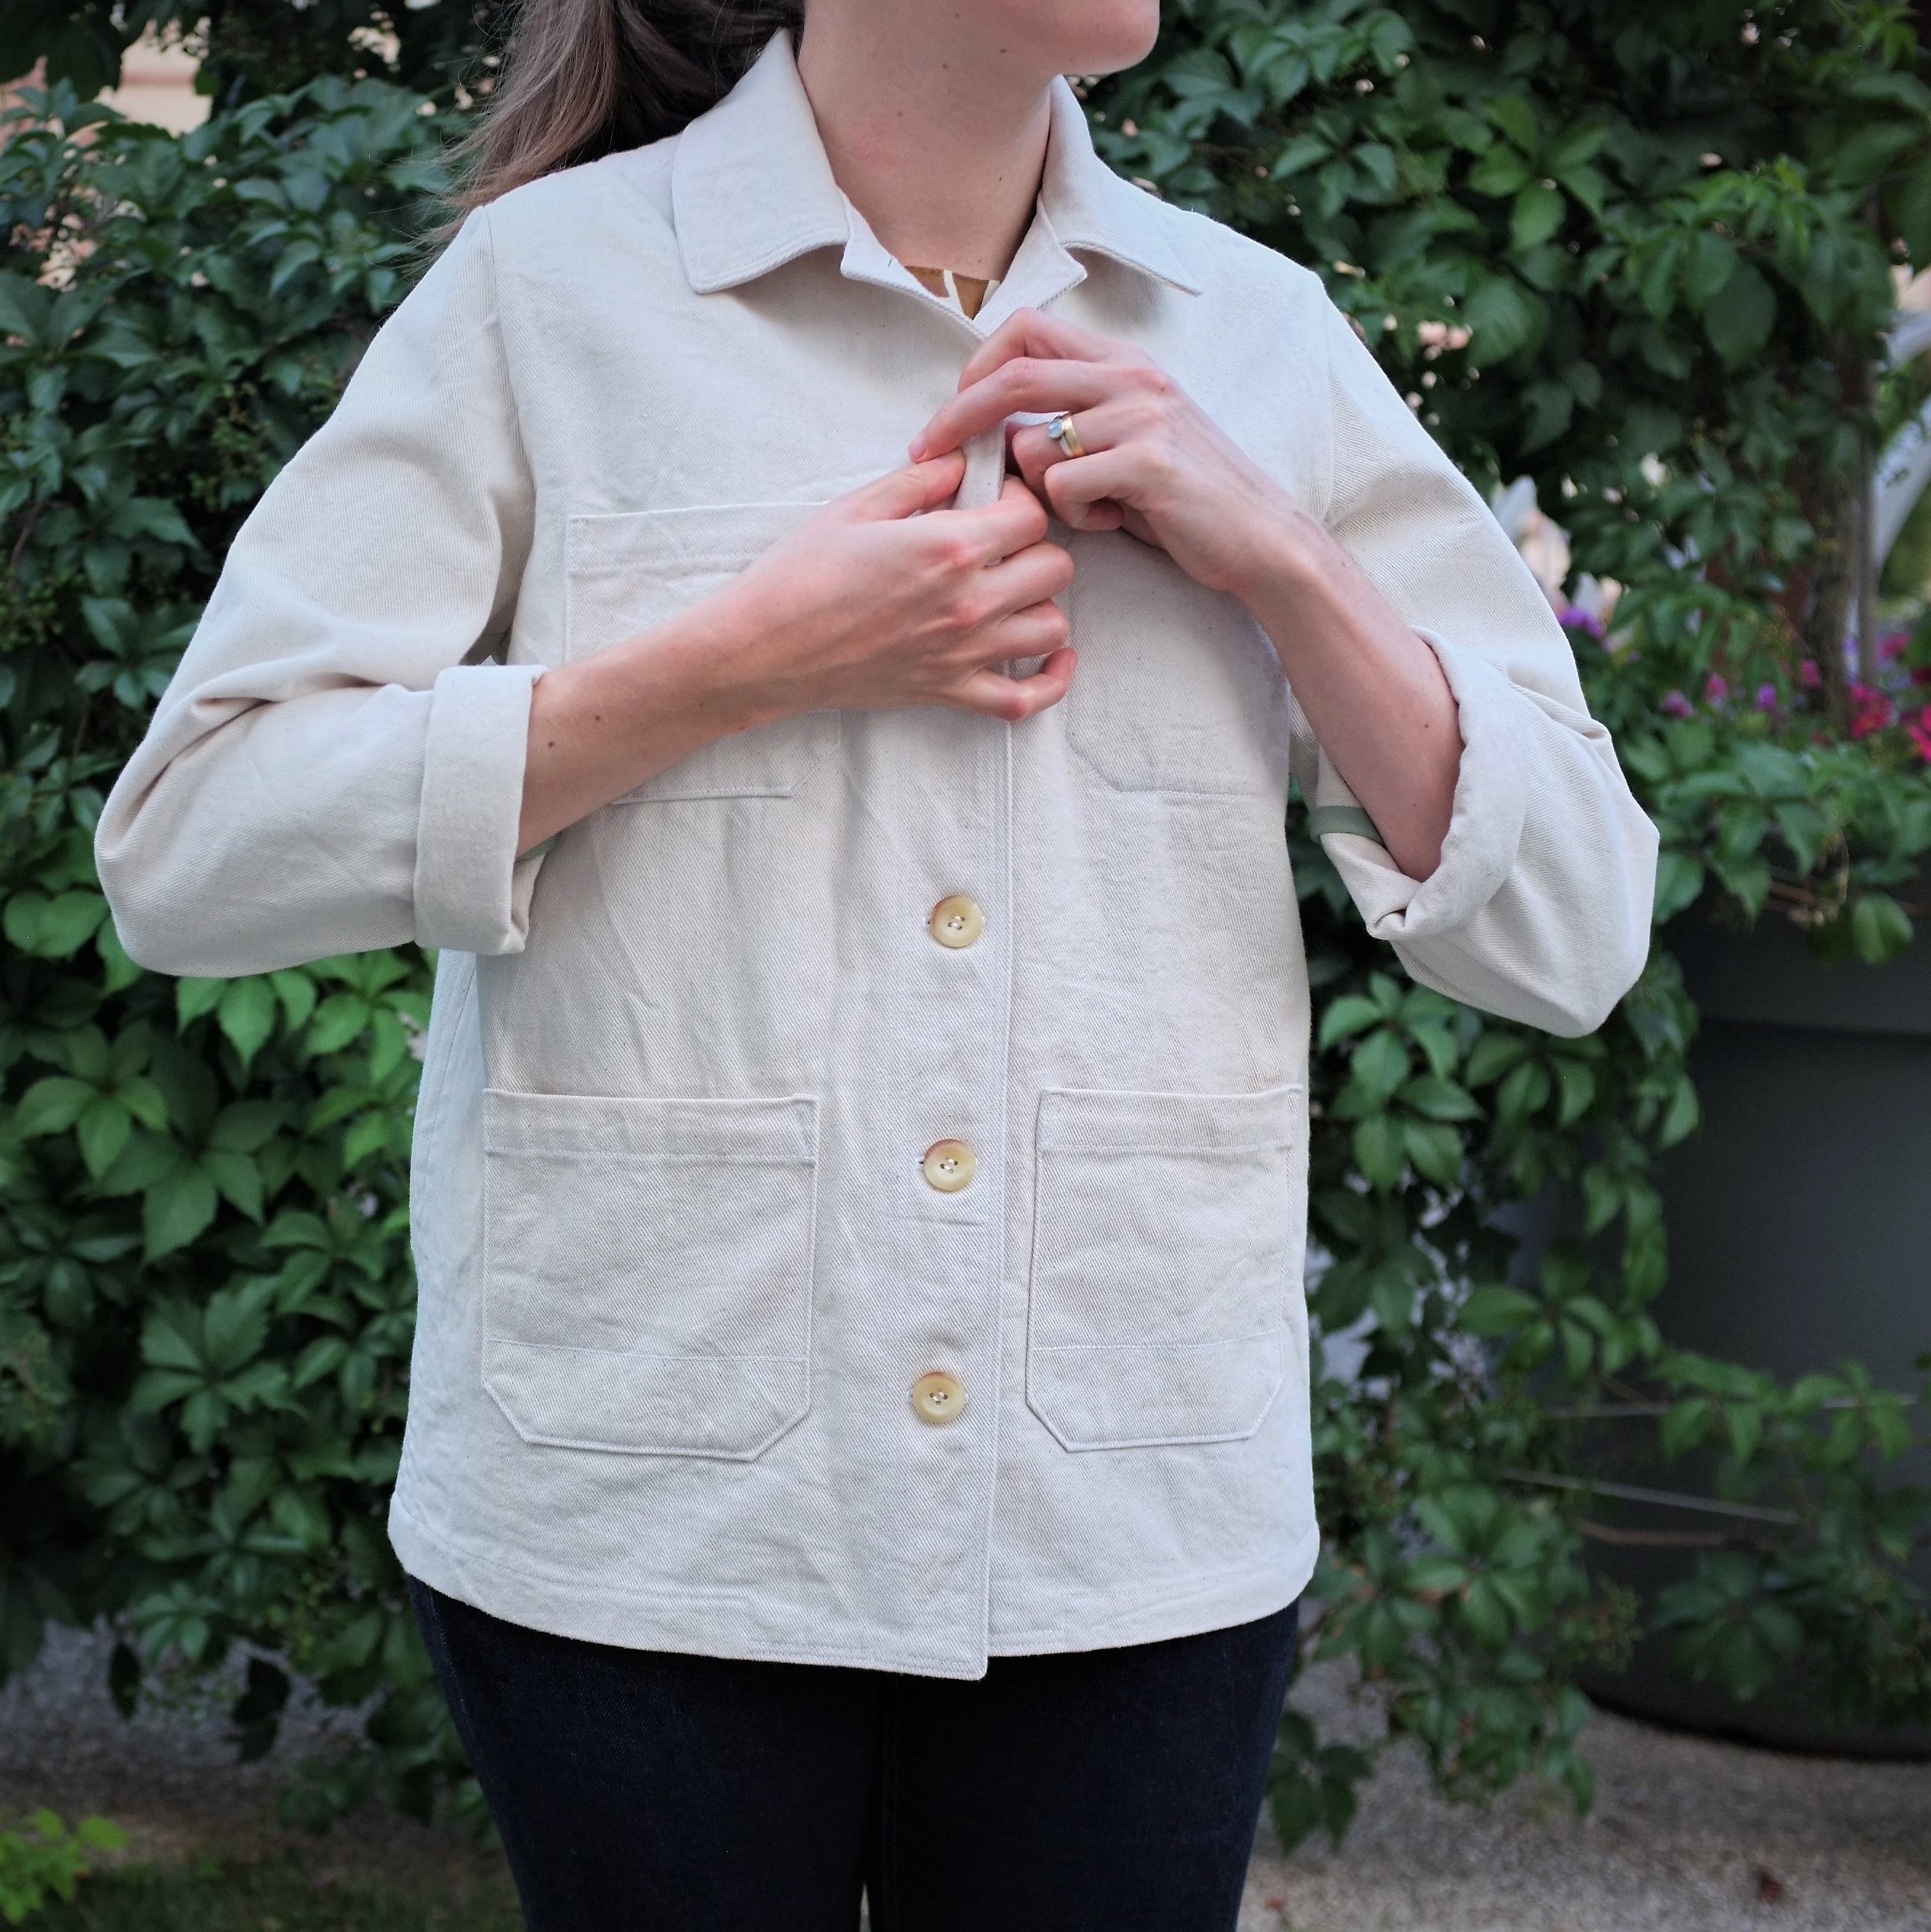
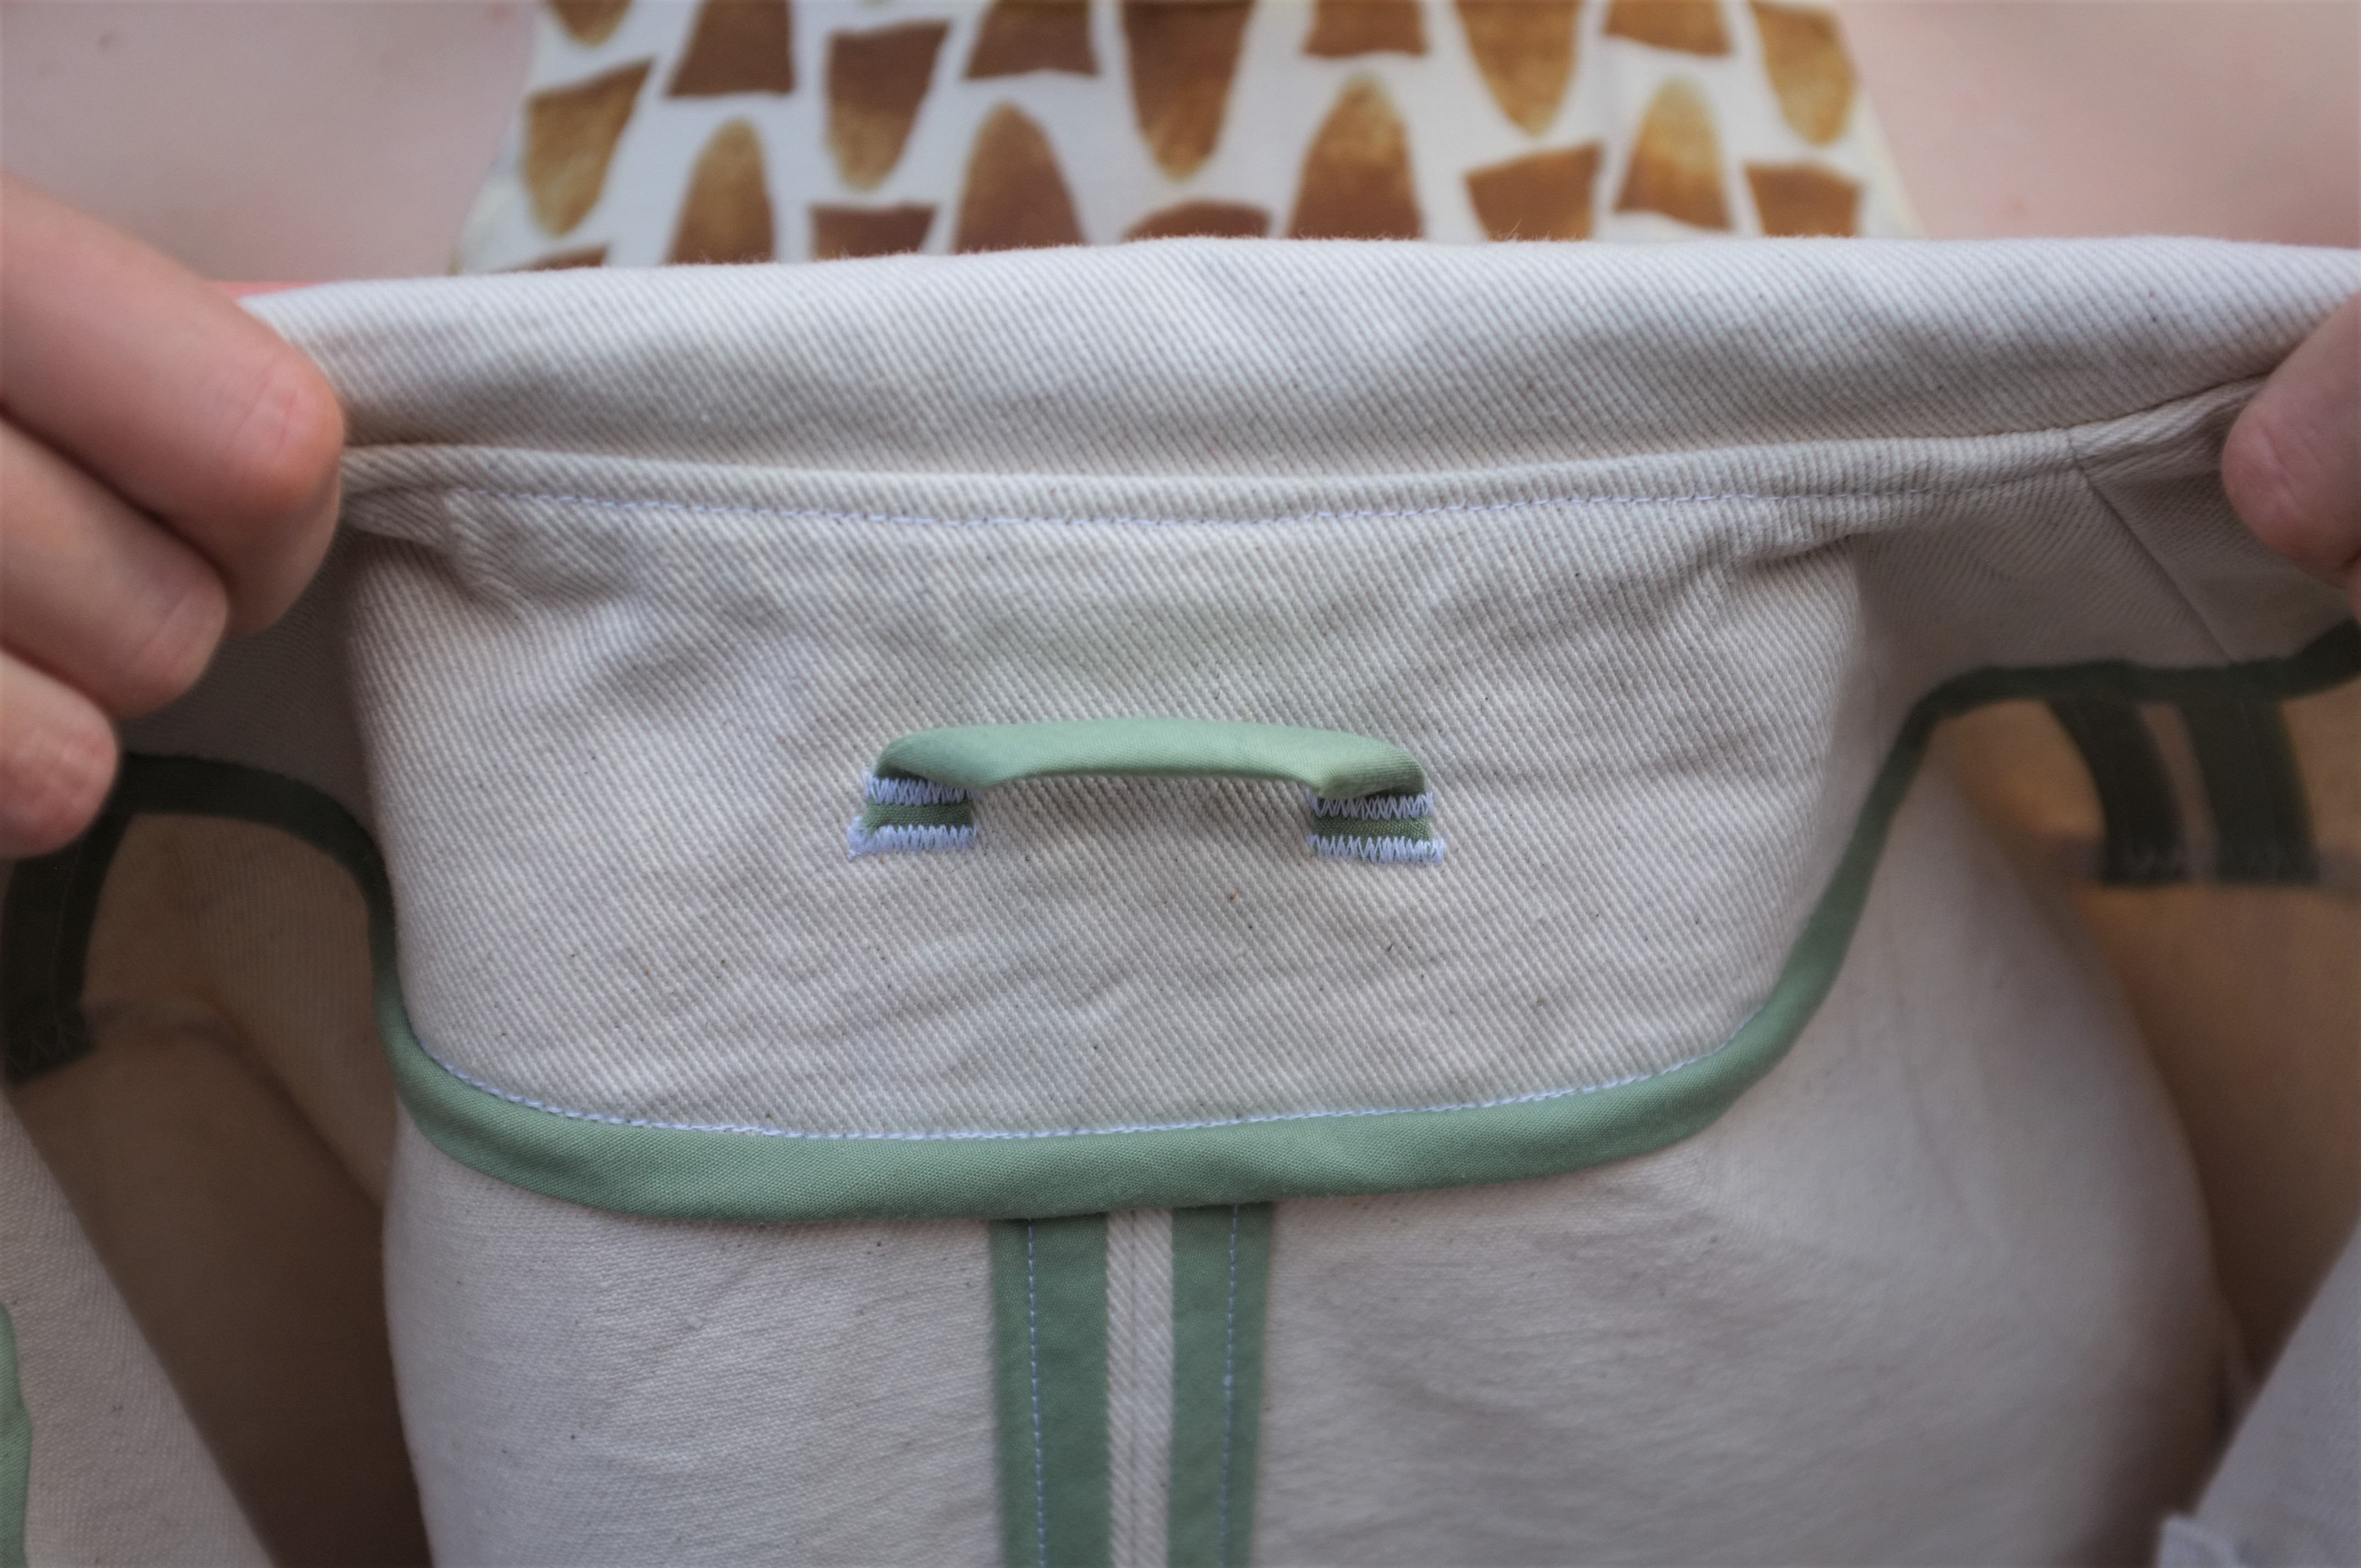
- Finally I changed the pockets. The original pattern has one zipped breast pocket and the lower pockets extend over the side seams. To match my original inspiration I decided to just stick with patch pockets. One of the upper pockets attached on the inside. This was a feature that I saw on one of the ready-to-wear jackets and really liked. It’s perfect to keep my phone secure. The pockets were all attached through the facing, which keeps the latter in place.
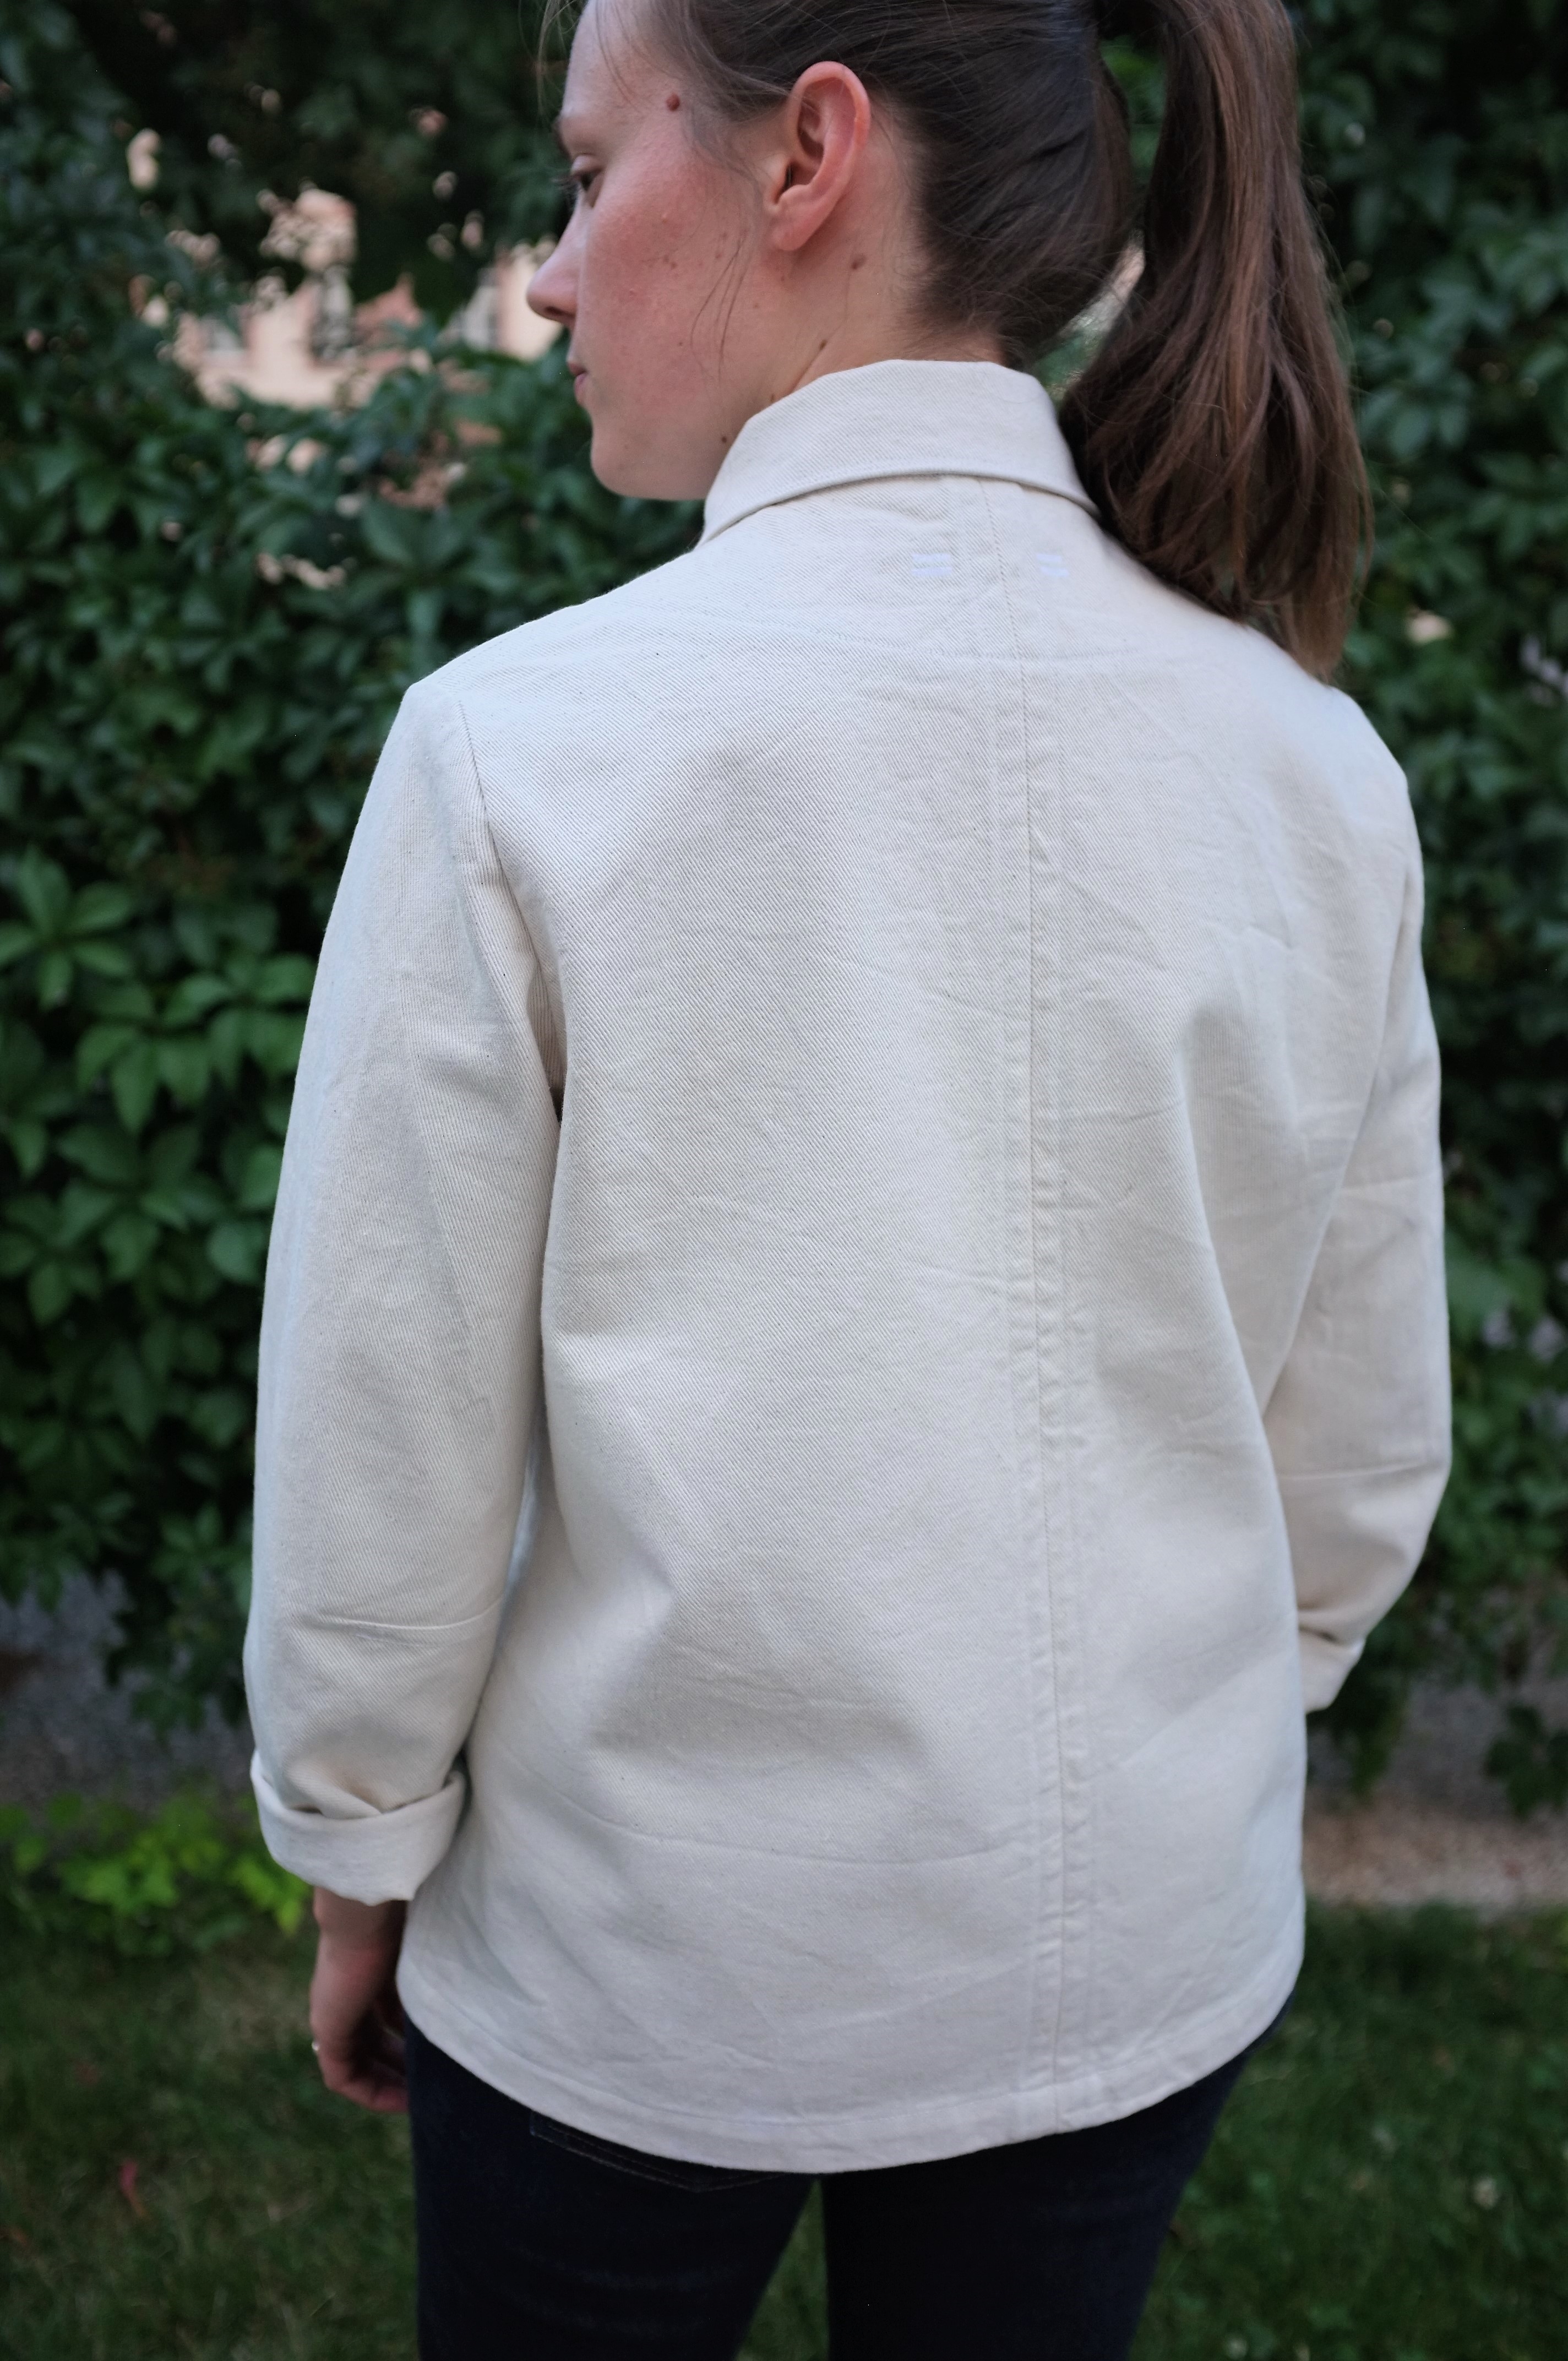
So that’s it. A long list of changes but all of them easy to make. I think this pattern is a great starting point for a jacket style like this. The instructions are great and it has lovely details such as the elbow darts. I finished all seams with bias binding, which gives it a clean look and a pop of colour on the inside. I also added a hook from bias tape, which I attached with bar tacks. The buttons are simple plastic ones from John Lewis.
While I was sewing the jacket, I wasn’t 100% sure if I would like the finished garment, it looked shapeless and in this calico a bit like a muslin. However, now that it’s finished I love wearing it! It’s such a great simple summer jacket, which goes well with a lot of my wardrobe at the moment. I was contemplating dyeing it (I already sewed it up with cotton thread so it would take the dye) but this off white is growing on me. So for now I’ll keep it as it is, I can always change my mind and dye at a later stage.
I hope you are ready for a lot of pictures. It’s the first time that we are taking pictures here in Colmar and there are so many great back-drops!


 Oh and this? Just me casually walking along a colourful wall. I didn’t know that this was so difficult. How does everyone else make this look so effortless?


