Shoe making – Espadrilles

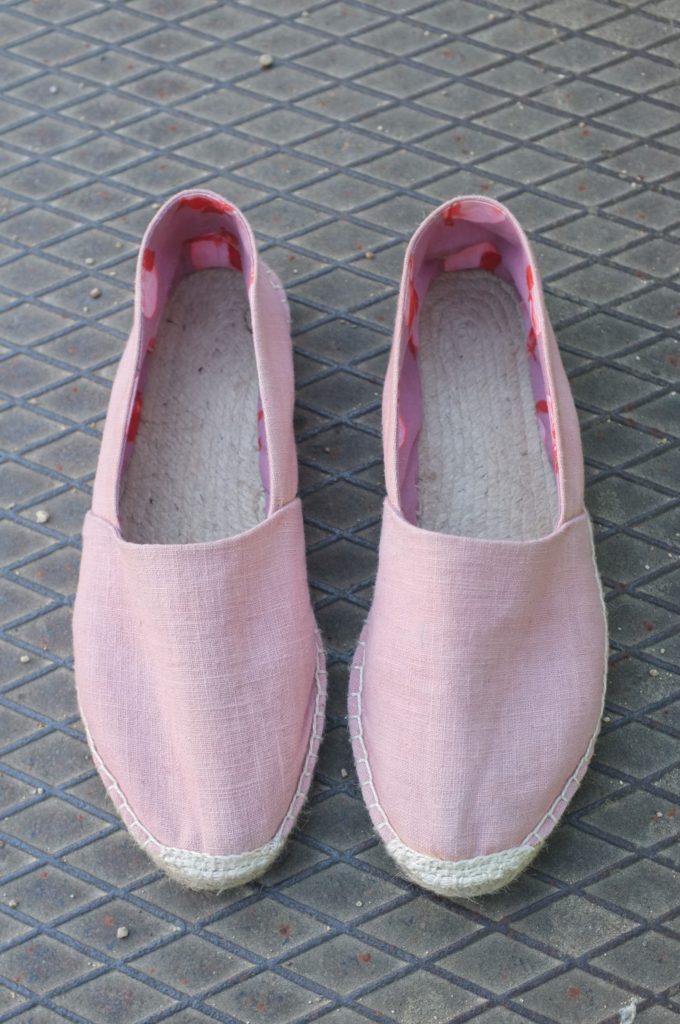
My second Summer of Basics piece(s) is done: a pair of espadrilles. This was my first venture into shoe making and it was a lot of fun!

For a couple of years now I’ve been searching for the perfect pair of summer shoes. After a pair of navy canvas shoes, that I bought in Spain ages ago, bit the dust, I started the search for a replacement pair. I’ve now been through the 4th pair, and none of them were comfortable. I even invested in a pair of Superga sneakers and had to give them away because I was getting blisters. I’m not sure if I have hyper-sensitive feet, but really nothing was working. So when I though about the third element in my Summer of Basics plan, it hit me that I could easily make canvas shoes myself.

I’ve seen the Espadrilles kits everywhere this summer and lots of cute versions online. So why not give it a try? I got the Prym soles, leather needles and interfacing from Guthrie and Ghani. The thread was some cream embroidery thread that I had in my stash.

For the fabric I was debating whether my wardrobe could take any more pink pieces. Since my latest avocado dyeing experiment, it has become one of the dominant colours in my wardrobe. In the end the scraps from my Blaire shirt were just the right size and too pretty to be wasted, so pink it was. Also for the lining I chose fabric that I had already used for my shirt (Cotton + Steel, Melody Miller quilting cotton “Peaches orchid”, originally from Miss Matatabi, but not stocked any more), for a super matchy-matchy look.

The Prym soles come with the pattern pieces but no instructions; however, there are many good tutorials out there. I watched this video from The Makery and referred to this blog post from Sophie of Ada Spragg. I won’t go too much into the details of the construction but the basic steps where as follows: I interfaced the outer fabric pieces with medium weight fusible interfacing, sewed the shell and lining pieces together, turned them inside out and attached them to the soles with a simple blanket stitch. The side seams were closed with a slip stitch and bar tacks at the top and the bottom of the seam. Finally I stitched the toe re-enforcement, which is basically filled-in blanket stitch. Sophie is right this detail really elevates them from slightly crafty to quite professional looking.

All in all it was quite a straight-forward process. The trickiest bit was probably pushing/pulling the needle through the sole. This required a lot of force and even using a good thimble, I still had sore/numb fingers in the end. Apparently you can buy an Espadrilles Tool Kit , which includes little rubber grippers that according to Melissa make all the difference. Next time…

In terms of sizing I went with a size 40 (typically falling between a 40 and a 41). When I first tried them on, I thought they were a little bit slim around the front, but once I had finished fitting them I realised that they need to be relatively tight to not slip off your foot. I actually had to re-adjust the side seam twice to make sure the back piece was tight enough. I would definitely recommend pinning the side seams and spending some time walking around in the shoes to make sure that they are not too loose.

Since finishing them last week I have already worn them on a walk to the pub and for exploring some beautiful Oxfordshire gardens and so far I’m super happy with them. They are very comfortable thanks to the limited amount of seams and the rubber soles make them feel quite sturdy. The best thing of course: they are pink and this colourful lining just makes me happy! If you are interested in shoe making, this is definitely a great beginners project.

Two down, one to go. These Summer of Basic pieces are coming together quickly! Next up some Ginger Jeans Shorts, I’m excited!

Blaire Shirt Number 2 – The Avocado Edition

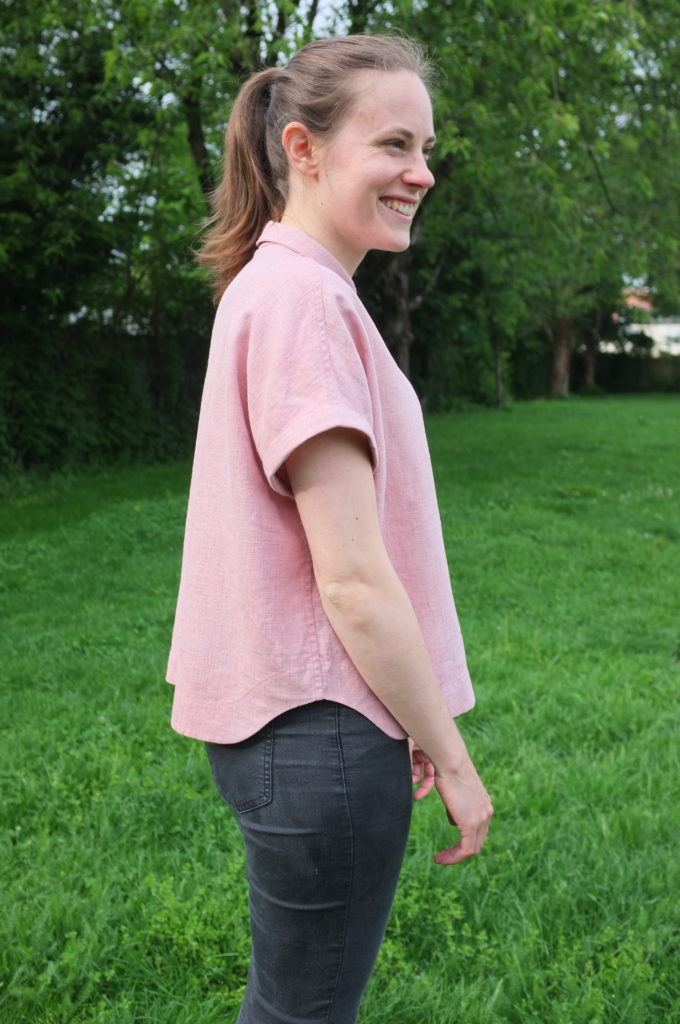
After finishing my first Blaire shirt, I knew immediately I wanted to make a second version. This was exactly the piece of clothing that was missing from my summer wardrobe. With a short trip to Italy coming up, I had some pressure to finish this quickly.

This time round I wanted to try something new: natural dyeing. I’ve been following other sewists on their adventures and was particularly intrigued by dyeing with avocado skin. First of all it would be super easy to source (I love guacamole) and second it produces the prettiest shade of pink. This blush colour is one of my favourites (I’m such a millenial!). I did some research online and came across this tutorial here by Rebecca Desnos. It’s very thorough and uses soy milk to increase the absorption of the plant dye, which sounded like a simple method. I didn’t follow the instructions exactly, due to time pressure, and skipped a couple of steps. So here is what I did. Please keep in mind that I am no expert at this and I haven’t tried any other methods, so there might be better approaches out there.

I started with some plain white linen that I got from Ditto Fabrics, they don’t seem to have the exact one online anymore but it looks like this is a similar linen. When it arrived it was a little bit heavier than expected, which wasn’t an issue for the design but meant that I had to collect more avocado skins. According to the tutorial, you should use the same weight in avocado skins as you have in fabric. After collecting avocado skins for a couple of weeks (storing them in the freezer) I was still shy of the 300 grams of skins that I needed. Since dyeing with avocado pits works as well, I decided to just use 5 dried and cut up pits together with the skins of 10 avocados.

I prepared the fabric by first putting it through the normal wash and drying it. Then I let it soak in a mixture of soy milk and water over night as instructed, put it through a spin cycle in the washing machine and let it air dry. Next I dipped the fabric again in the same soy milk mixture (only a quick dip to avoid washing out the first layer), put it through a spin and dried it. The instructions then tell you to repeat this step a second time. Since I didn’t have the time for a second round, I skipped that step. I also skipped the step of storing the fabric in a plastic bag for a week before using.

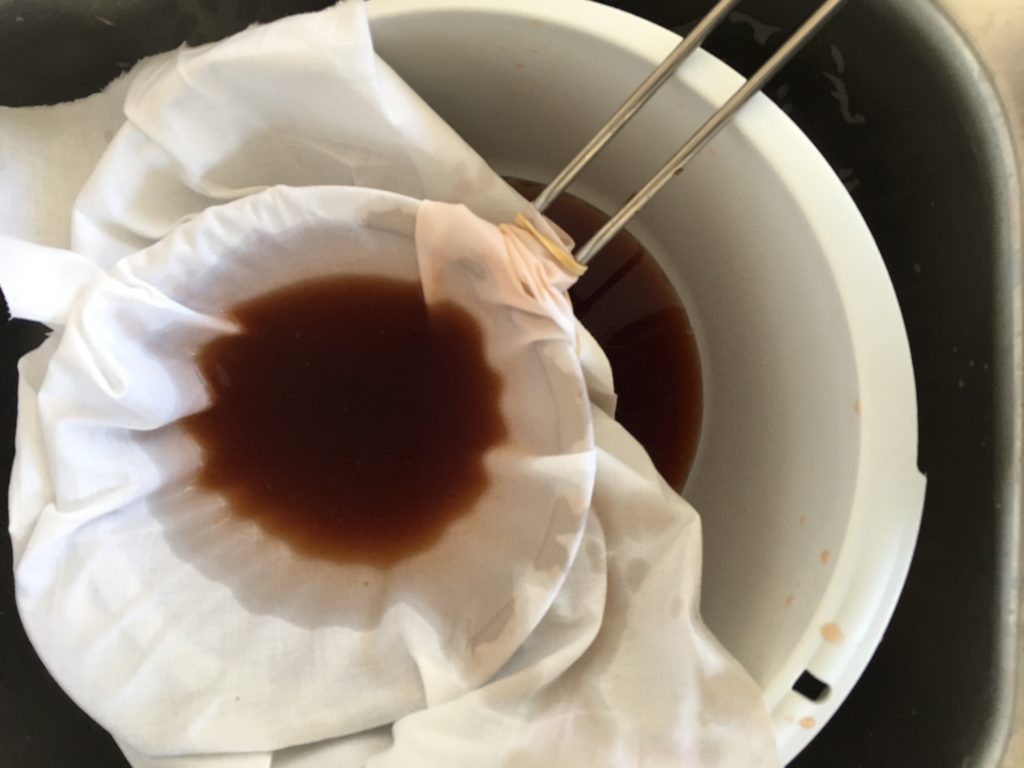
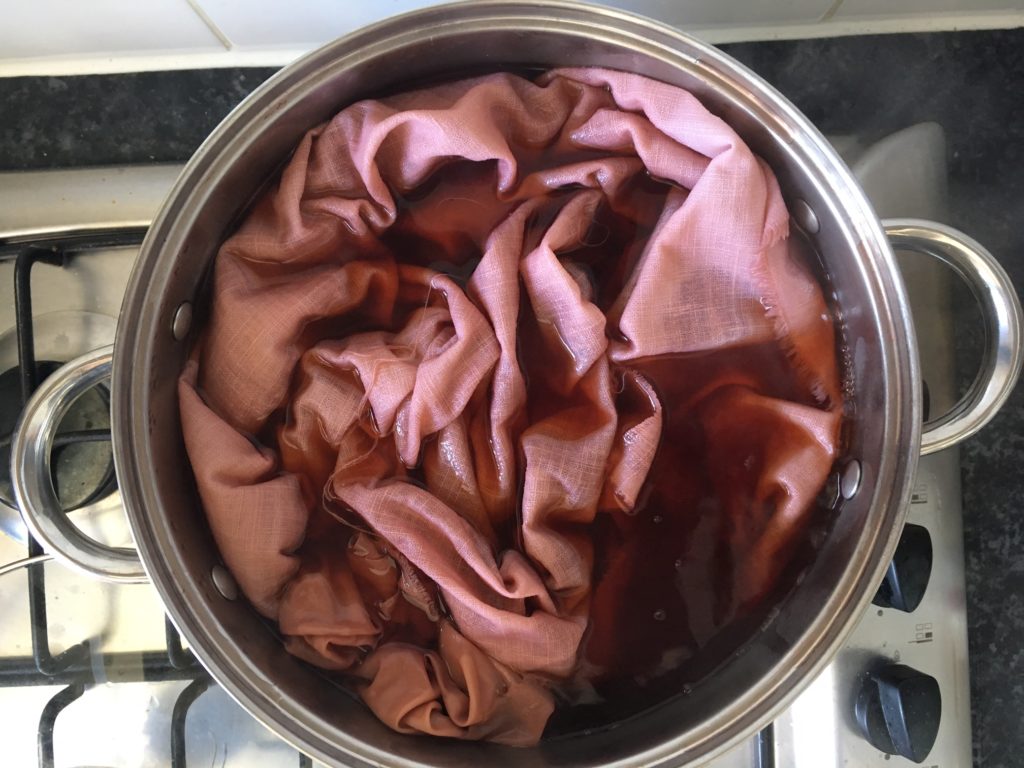
Then on to the avocado dye. I defrosted the skins and chopped up the pits, which I had peeled first (probably not necessary but easy to do when the pits are dried). I added them to an aluminium pot and filled it two thirds with water. Next I put it to a boil and let it simmer for roughly 2 hours. The skins quickly broke down and the water turned a brownish red. After letting it cool down, I put the mixture through a muslin lined sieve. Once heated up again, I added the fabric and a little bit more water to cover it sufficiently. As you can see the pot was a little bit small for all the fabric, so I made sure to move the fabric around a lot to avoid blotches. The fabric quickly turned pink and after an hour or two of boiling the fabric in the dye bath I let it cool down again and sit overnight in the pot with a plate holding the fabric under water. The next day I took out the fabric, put it through the spin cycle in the washing machine and let it air dry.

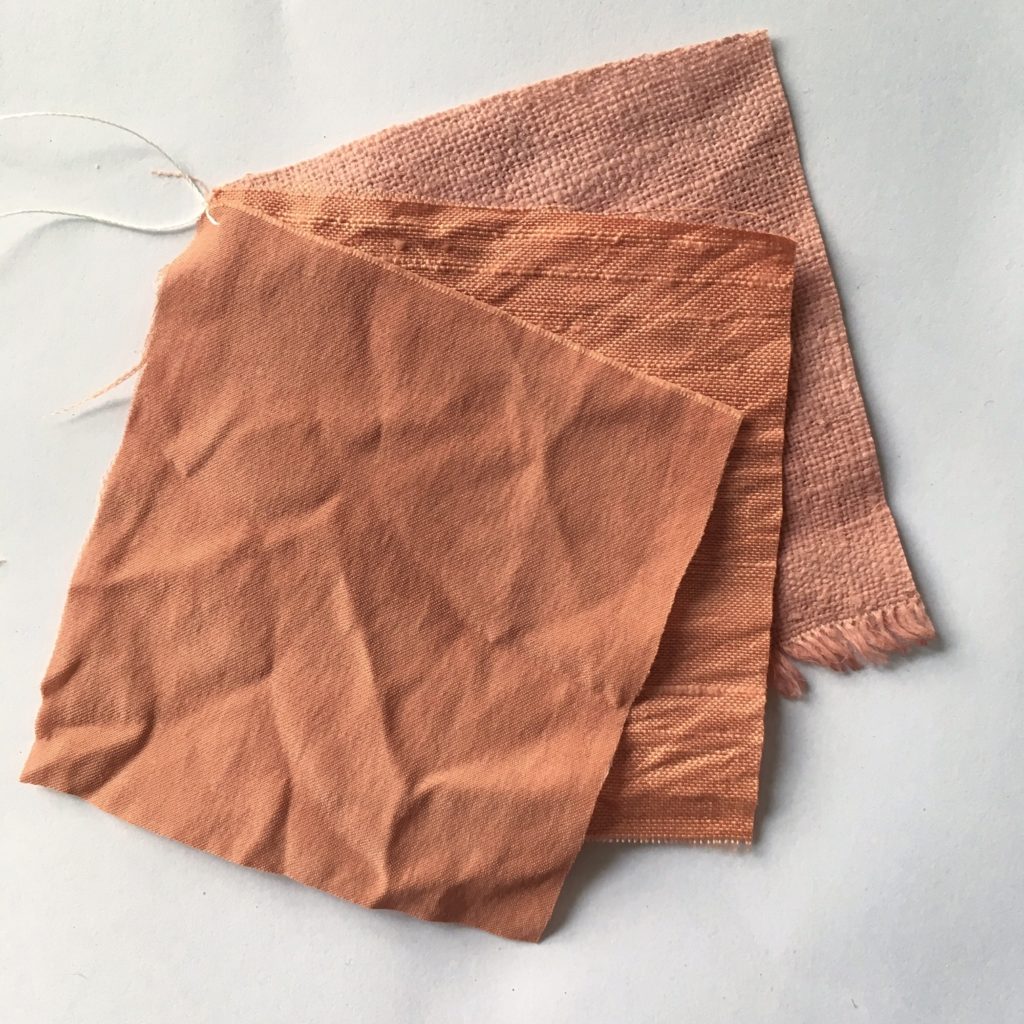
The colours turned out beautifully. The linen didn’t take the dye as much as some pieces of sand-washed and dupion silk, which I had thrown in to test the colour on other fabric. Since I was more going for a blush colour on the linen I was very happy with the outcome.

Before rinsing it the fabric is supposed to sit for a week. Impatient to start my shirt, I worked with the unrinsed fabric, which wasn’t a problem, it only slightly smelled of avocado skin. Below some pictures of the process and the final swatches.

Construction-wise I sewed up the Blaire shirt with exactly the same alterations as my first version. Again I was short of fabric and thus had to simplify the design. As in the other version, I finished the hem with a contrasting facing. This time a Melody Miller cotton that I got from Miss Matatabi. The buttons this time were reclaimed from one of my husbands worn out work shirts.

If you’re interested in the colour fastness. Once the shirt was done, I put it through a gentle hand wash and a week later through a 20 degree cycle in the washing machine. Both times it didn’t loose a noticeable amount of colour.

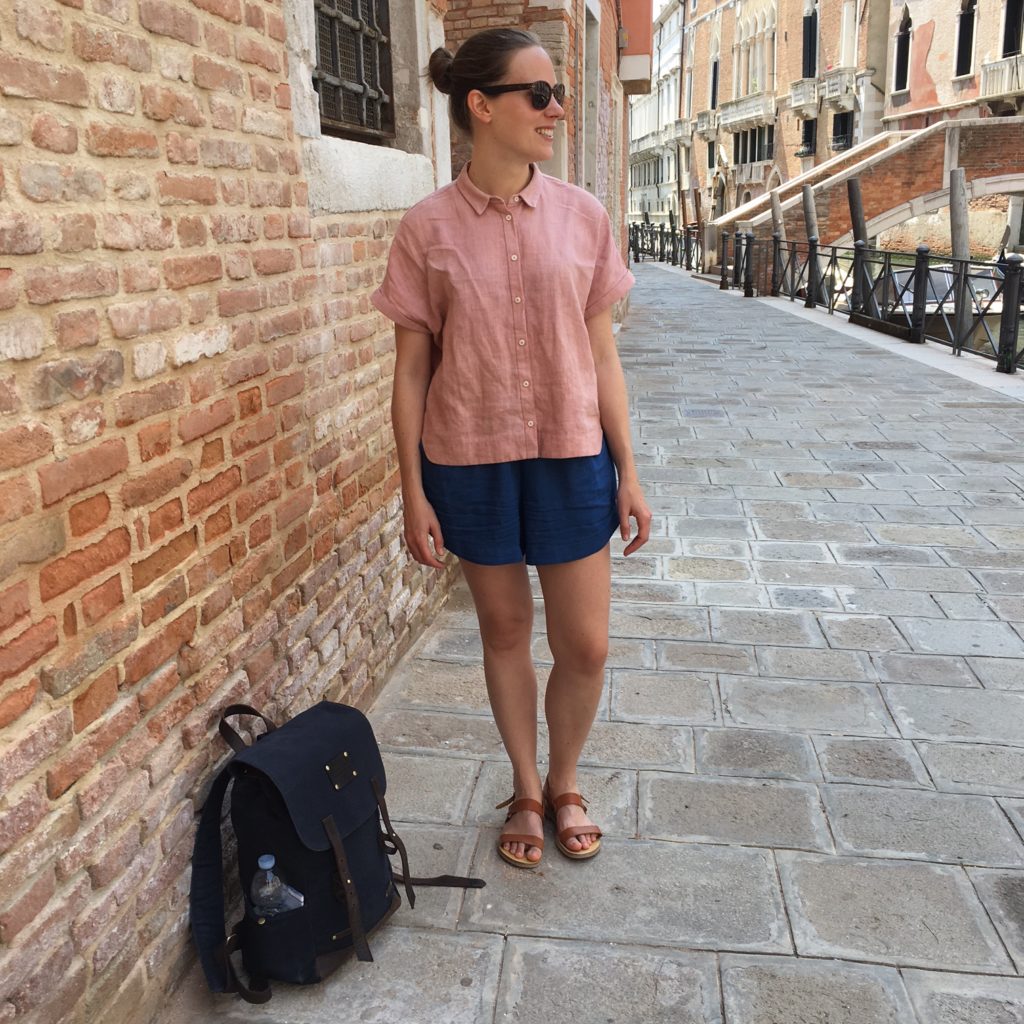
I love this shirt so much! It was the perfect thing to wear on scorching hot days sightseeing in Venice (below a photo in action, a little bit rumpled from carrying around a backpack all day). I also really loved the fabric dyeing process, I now want to avocado dye everything! Unfortunately there is only a certain amount of pink garments a closet can take and I fear I have reached that point. I might have to do some research into other natural dyes next.

This is also my first finished garment for the Summer of Basics, a make-along initiated by Karen Templer of Fringe Association. The idea is to make 1 garment a month for 3 months, June through August, with the goal of filling in basic wardrobe gaps. This definitely filled one. I’m now trying to decide on my other two pieces. I’m thinking Closet Case Ginger Shorts and a pair of espadrilles but I’m not 100% sure yet.

Blaire Shirt Number 1

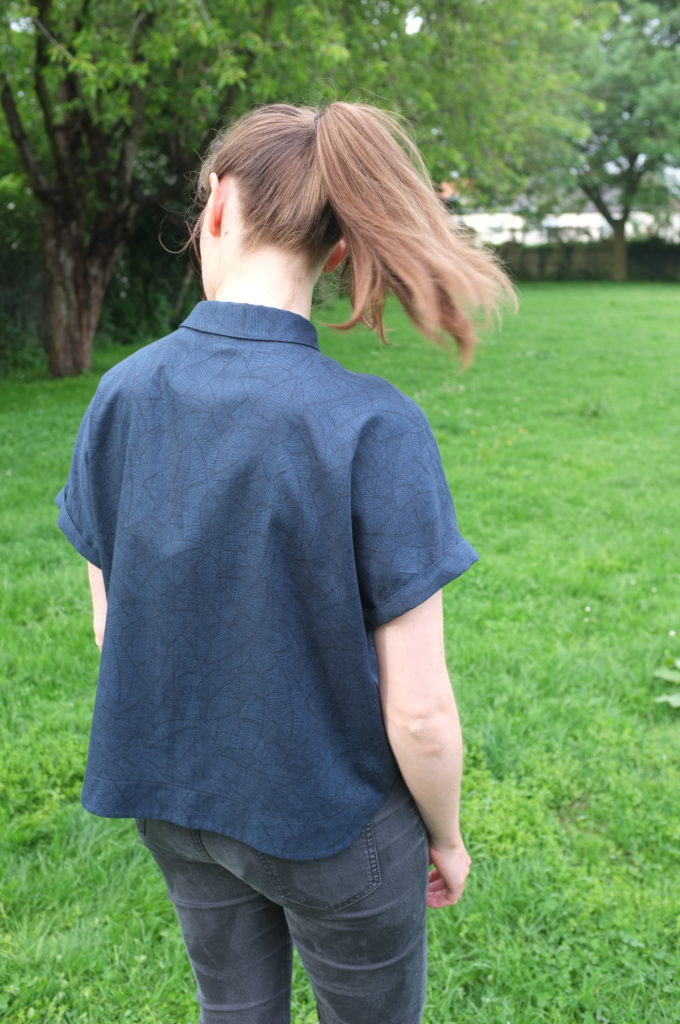
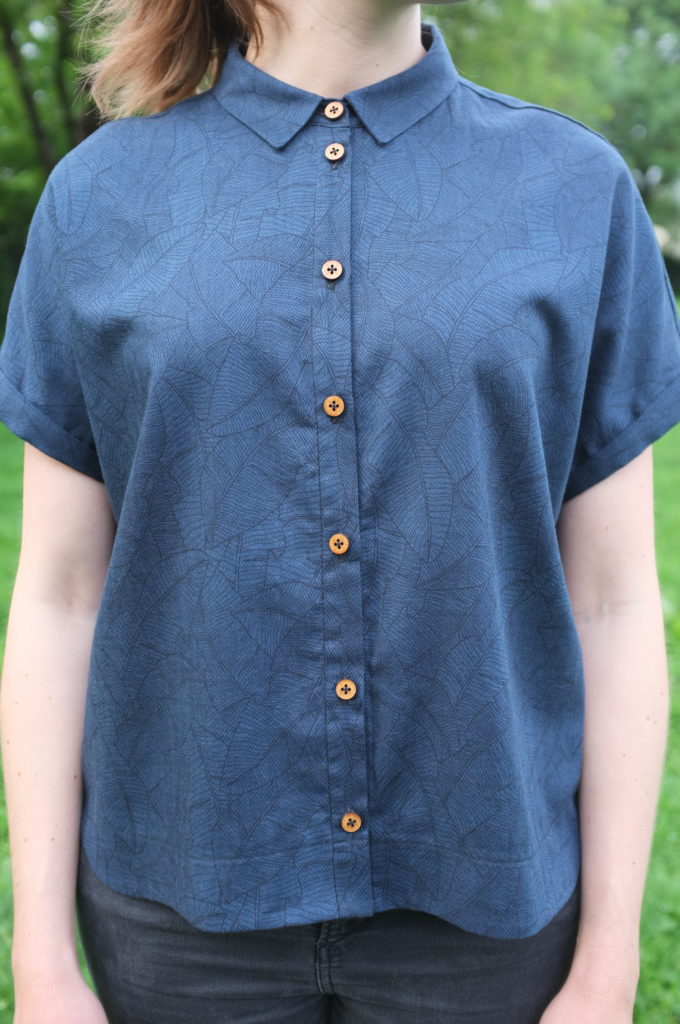
I didn’t officially take part in Me Made May this year but I used the month to analyse my day to day outfits and identify any gaps in my wardrobe. One thing that I’m definitely lacking are loose summer tops to wear with slim fitting shorts or trousers (my go-to silhouette). Lately I’ve been in particular drawn towards boxy button-up shirts. One of the patterns I’ve seen pop up a lot is the Style Arc Blaire Shirt & Dress and have to say I loved every version I’ve seen so far. So when I tried to decide what I should use this pretty Kokka Leaf Print fabric for (from John Lewis but unfortunately they don’t stock it anymore) I realised the Blaire would be the perfect match.

It was my first time using a Style Arc pattern. I love many of their designs and was curious to try them out. I already knew that their instructions are quite brief, but since i learned sewing with BurdaStyle patterns, I didn’t have any issues. It of course helped that I made a couple of shirts before.

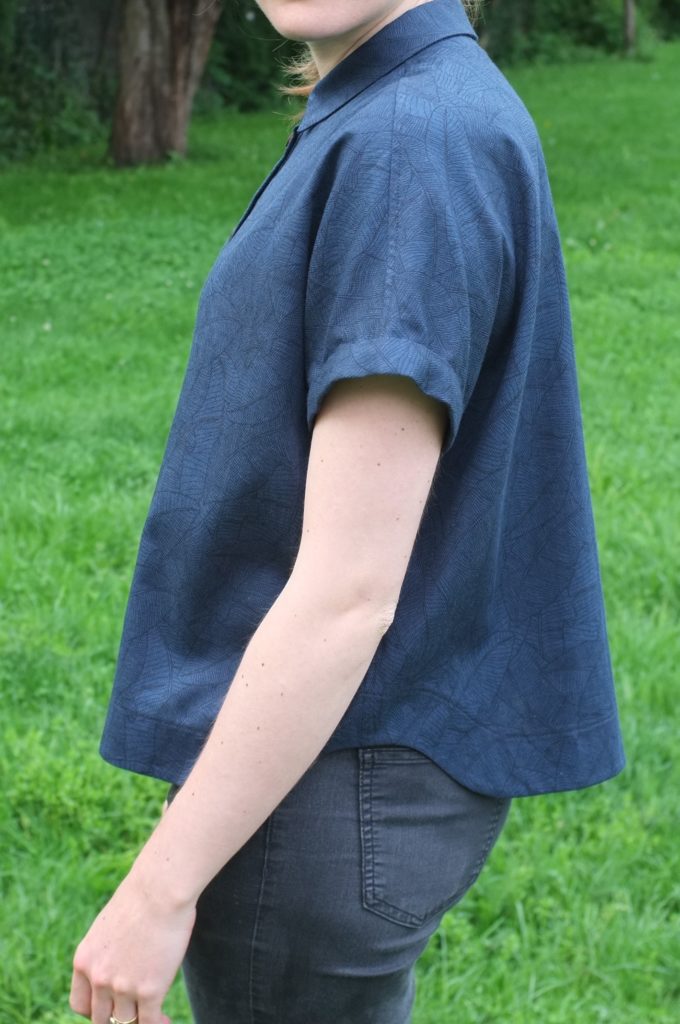
I only had 1 metre of fabric, which is my default fabric length when I’m planning a top, but for a boxy shirt that was quite a stretch. To save fabric I omitted the horizontal seam at the waist and left off the overlay at the hem. Both are really cool design features if working with a stripe or different colours, but they would have been lost in this fabric. To have a decent hem at the side seams I lowered the curve by 12 cm, which still resulted in quite a pronounced curve.

The construction was relatively easy. The only slight issue I had was that I attached the sleeve cuffs in the wrong way, which resulted in some bunching of fabric. After consulting Instagram I realised the cuffs were supposed to be folded in half, rather than at the seam, which gives a slimmer cuff and allows the the fabric to lie flat. I deviated from the instructions to finish the side and shoulder seams with flat felled seam. Due to the 1 cm seam allowance this was a little bit fiddly but thanks to the thinness of the fabric they still turned out alright. (Of course I should have thought of increasing the seam allowance before cutting.) Due to the extreme curve, I decided to finish the hem with a wide facing. I just love the neat finish and it’s a great opportunity to use some contrasting fabric.

In terms of sizing I opted for a size 10. I fell between an 8 and a 10, but really wanted a boxy look. I think the size is spot on. Tight enough but not too tight at the collar and wide enough for a loose look.

Once everything was done I realised I didn’t have any buttons in my stash that would do this fabric justice. However, I’ve been lusting after ArrowMountain buttons for ages and finally decided to splurge on a couple of sets. Since they had to be shipped from Australia, I had to wait a while for them to be delivered but they were well worth the wait, I love how the bamboo goes with the navy fabric!

So the verdict? This pattern is definitely a winner. It’s a cool silhouette and has nice design details. I actually loved it so much that I immediately made a second version with some avocado dyed linen. Stay tuned!